In this tutorial, you will learn how to add months to a date in Excel. We show you how to do this with the EDATE function and the MONTH and DATE functions. You will also learn how to create a series with a starting date with the Fill Series feature. But why would you need to do any of this?
If you are calculating product expiry dates or delivery dates, you will need to add months to starting dates. This will be covered in the sections with using functions to add months, years, or days. We will also go over how to deduct months to return an earlier date. The Fill Series feature will cover how to list a series of dates e.g. for an event that takes place monthly on the same day.
Let’s get adding!

Method #1 – Using EDATE Function
The EDATE function can be used to add months to a date in Excel. The EDATE function adds or deducts given months from a date and returns the relevant serial number. Using the formula below, we will add and deduct months mentioned in a separate column with the EDATE function:
=EDATE(B3,C3)Column B contains the manufacturing dates of products and column C has their shelf life mentioned in months. Our objective is to arrive at the expiry dates by adding the shelf life to the manufacturing dates. The EDATE function takes the date from cell B3 and adds the number of months in C3 to arrive at the expiry date. The date will however return as a serial number. Format the target cells to a date format to convert the serial numbers to dates.
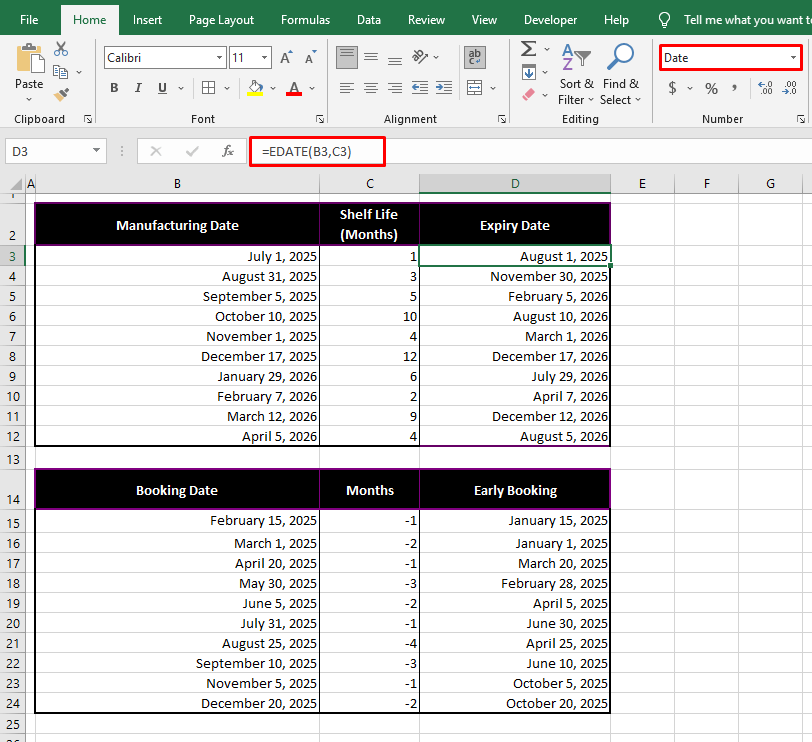
The same formula applies for deducting months from dates. E.g. To arrive at an advance booking date for offering discounts, we would have to deduct the number of months from the regular booking date. For that, the months will be entered as negative values and the same formula will be applied to arrive at an earlier date:
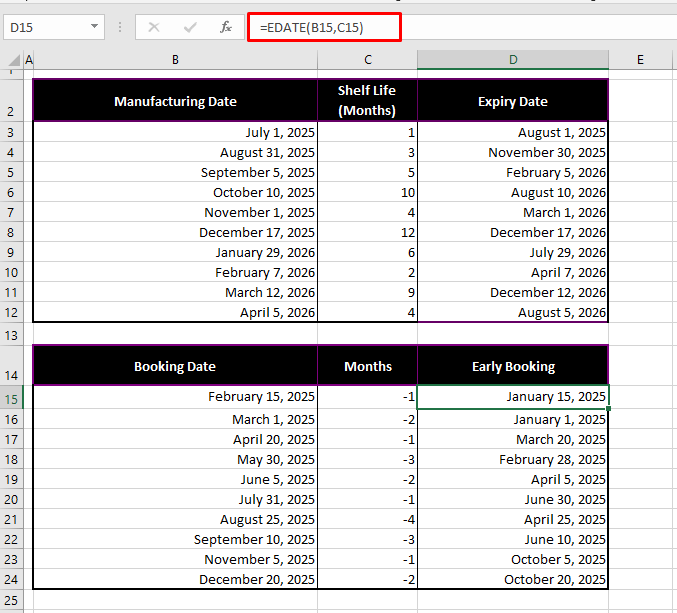
The second argument can take a numeric value instead of a cell reference. But that would be more convenient if all the dates need the same number of months added.
Adding Years to a Date
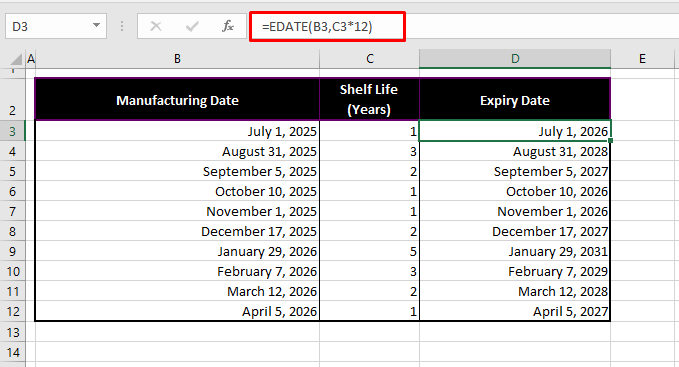
The second argument of the EDATE function can be adjusted to add years to the dates. This is the formula we are using to add years to dates with the EDATE function:
=EDATE(B3,C3*12)The values in column C represent the shelf life of products in years. The second argument of the EDATE function will take them as months, therefore the second argument is multiplied by 12. In this way, the years are added to the dates using the EDATE function:
Method #2 – Using MONTH & DATE Functions
Another way of adding months to dates involves the MONTH function. The MONTH function itself returns the number of the month from a date. Using the DATE, YEAR, and DAY functions with the MONTH function we can add months to a date. To add months to a date, we will use the following formula:
=DATE(YEAR(B3),MONTH(B3)+C3,DAY(B3))The DATE function takes a year, month, and day argument to return a date in a serial number (dates are stored as serial numbers in Excel). The YEAR, MONTH, and DAY functions are used to pick the year, month, and day from the date in B3. But with the MONTH function, we have added the value in C3 i.e. 1 in this case. This will add 1 month to the date in B3 and return the date with 1 month added:
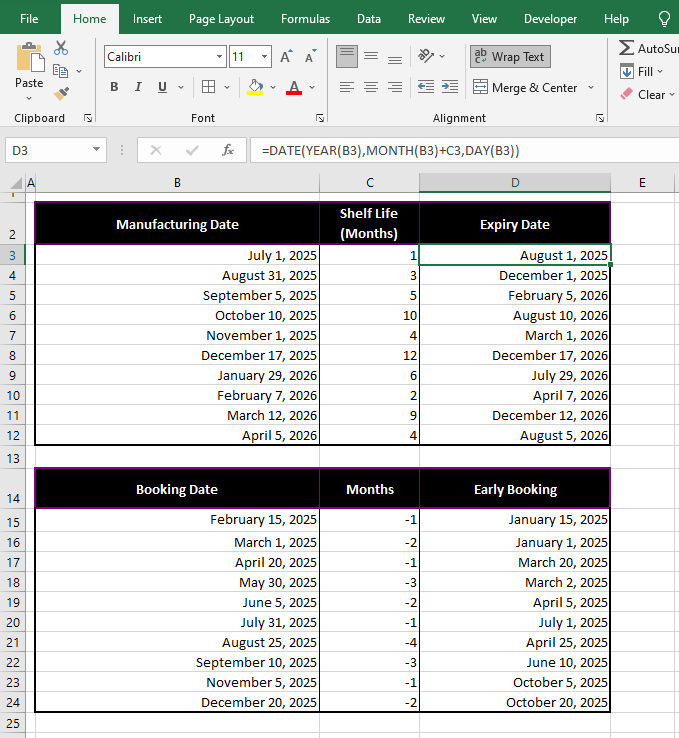
The formula is also applicable for deducting months from dates.
For adding years or days to dates, the given numbers can be added to the YEAR or DAY functions within the DATE function, in the same way they were added to the MONTH function.
E.g. To add 1 day to the date July 1, 2025, the formula will be edited to:
=DATE(YEAR(B3),MONTH(B3),DAY(B3)+C3)This formula will return July 2, 2025
To add 1 year to the date July 1, 2025, the formula will be edited to:
=DATE(YEAR(B3)+C3,MONTH(B3),DAY(B3))This formula will return July 1, 2026
Method #3 – Using Fill Series Feature
The Fill Series feature adds a consistent number of months, days, or years to a date. These are the steps for using Fill Series to add a set number of days, months, or years to a date:
- Select the date and the target cells where you want the dates to be filled.
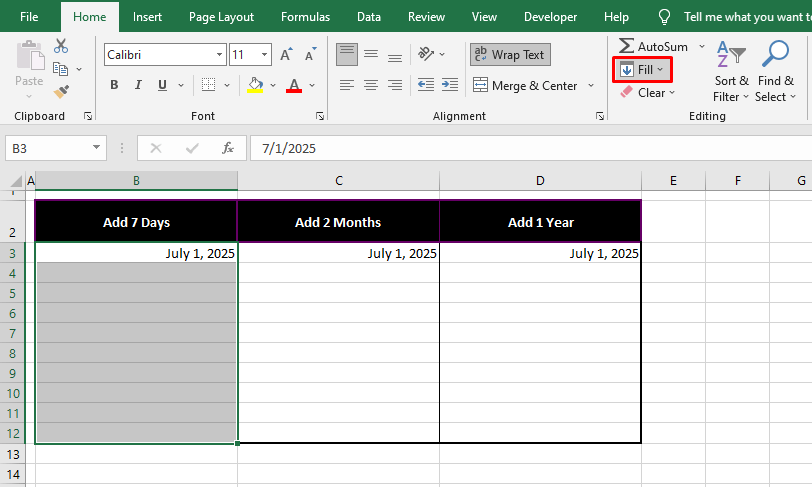
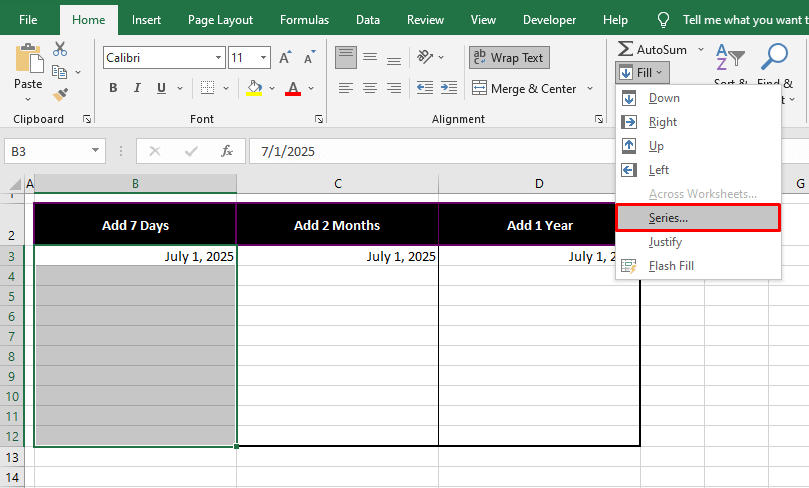
- In the Home tab, from the Editing section, select the Fill icon and then select Series from the menu.
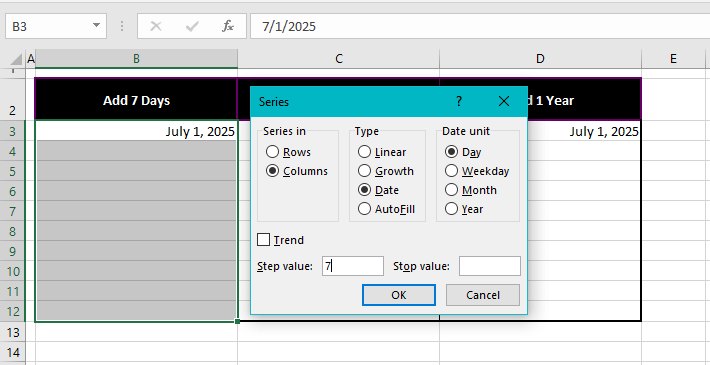
- In the Series dialog box make the following selections:
- the Columns radio button from the Series in section,
- the Date radio button in the Type section,
- the Day radio button in the Date unit
- In the Step value field, enter the increment value for the number of days.
- For adding 7 days to the dates, we are entering the number 7 in the provided field.
- When done, click on the OK
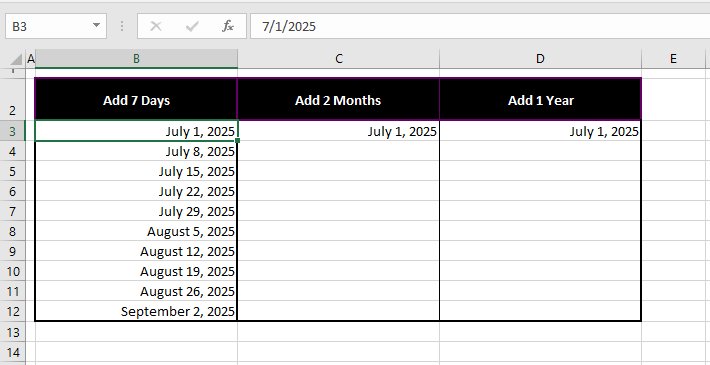
- The series will be created with the incremental value and filled in the selected cells:
- Follow the same steps to create a series with incremental months, selecting the Month radio button in the Date unit
- Enter the incremental value in the Step value field e.g. we are entering the number 2 for creating a series with 2 months.
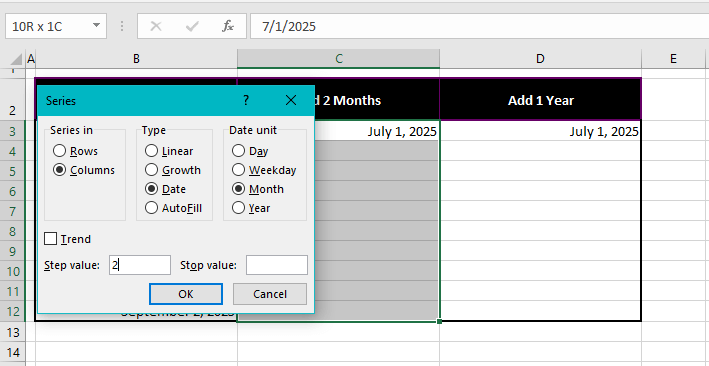
- The series with 2 incremental months will be created in the selected cells:
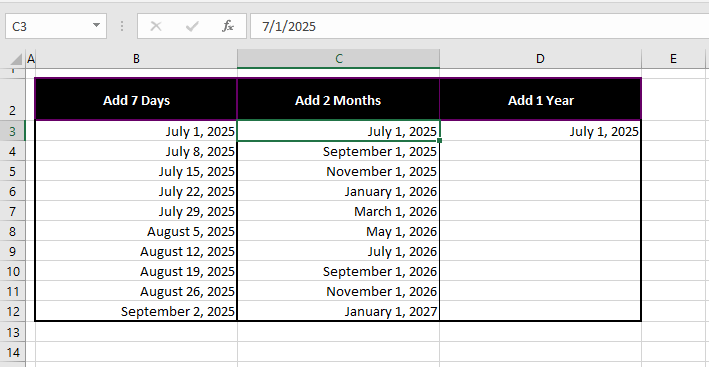
- Similarly, create a series with 1 added year by selecting the Year radio button and adding 1 as the Step value:
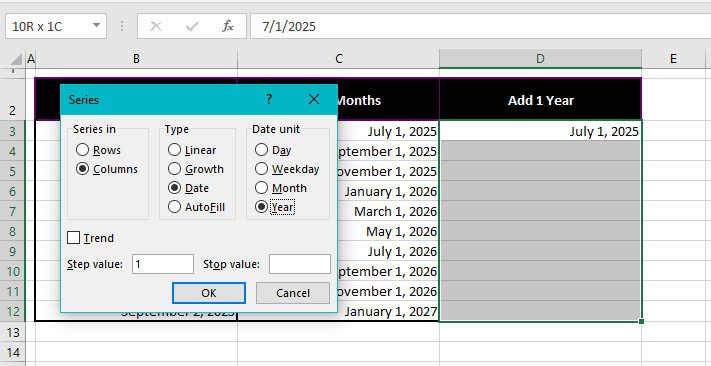
This fills the selected cells with a series of dates with 1 added year:
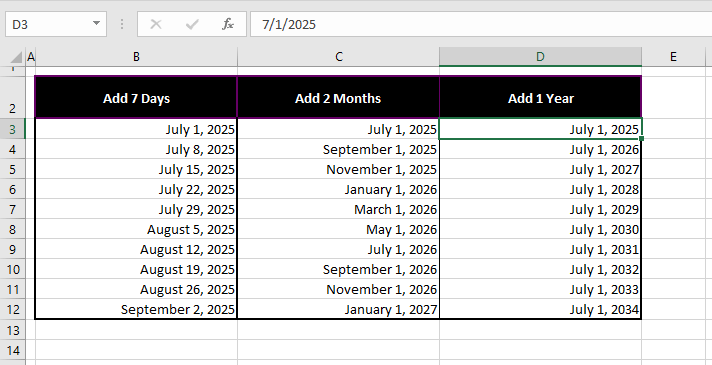
Now we add a wind-up. Today you learned how to add months to a date in Excel with various functions and the Fill Series. The methods in this guide allow you to add varying months, years, or days to each date or create a series with incremental values. We won’t be adding months to your wait for the next Excel trick, so stay tuned!


