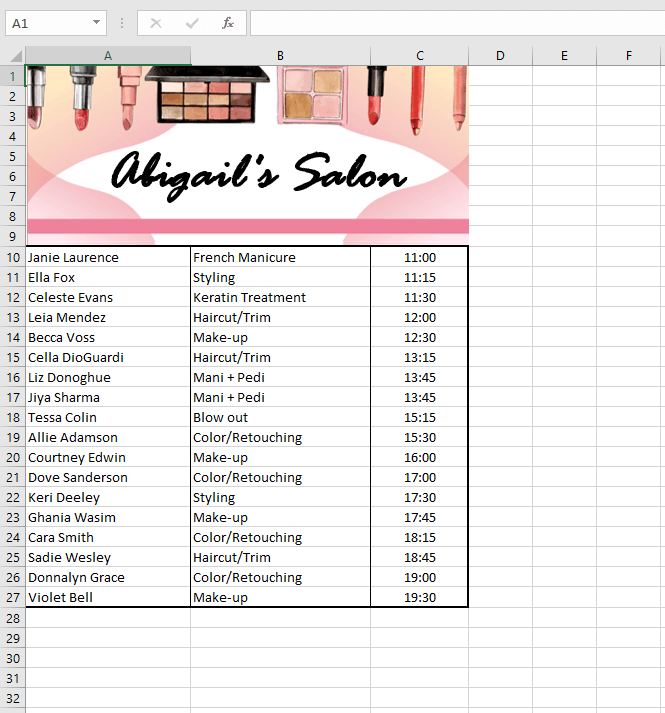
You have a slight list that you need on your desk or pasted to the wall. A modest to-do list, price list, vendor list, a small handout of project allotment, roles, or daily tasks, you get the idea. We have a small appointment schedule that looks pretty neat when arranged on a spreadsheet:
But the printout is so sad it makes us want to find the nearest pair of salon shears and hack at it:
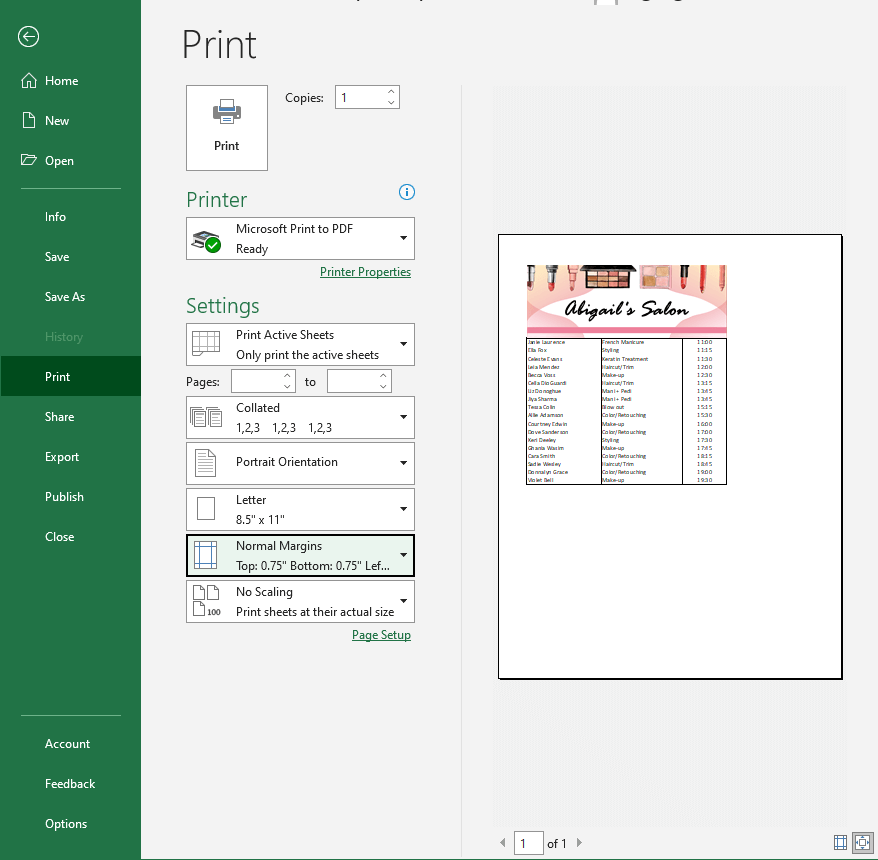
You had one job, Printing Peter. By default, the sheet is printed with the data aligned to the upper-left of the page. Now, why should we be hacking crookedly at our pages when we only need to soft-align the data to white-bordered perfection? Our short Excel tutorial today will help you save the hassle of wanting to shred or scrunch up your prints because please, let’s minimize wastage!
We will guide you on 3 easy ways to center a worksheet horizontally and vertically in Excel. All 3 methods require the page’s Margins settings which we will access with the Page Setup launcher tool, the toolbar Ribbon, and Print Preview.
If you’re still having centering frustrations where too much white is gaping at annoying widths and heights, we have 2 quick tricks to help set up the Print Area, centering the data with it, using Print Selection and Page Breaks. All the while you can head to Print Preview to see what your print will look like. Sounds promising?
Let’s get centering!

Method #1 – Using Page Setup Launcher Tool
With the Margins settings in the Page Setup dialog box, we can have the data centered horizontally and vertically. In this method, we are using the dialog box launcher from the Page Layout tab. Below are the steps to center the worksheet horizontally and vertically using the Page Setup launcher tool:
- On the worksheet, select the data you want to be printed.
- Go to the Page Layout In the Page Setup section, click on the dialog box launcher to open the Page Setup dialog box.
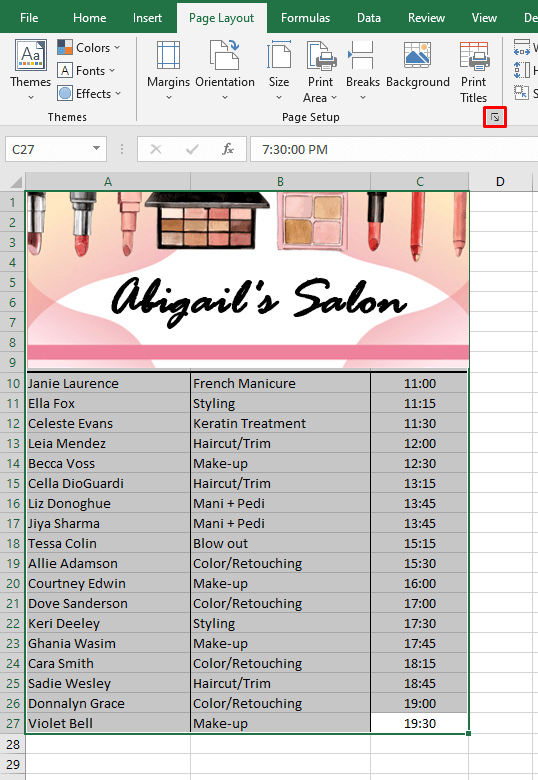
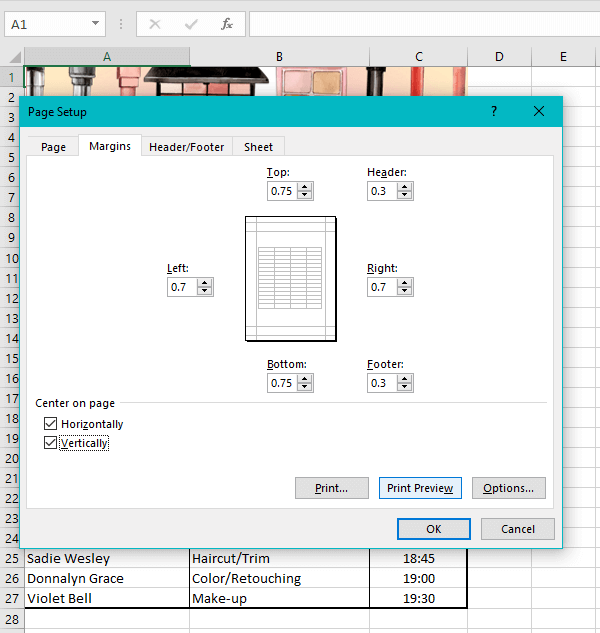
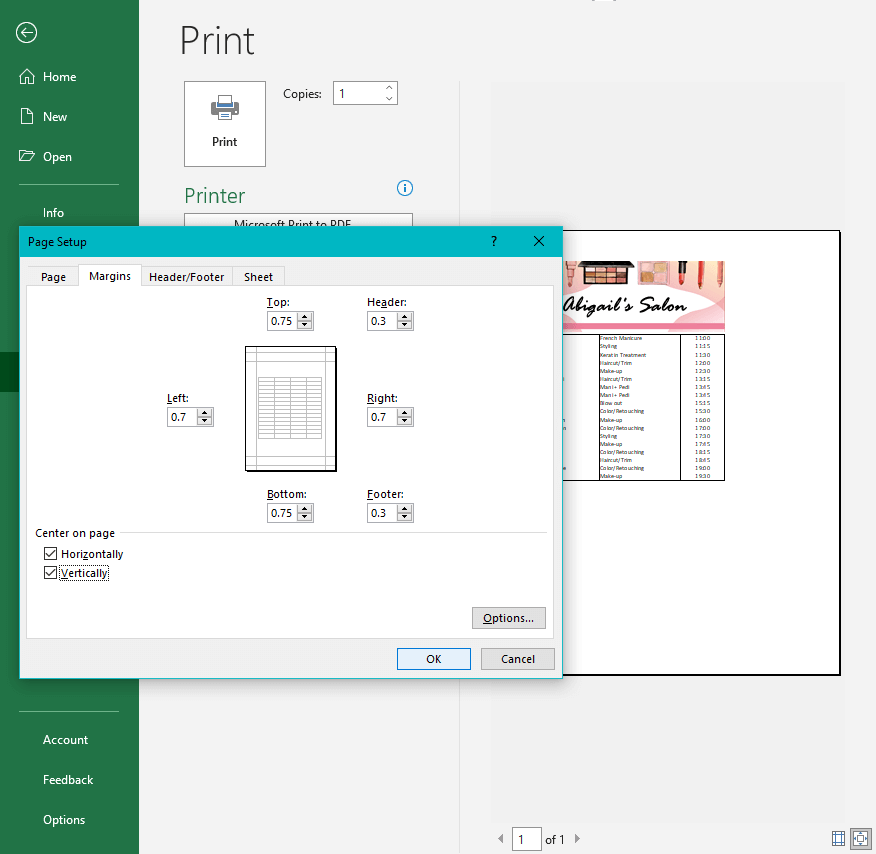
- Click on the Margins. The margins preview will show the margins on the page and the location of the data on the page for printing.
- Check both the Center on page checkboxes, Horizontally and Vertically, to center the data on the page.
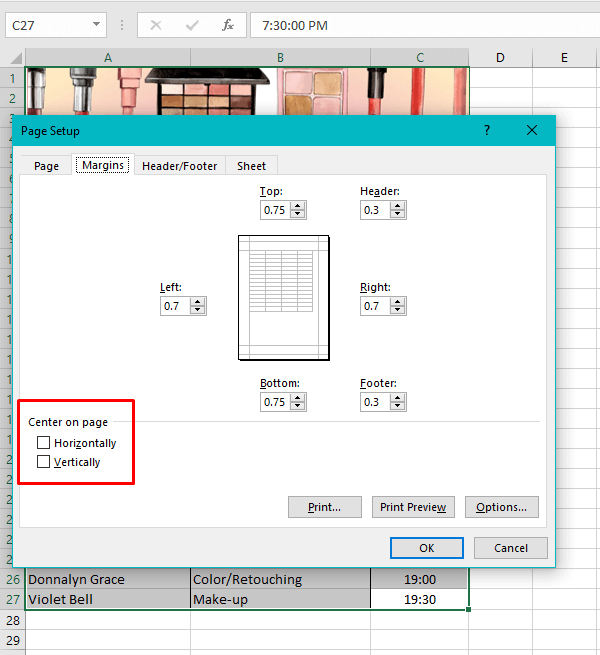
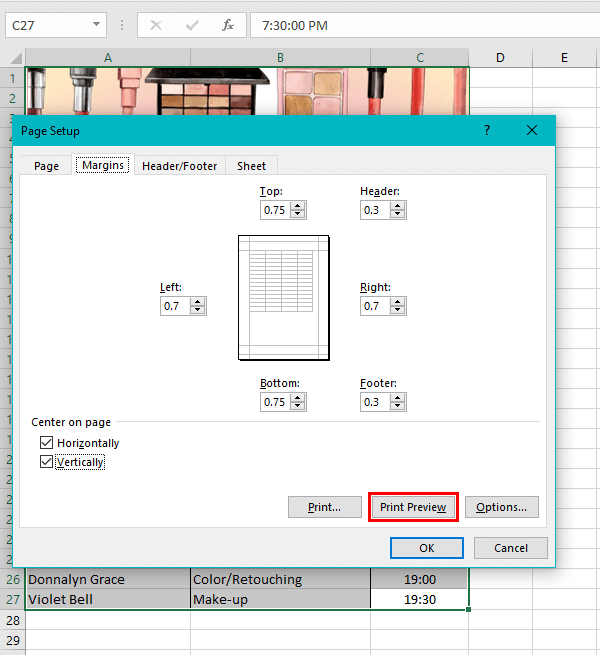
- As displayed in the preview, the data will have been centered on the page but it’s still a good idea to check the Print Preview and you’ll see why.
- Click on the Print Preview command button.
Resetting the Print Area
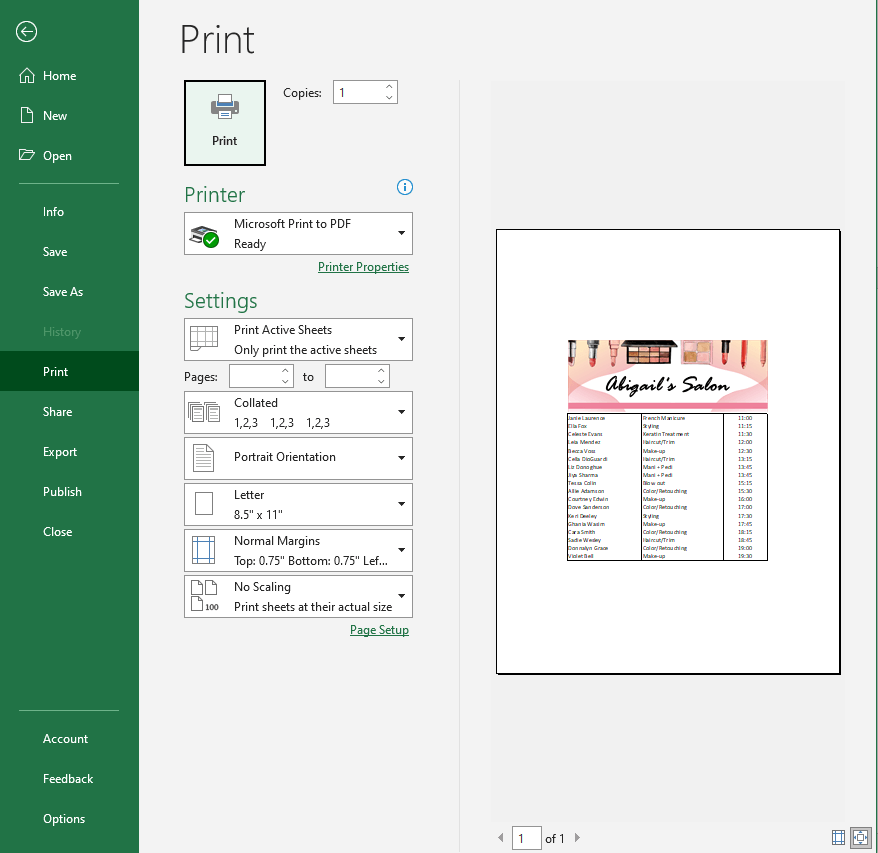
As you see below how despite centering the worksheet horizontally and vertically, it still isn’t centered?
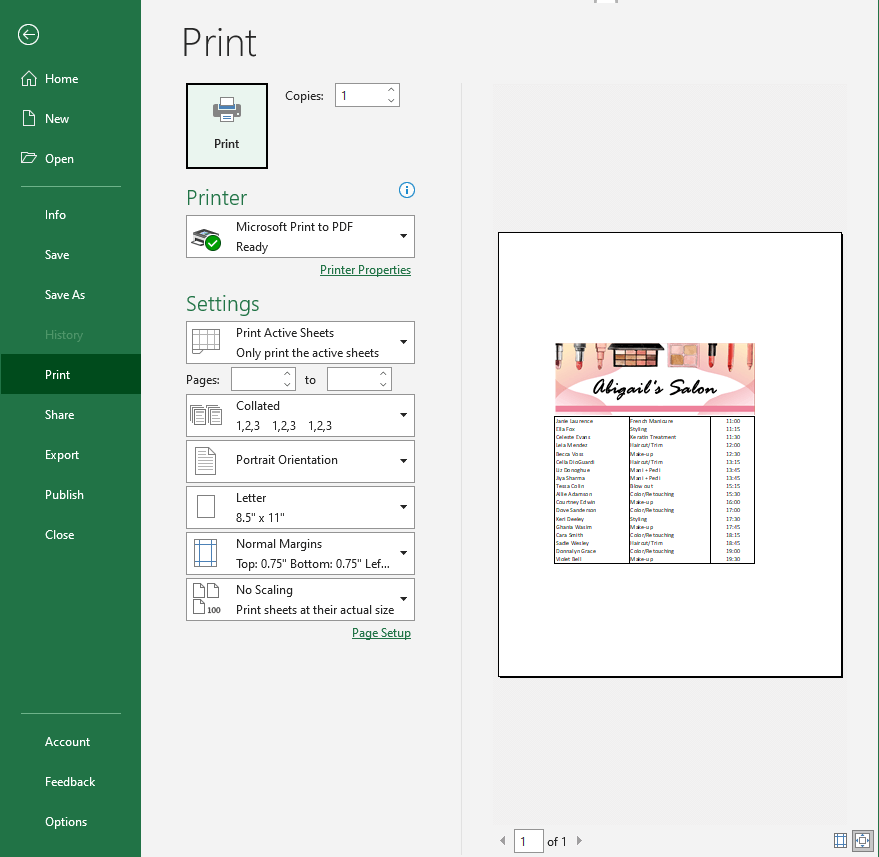
This could be because the Print Area hasn’t been set. The Print Area can be set from the Page Setup options in the Page Layout tabs now or beforehand but we have a couple of quicker tricks.
Print Selection
The first trick is the reason the data was selected in the first step. Let’s proceed with the trick.
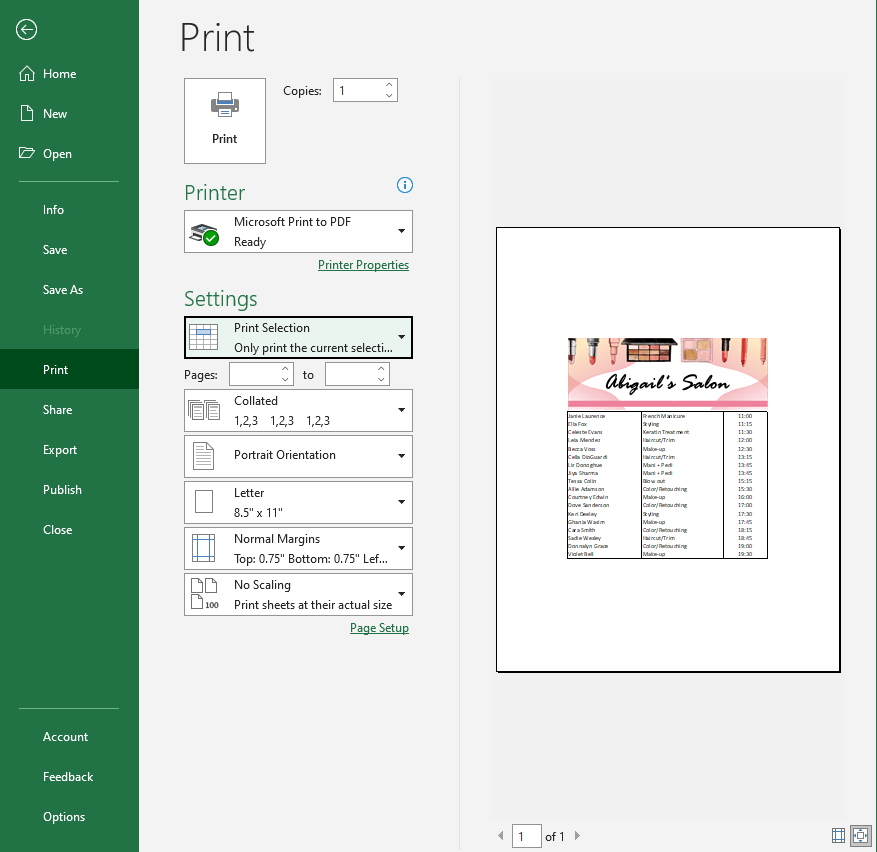
- In the Settings, click on the first button that reads Print Active Sheets.
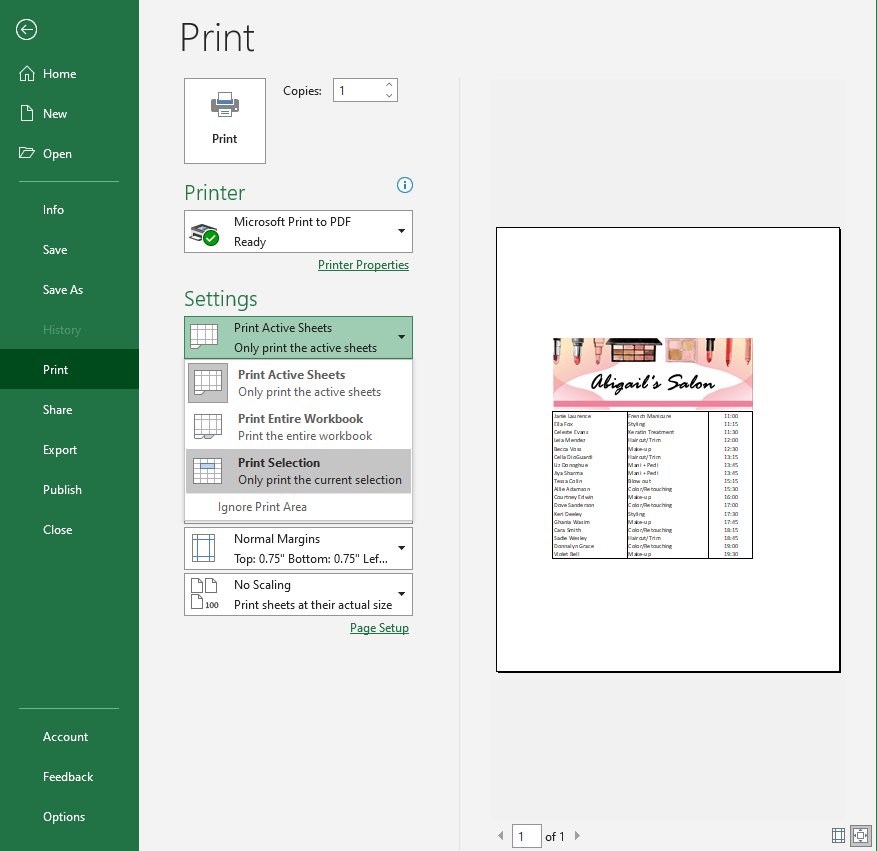
Since the data has already been centered, getting only the selection to be printed will ignore the Print Areas inhibiting the data from being centered on the page:
Adjusting Page Breaks
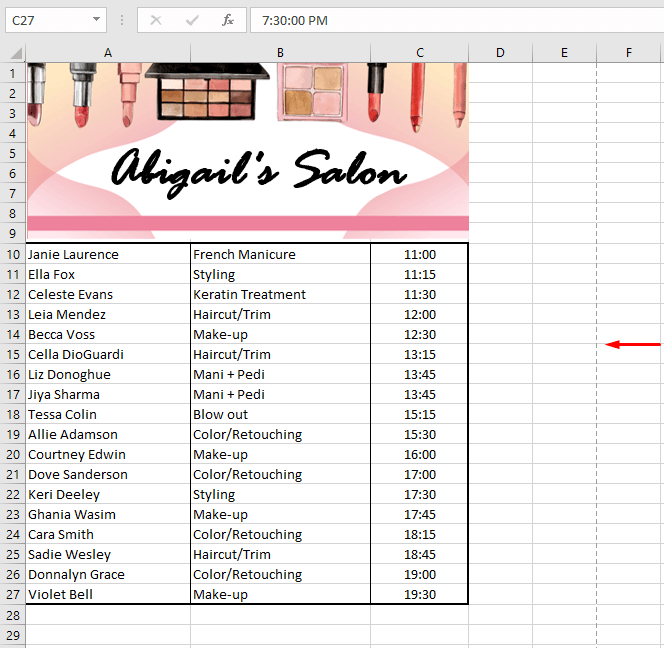
The second trick is to adjust the Page Breaks which will also eliminate any unwanted Print Areas. If you escape the Print Preview, you will find the culprit space edged with a dashed line on the active worksheet:
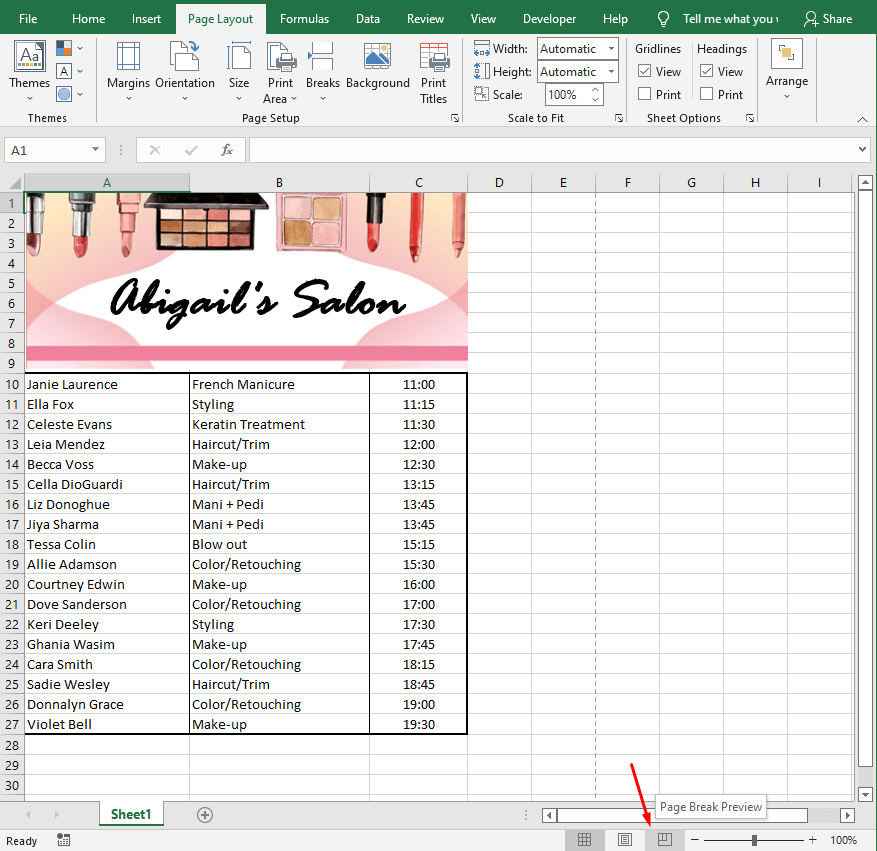
- Click on the Page Break Preview
- The dark blue lines are Page Breaks:
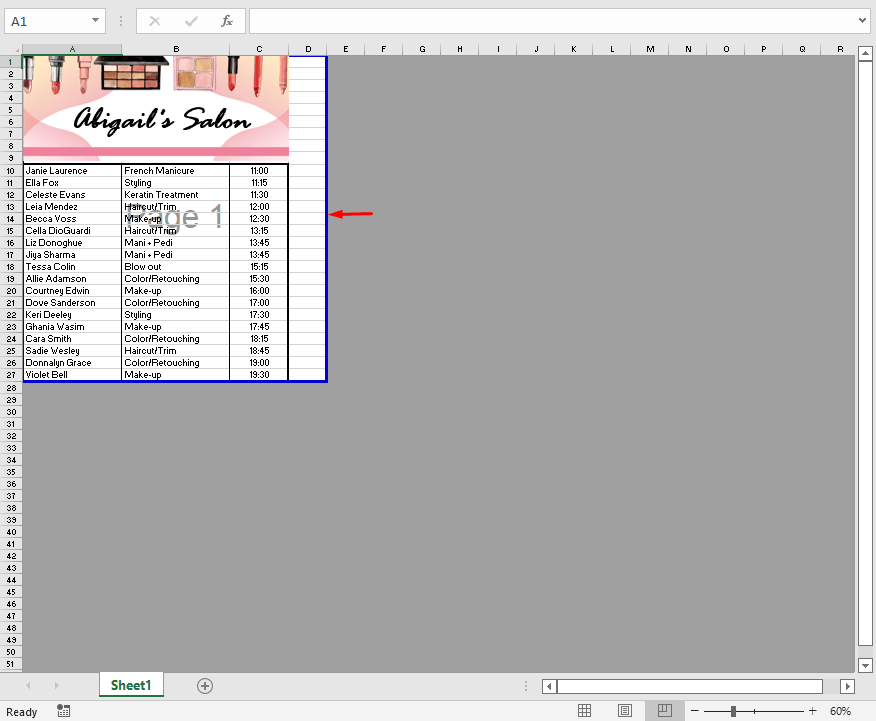
- Click and drag the Page Break to eliminate the Print Area excess of the data.
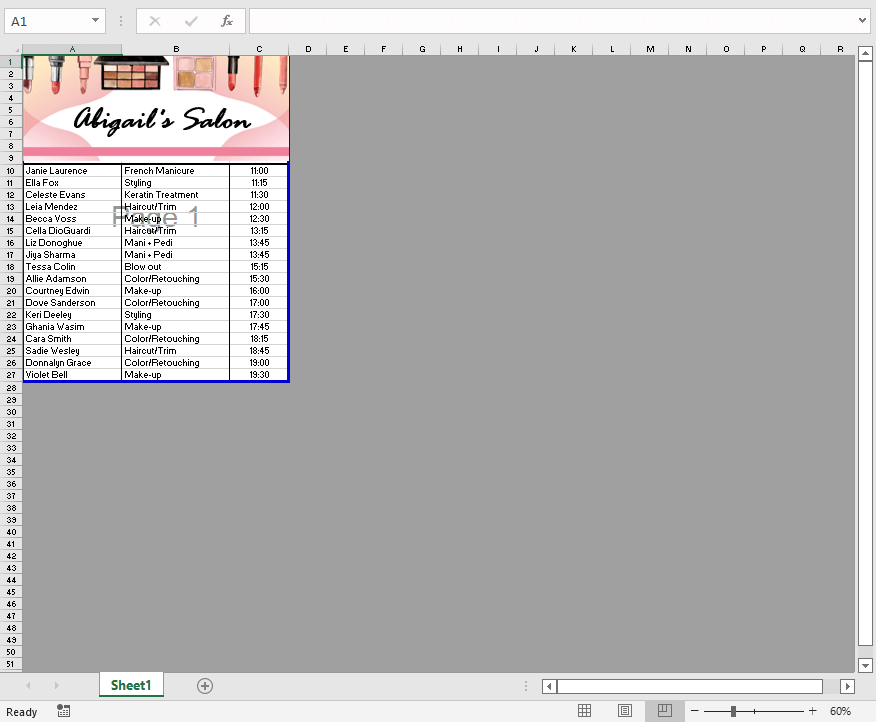
Now if you check in the Print Preview, the data will be centered:
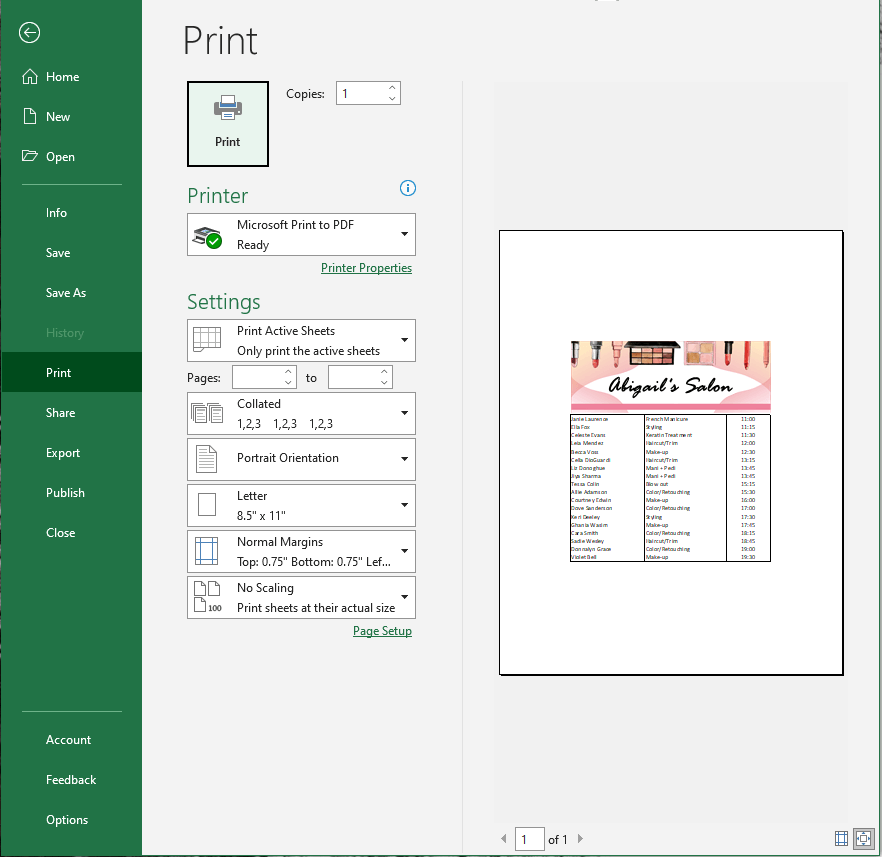
Method #2 – Using Custom Margins
This method also uses the Margins options from the Page Setup settings but instead of the dialog launcher, the options will be accessed from the Ribbon. Let’s see how to center the data on a worksheet horizontally and vertically using Custom Margins from the Ribbon:
If the Print Area hasn’t been set, select the data as the first step so that the Print Selection option will be directly applicable if needed.
- In the Page Layout tab, from the Page Setup group, select the Margins
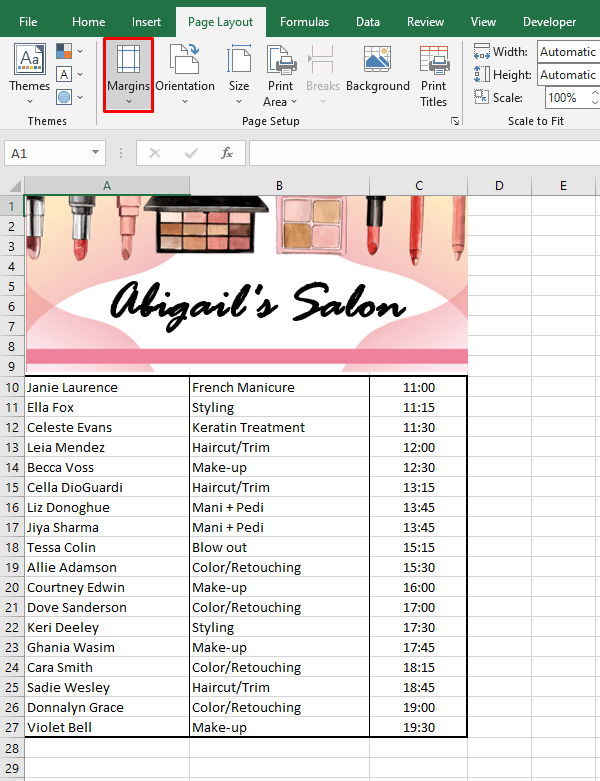
- From the Margins menu, select Custom Margins to be redirected to the Margins tab in the Page Setup dialog box.
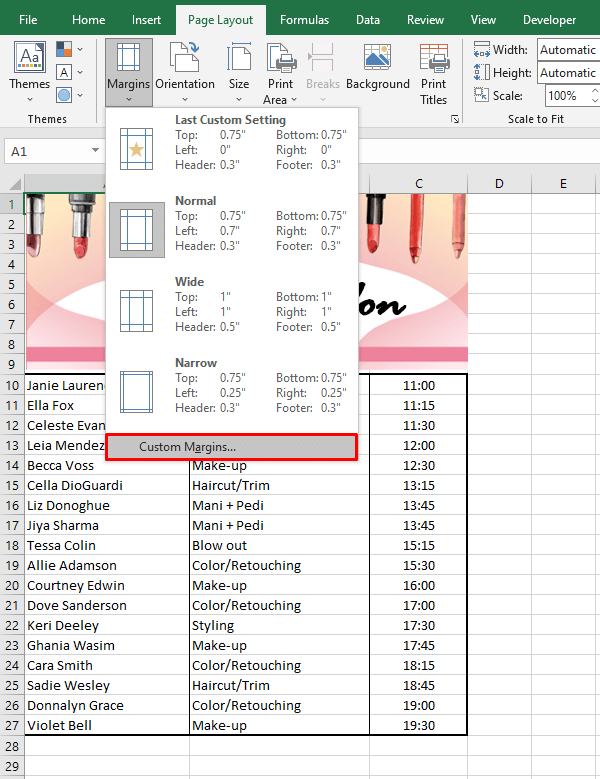
- Tick both the Horizontally checkbox and Vertically checkbox in the Center on page
- Now you can select the Print Preview button to check if the worksheet has been centered correctly.
If the worksheet still has print area exceeding the data, adjust the Page Breaks or use the Print Selection option in Print Preview.
Method #3 – Using Print Preview Mode
The third way to access the Margins settings is through Print Preview. Again, a helpful tip would be to select the data you want to get centered on the page if the Print Area hasn’t been defined. This would make the Print Selection option in Print Preview a one-step action.
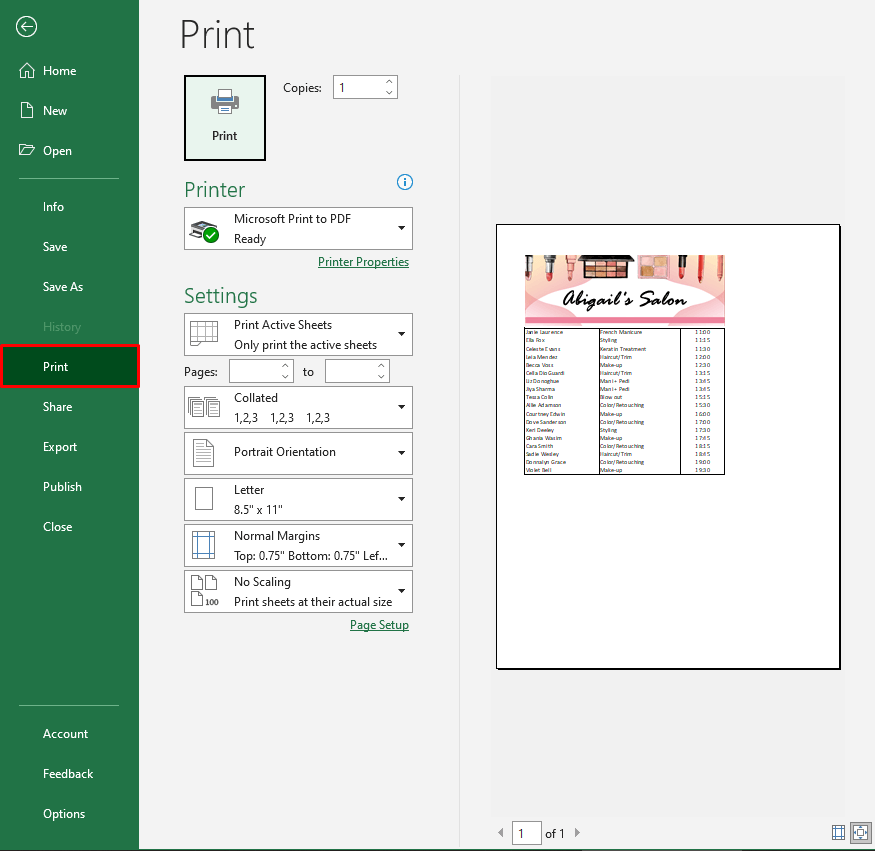
- Select the File tab and then Print from the left pane to open the Print Preview. Alternatively, press the Ctrl + P
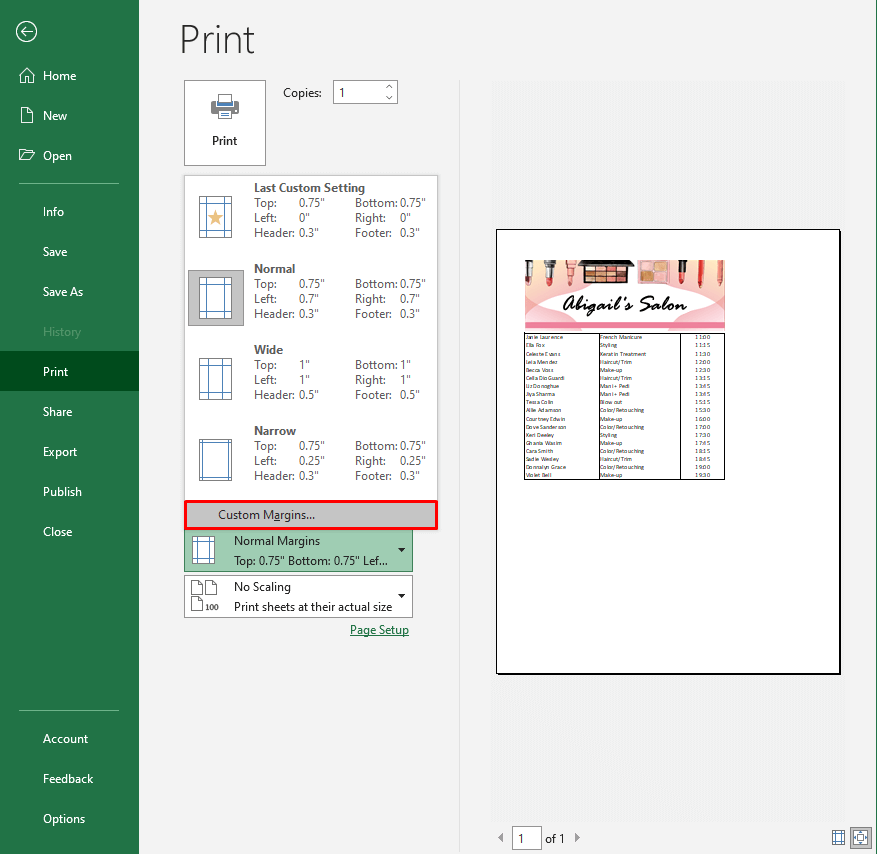
- Select the second-last button that reads Normal Margins to open further margins options. Choose the last option from the list i.e. Custom Margins.
- The Page Setup dialog box will open in the Margins tab.
- In the Center on page section of the dialog box, checkmark both the Horizontally and Vertically tick boxes.
- Then click on the OK button to close the Page Setup dialog box.
- Adjust the Print Area if needed. If the data to be printed was selected on the worksheet, the Print Selection option can be accessed directly from Print Preview.

That was all of our Excel shorty and all of three easy ways to center a worksheet horizontally and vertically with margins settings in Excel. Our Excel hat is full of Excel tricks and we’re pulling something up our sleeves while you’re learning how to center your worksheets. See you on the other side of another Excel abracadabra!

