By default, the page orientation in documents is portrait mode, the other being landscape. An Excel file will also automatically be set to portrait orientation.
On the worksheet, the page orientation has no relevance and comes to play in printing the work. How a worksheet prints is determined by the page orientation. Data with a vertical structure would be best for the default portrait orientation while horizontal goes with landscape.
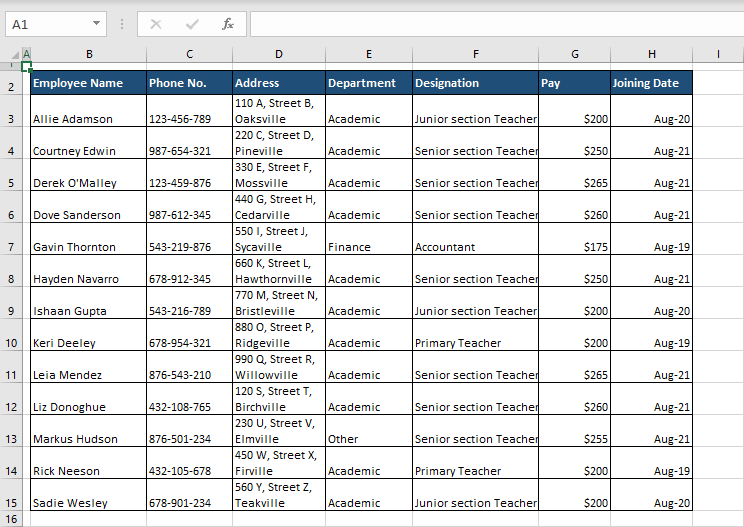
Let's see what happens if we try to print the dataset shown below.
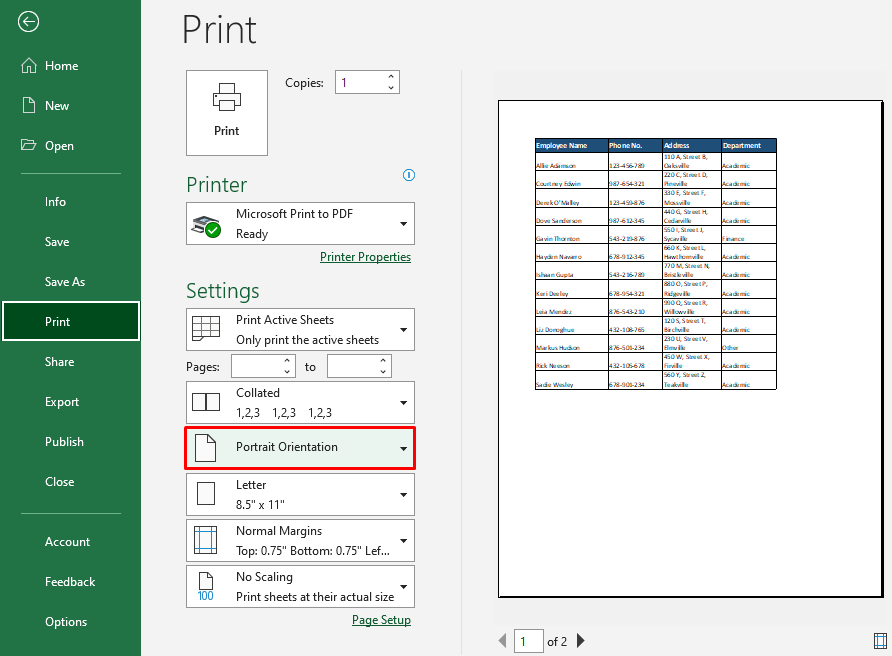
The Print Preview shows us 4 out of 7 columns of the data:
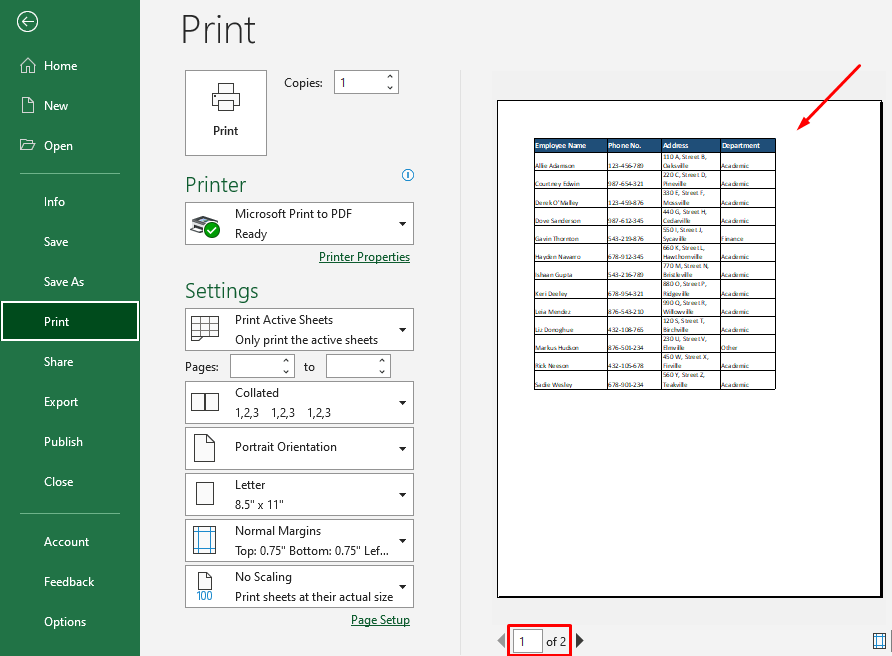
What can very easily be printed on a single page is taking up 2 pages as also indicated by the page numbering at the base of the Print Preview window. Let's switch things up and here we are:
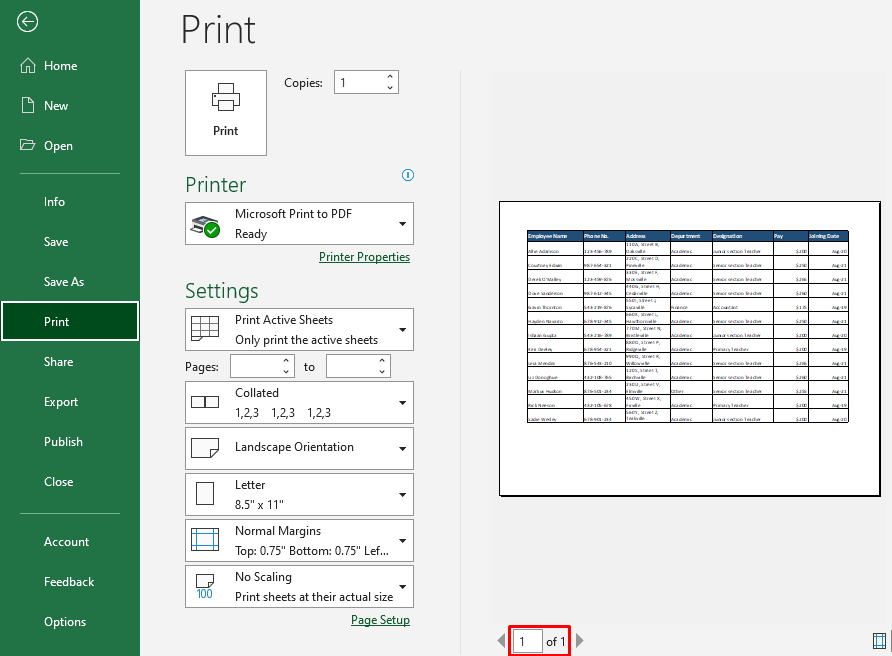
Now we have all 7 columns and just 1 page to be printed. Other differences are the visual page orientation and the page orientation in the settings on the left. Changing the orientation to landscape has solved our printing problem here.
Our tutorial will show you a handful of ways to change the page orientation in Excel whether you want it done in a few clicks, with a keyboard shortcut, or while readying the file in Print Preview. All the methods guide on changing the page orientation from the default Portrait to Landscape.
Pro Tip: Use grouped worksheets to change the Page Orientation of multiple sheets or all sheets in Excel simultaneously. All your questions about Excel sheet groups can be found here. So, the idea is to form a group and then proceed with, let's say method 1 for changing the page orientation. This way, the change will apply to all the grouped sheets.
Portrait to Landscape or vice versa…
Let's get page-orienting!

Method #1 – Using Page Layout Tab
Change the Page Orientation in Excel using the Page Layout tab. Use this method to quickly switch page orientation while remaining on the worksheet. The steps for using the Page Layout tab to change the page orientation are as follows:
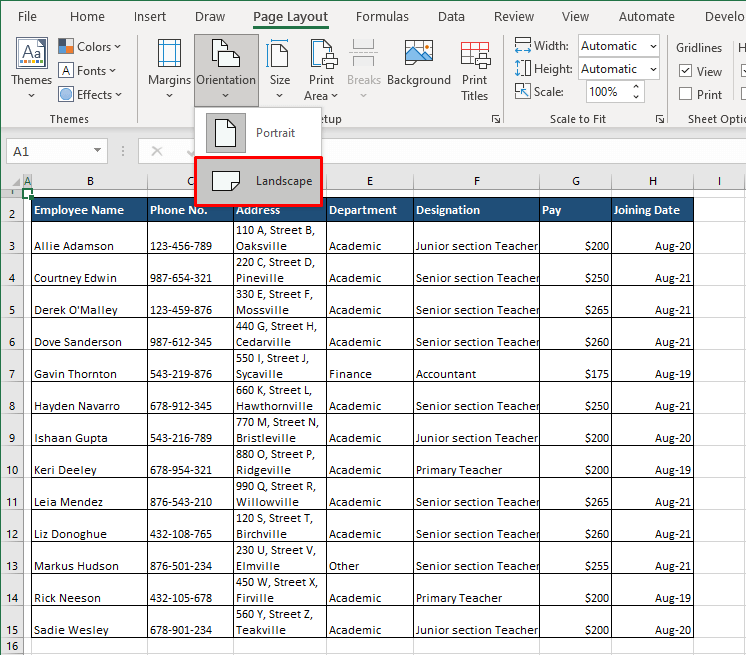
- Click on the Page Layout tab above the Ribbon. In the Page Setup group, select the Orientation button and then the Landscape
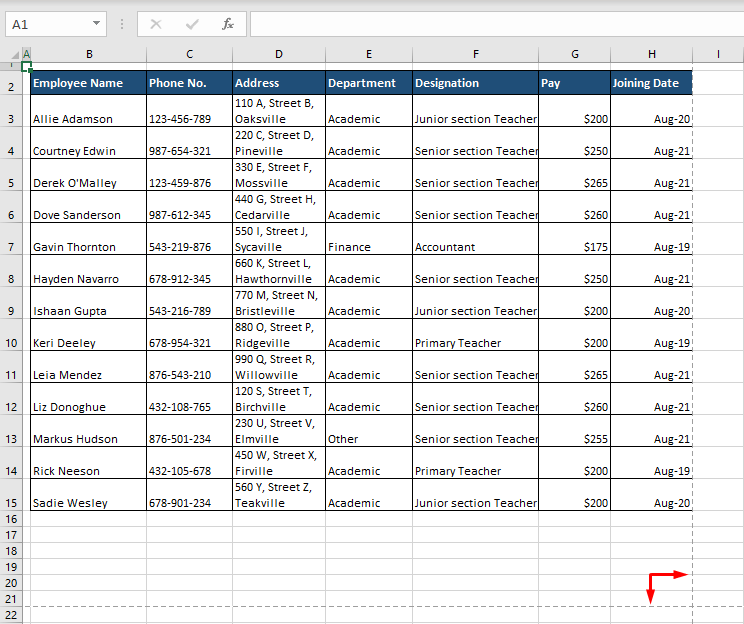
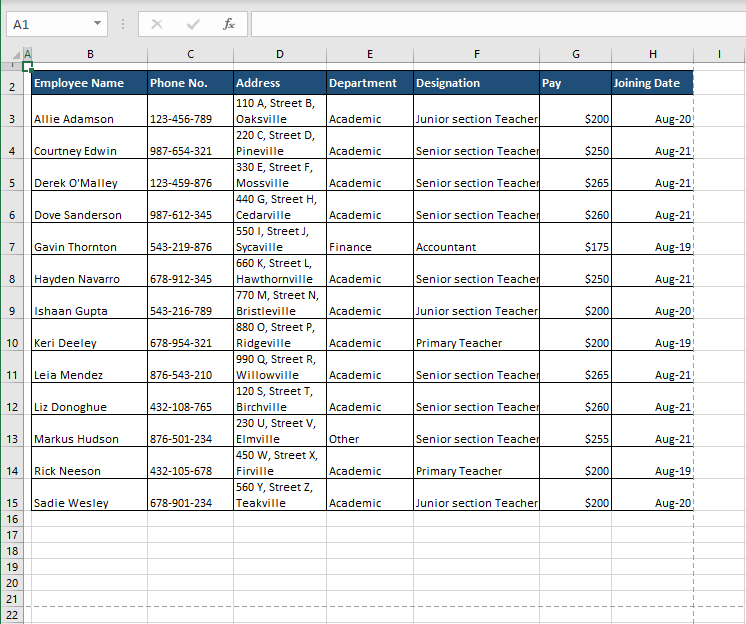
- On the worksheet, the difference you will see is the appearance of dashed lines indicating the page breaks as per the Landscape orientation.
- You can also confirm the Page Orientation from the Print Preview:
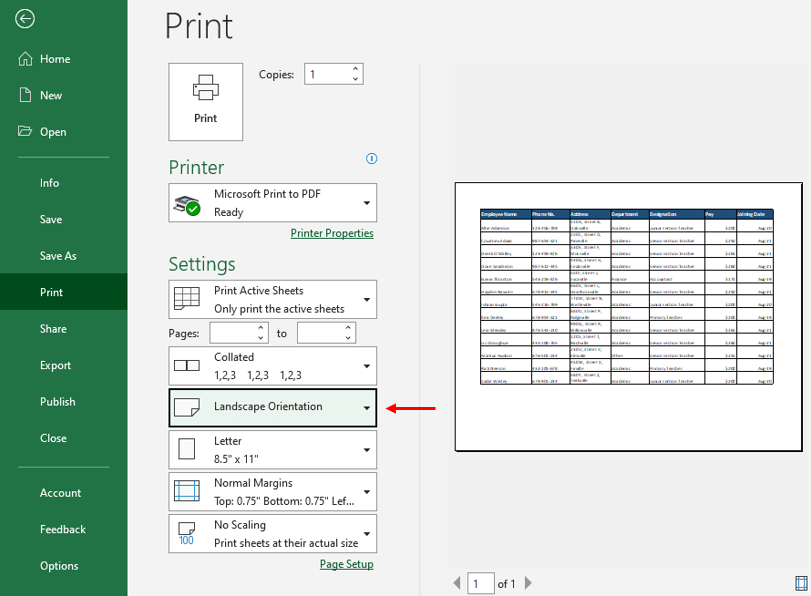
While we're at it, why not explore this method for setting the page orientation? Keep reading.
Method #2 – Using Print Preview
The next method involves using Print Preview for changing the page orientation in Excel. Print Preview is not just for viewing a print sample or proceeding with printing but also has Page Setup options including Page Orientation.
This method quickly displays the change in page orientation in terms of a print sample and is super quick for changing the orientation and sending the sheet(s) for printing. The details of using the settings in Print Preview to change the Page Orientation in Excel are given in the steps below:
- Open the Print preview window using the Ctrl + P keys or click on the File tab and select Print from the left pane.
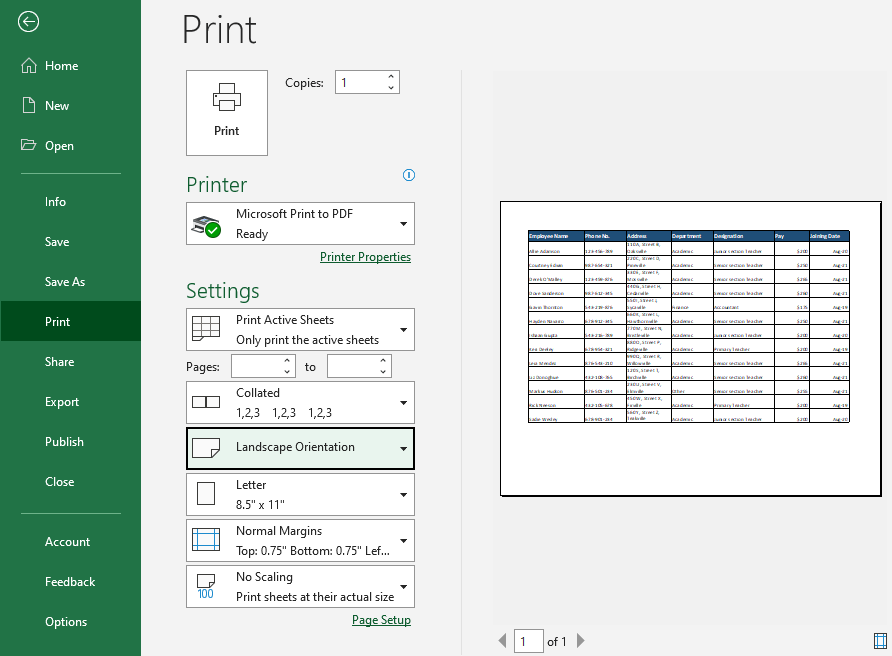
- The Settings section shows the current page orientation which will be Portrait Orientation if this setting has not been changed before as is the case here:
- Click on the button displaying the page orientation and select Landscape Orientation from the drop-down menu.
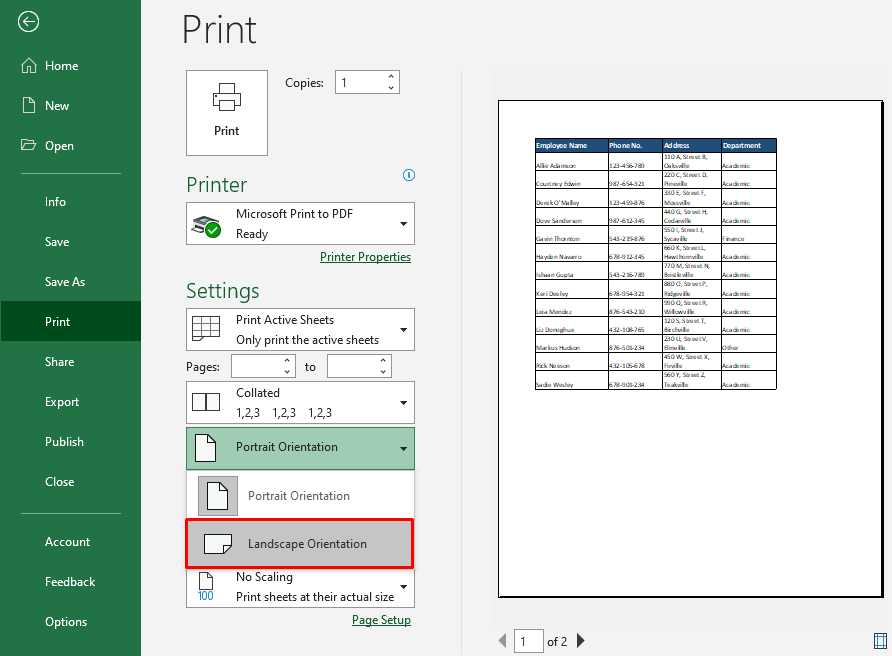
The Page Orientation will be set to Landscape and the layout can be instantly confirmed from the preview in Print:
Method #3 – Using Page Setup Dialog Box
The page orientation can be changed in Excel from the Page Setup options. The Page Setup settings have vast options including setting the Page Orientation. Use this method for making other changes to the Page Setup along with the Page Orientation. Below are the instructions for changing the page orientation in Excel with Page Setup:
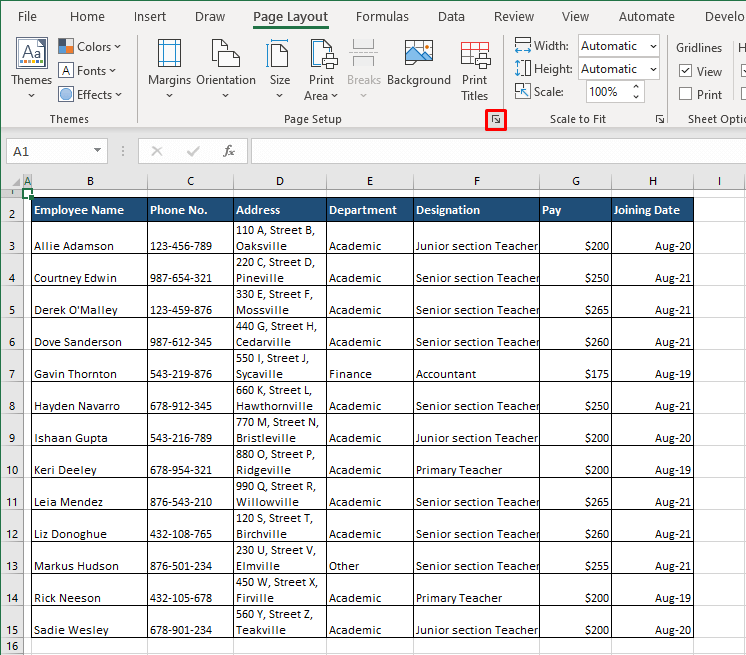
- Head to the Page Layout Click on the dialog launcher (highlighted below) of the Page Setup group to launch the Page Setup dialog box. You can also use the Alt, P, S, P keys in succession to do this.
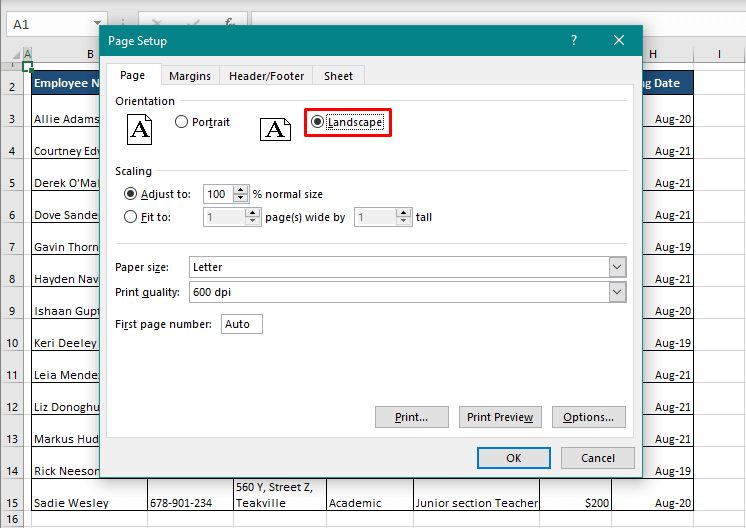
- Make sure you have the Page tab open in the dialog box.
- Select the Landscape option in the Orientation
- Hit the OK
The dialog box will now close as you return to the worksheet, the dashed lines showing the change in Page Orientation:
Method #4 – Using Keyboard Shortcut
Switch the page orientation in Excel using a keyboard shortcut. This is the shortcut-keys method of changing the Page Orientation from the Page Layout tab. The keyboard shortcut to change the Page Orientation in Excel is given below:
Alt, P, O, (Arrow key), Enter
The keys are to be entered in the mentioned series, not together.
The Alt key displays the shortcut keys for the tabs above the Ribbon in Excel.
The P key opens the Page Layout tab.
The O key opens the Orientation options by selecting the Orientation button in the Page Setup group.
(Arrow key) In this case, the arrow key that we need to use here is the down arrow key as we are switching from Portrait to Landscape orientation.
The Enter key acts as the command key to select and apply the chosen Page Orientation (Portrait or Landscape).
When the Enter key is hit, the Landscape orientation will be applied. Confirm the change from the dashed line in display now:

Method #5 – Using VBA
Use VBA in Excel to change the Page Orientation. VBA carries out user-defined tasks in Microsoft applications. You will require a code to change the page orientation.
While the methods given above are for just the active worksheet, the codes we have for you below will change the page orientation of the active worksheet or the whole workbook. The codes and the way to apply them to change page orientation in Excel are listed here:
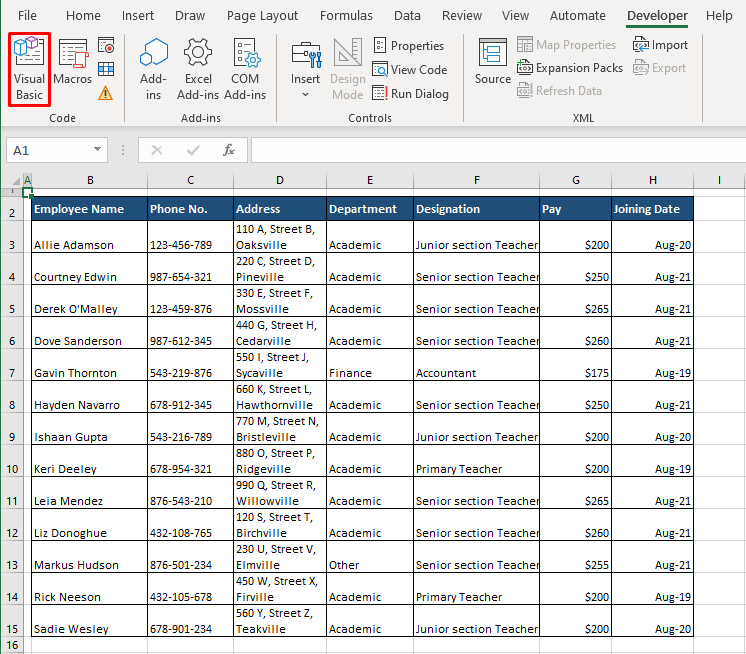
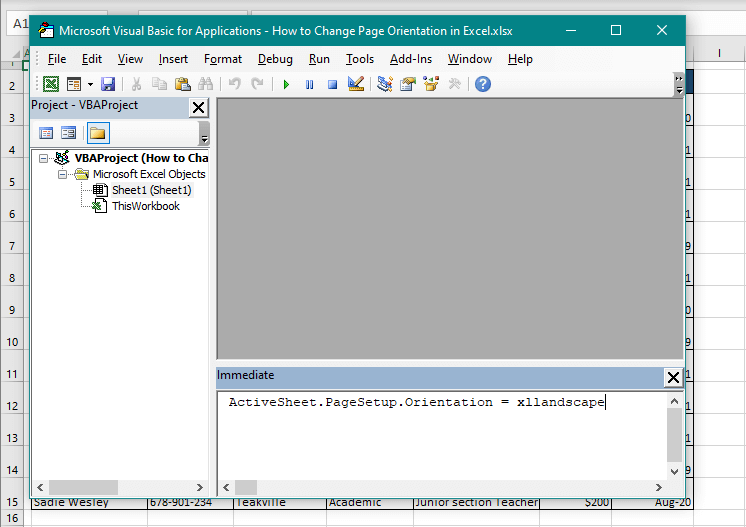
- First, open the Visual Basic Do this with the Alt + F11 keys or from the Developer tab > Code group > Visual Basic button.
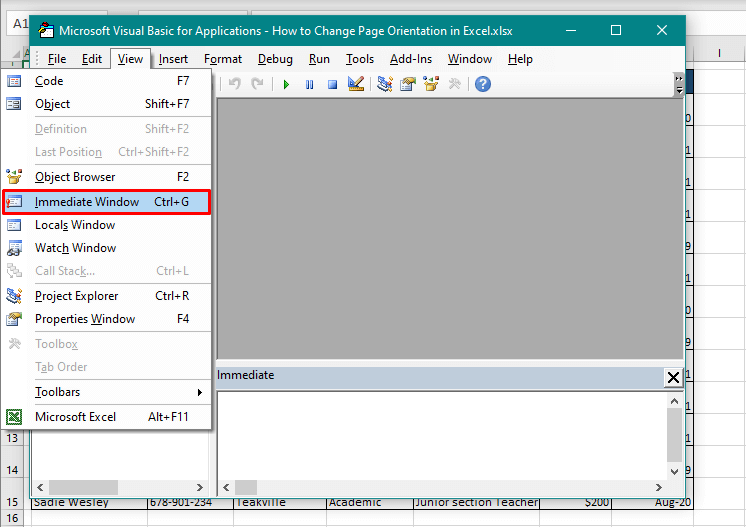
- Click on the View tab in the editor and choose the Immediate Window
- Copy the following code and paste it in the Immediate
For changing the Page Orientation of the active worksheet to Landscape:
ActiveSheet.PageSetup.Orientation = xllandscapeFor changing the Page Orientation of the whole workbook to Landscape:
For each ws in Worksheets: ws.PageSetup.Orientation = xllandscape: Next ws
For Portrait orientation, change the "landscape" part in the code to "portrait". The codes become:
Active worksheet in Portrait Orientation:
ActiveSheet.PageSetup.Orientation = xlportraitFull workbook in Portrait Orientation:
For each ws in Worksheets: ws.PageSetup.Orientation = xlportrait: Next ws
- After pasting the code, press the Enter
- The code will immediately apply to the worksheet in the file.
- Close the Visual Basic
Returning to the worksheet, its page orientation will have switched to Landscape, as seen from the dashed lines:

If you had been tasked with changing the page orientation in Excel, we are positive that we've given you all the quick and easy ways of doing so. Be sure to make your printer's life easier and life in general, greener by responsibly setting up the pages first. See you where the grass is greener with another Excel trick to mow your worksheets with. Ready? Tricky? Go!
