This tutorial details deleting every other row in Excel. The requirement of the time may be some systematic sampling or selection, keeping data of even-numbered weeks/months, or maybe just slashing out one-half of too much information.
In this guide, we demonstrate deleting alternate rows using functions & filtering and VBA. We use the results of the functions to group the Nth rows and delete them. While we're here talking about deleting every 2nd row, it makes good sense to brush over on deleting every Nth row and it makes even better sense to get down to work. Let's dive in!

Method #1 – Using Formula Based Filters
When thinking of deleting alternate rows, you may have a mental mind-map of either keeping the even-numbered rows or the odd-numbered rows. That's exactly what we will do here. We'll use the ISEVEN function to denote each row as even or odd.
Then we'll filter the data to bunch up the even-numbered rows, select and delete them, unravel the filter, leaving the odd-numbered rows. Deleting every even-numbered row equals deleting every other row. Now let's show you the steps:
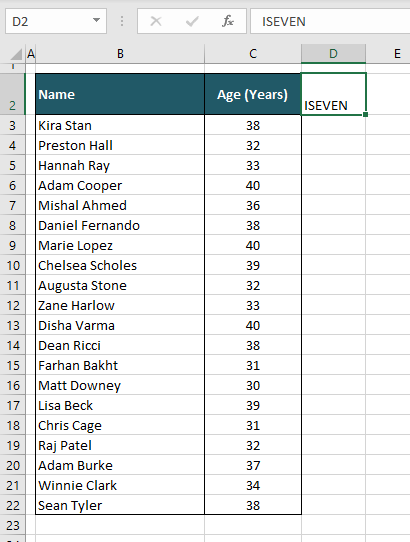
- Add a column header to the right of the dataset. This column will be used as a helper column and will be deleted later. Adding a header will help with the filtering options.
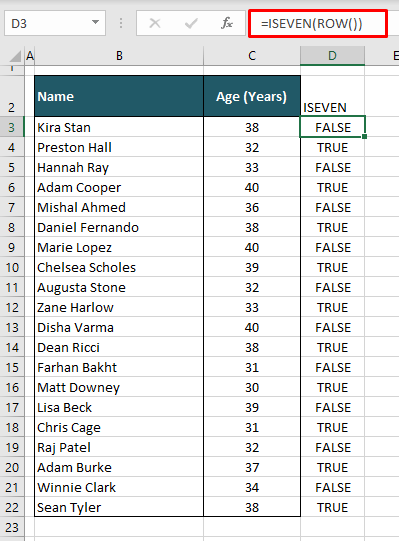
- Add the following formula in the new column:
=ISEVEN(ROW())The ROW function returns the row number of a reference. The ISEVEN function returns true if the given number is even. The ROW function used without an argument will return the number of the row the formula is in i.e. 3 in this case. The ISEVEN function checks the result of the ROW function as to whether it is even or not. 3 is not an even number and so the formula results in FALSE.
- With the formula filled down to C22, the rest of the rows in the ISEVEN column are rendered TRUE for even-numbered rows and FALSE for odd-numbered rows.
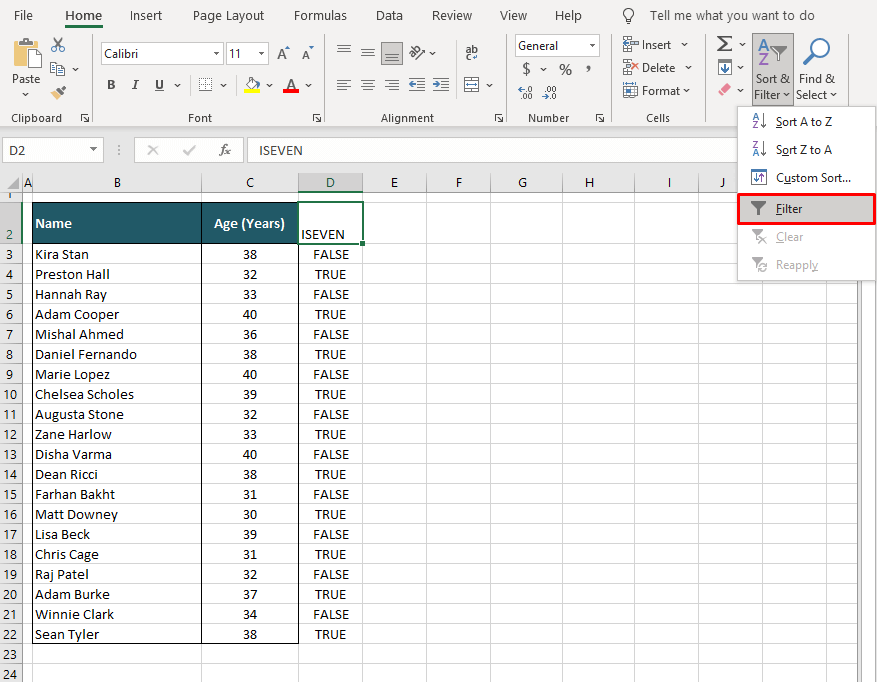
- Select any cell in the dataset, go to the Editing group in the Home tab, select Sort & Filter and then select Filter from the menu (or use the keyboard shortcut Ctrl + Shift + L).
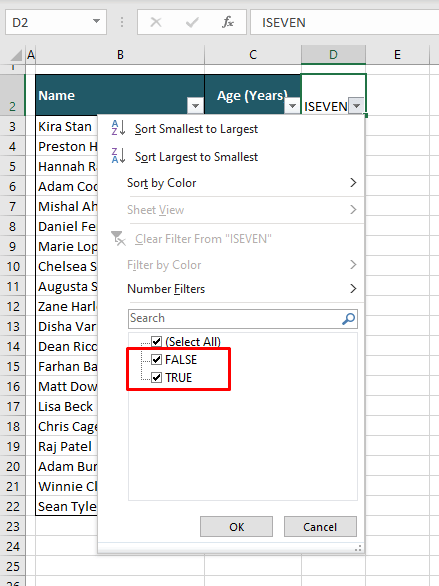
- With the filters added, click on the arrow of the ISEVEN column's filter to expand the filtering options. Uncheck one of the checkboxes; either TRUE or FALSE. We will uncheck FALSE.
- Click OK. All the TRUE rows (even-numbered rows) of the dataset will be displayed.
- Select all the TRUE rows in the dataset and delete them.
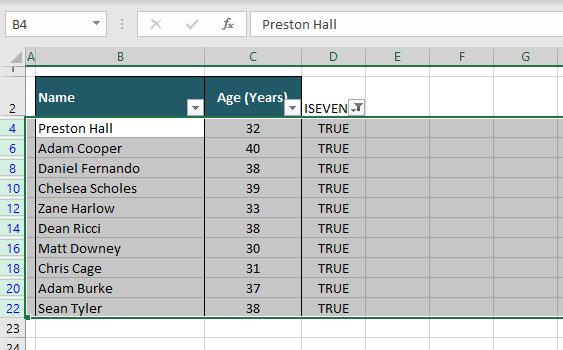
- You will be left with only the column headers since the TRUE rows have been deleted and the FALSE rows are not displayed.
- Click on ISEVEN column's arrow again and click on the (Select All)
- Click OK.
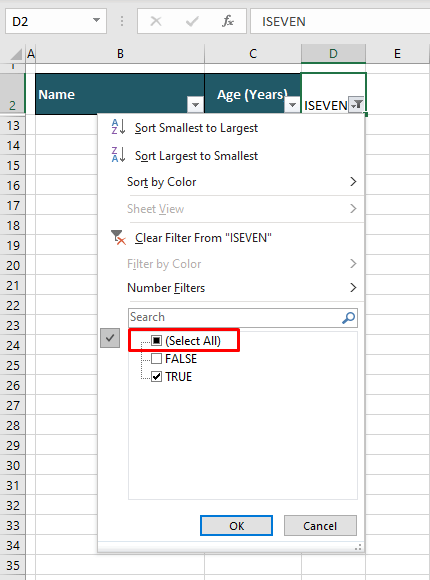
- The results of the ISEVEN function will recalculate but don't worry about that; the rows displayed are all the originally FALSE (odd-numbered) rows.
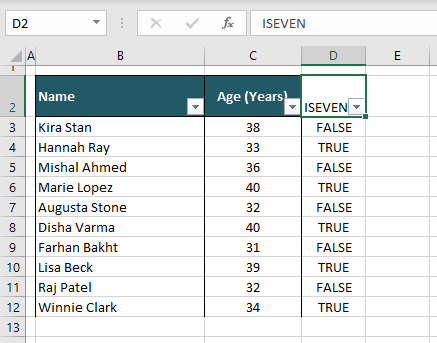
- With any cell from the dataset selected, press Ctrl + Shift + L to remove the filters (or reselect the Filter option from the ribbon menu).
- Delete the ISEVEN column and fix the formatting if required.
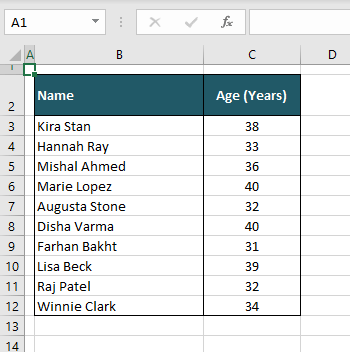
There we have deleted every second row (and cleaned up the mess from the rough work). We can also use the MOD function (you will see how in the last segment of this guide) instead of the ISEVEN function to delete alternate rows.
Method #1 – Using VBA
For those familiar with VBA, we have a macro-based method of deleting alternate rows. For those unfamiliar with VBA, here's your chance to learn something new. With VBA, user-generated functions can be created to make the manual work on Excel quicker and easier.
We will create an Excel macro (deleting alternate rows) by coding it using VBA. The macro can then be run from the window it was created in. For recurring use, the macro can be accessed from the ribbon menu to repeatedly perform the automated task. Below we have the steps to create a macro for deleting alternate rows:
- Open the VBA editor, select the Visual Basic button in the Developer If you haven't enabled the Developer tab, press Alt + F11 to access the VBA editor. This is what it looks like:
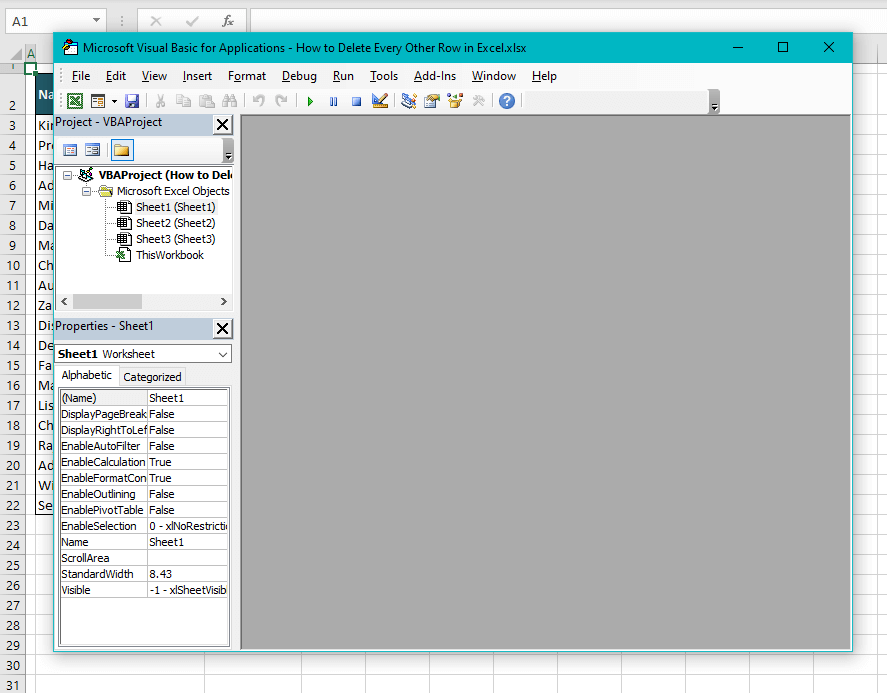
- Select the Insert Then select Module from the menu.
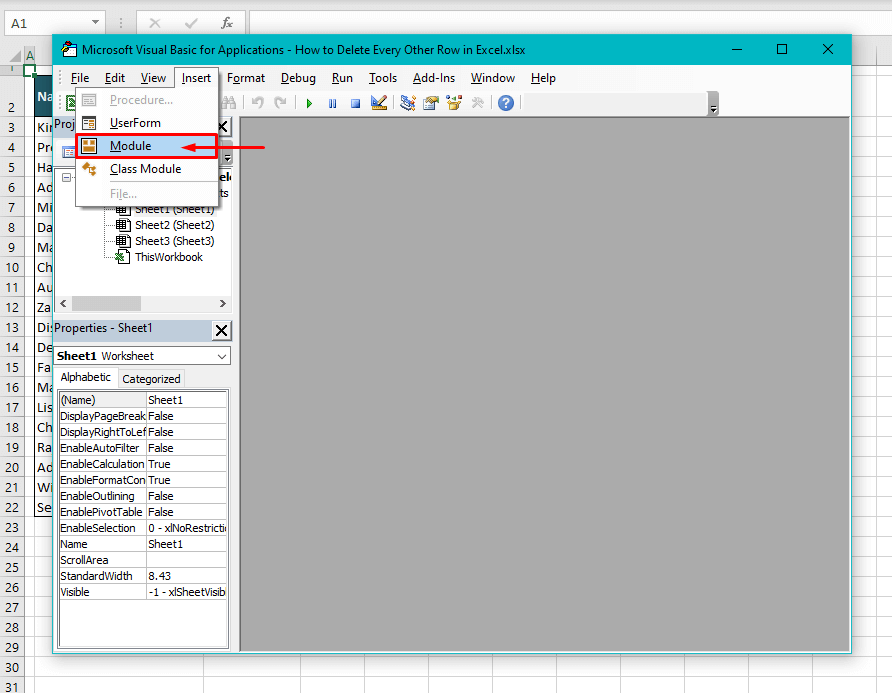
- A Module window will open. In the Module window, copy-paste the following code:
Sub Delete_Every_Other_Row()
Dim Rng As Range
Set Rng = Application.InputBox("Select the Range (Excluding headers)", "Range Selection", Type:=8)
For i = Rng.Rows.Count To 1 Step -1
 If i Mod 2 = 0 Then
 Rng.Rows(i).Delete
 End If
Next i
End Sub
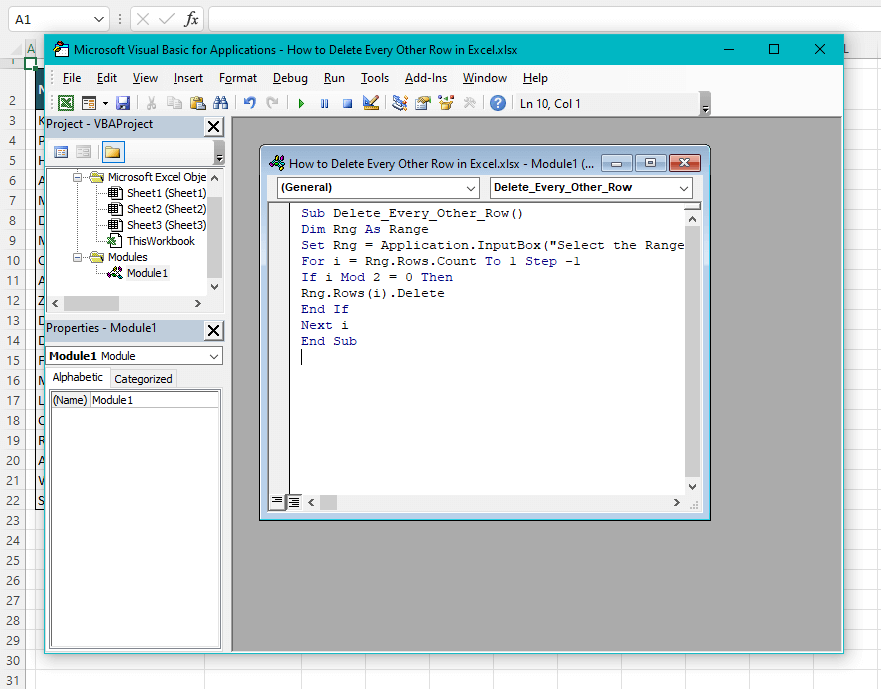
- To run the command instantly from this window, press the F5 key, then close the Module window and the editor.
- To run the command later, close the Module window and the VBA editor after entering the code.
- Go to the View tab and click on the Macros button (for the keyboard shortcut to access Macros, press Alt + F8).
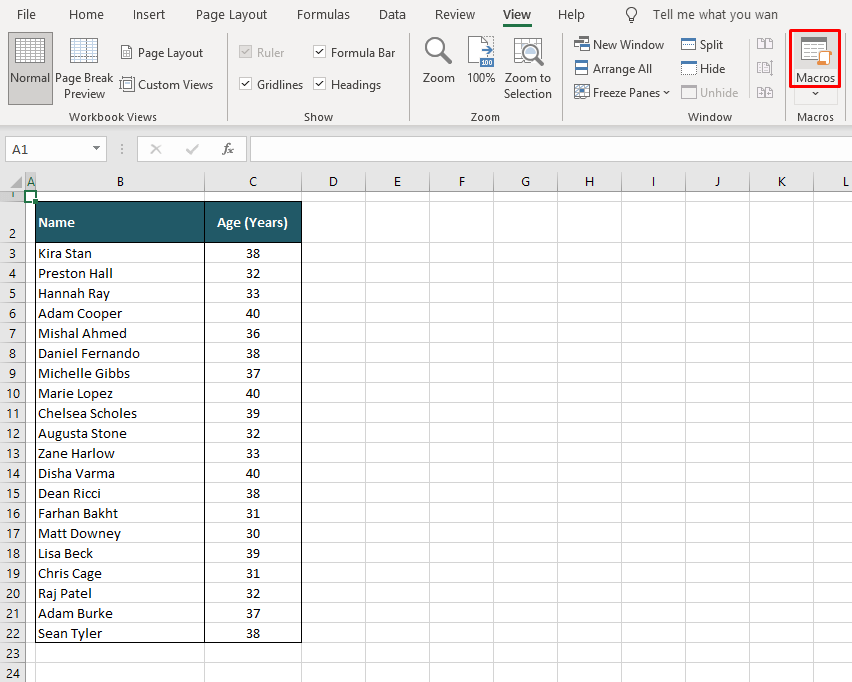
- Select the applicable macro from the Macro dialog box and select the Run command button.
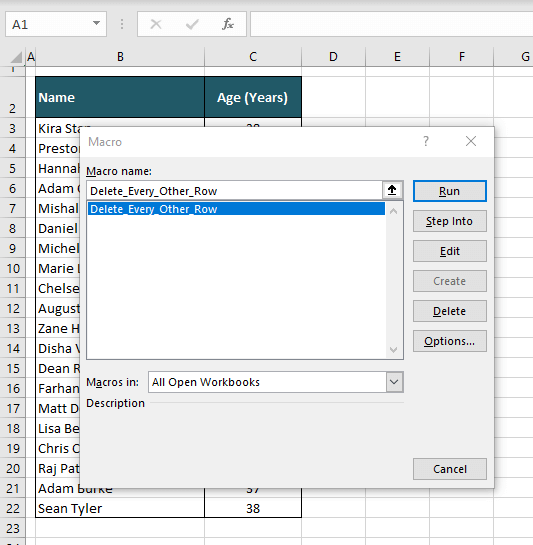
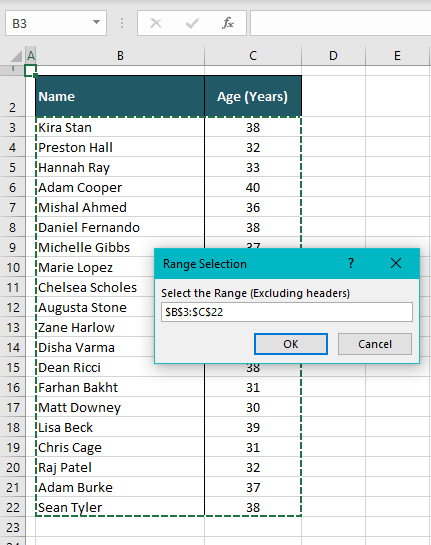
- A dialog box will pop up for selecting the range to delete the alternate rows from. In the dialog box, enter or select the range for deleting alternate rows.
- The marching ants line represents the selected range.
- Click OK.
The rows will now have been deleted.
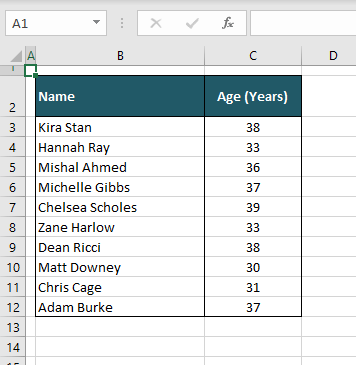
You may notice that there is no going back with macros; no Ctrl + Z amount of undoing will undo it. However, there is the data with every second row deleted.
Recommended Reading: How To Highlight Every Other Row In Excel
How to Delete Every Nth Row
In the segment above, we highlighted how to modify macro codes to delete every Nth row. Now we'll teach you how to delete every 3rd or 4th or whichever Nth row it is that you want to delete by joining the MOD and ROW functions together and filtering the results to gather and delete every Nth row.
The MOD function returns a remainder after a number is divided by a divisor. The ROW function returns the row number. Why these two work together, you will find out in the steps ahead:
- Add a column header to the right side of the dataset as a helper column which we will use for the formula and delete later.
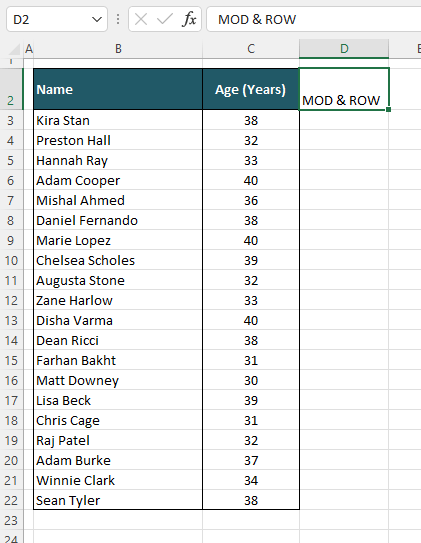
- Add the following formula in the new column and fill it along with the last cell of the dataset.
=MOD(ROW(),3)=2The ROW function has been entered with no argument so the function will return the row number of the sheet where the function is being entered i.e. 3 here. The MOD function takes the row number, divides it by 3. The outcome of 3 divided by 3 is 1 which is the first bit of the formula. The last bit of the formula is "=2".
The formula becomes 1=2. This is FALSE and the final result of the formula.
How would you know what numbers to add to the formula?
3 is the Nth row to be deleted. We want to delete every 3rd row and have entered 3 here.
2 is the row number the data starts from -1. Our data starts from row 3 which makes 3-1=2.
You can edit this number to set which row to start deletion from. E.g., in our data below, we are currently getting these results:
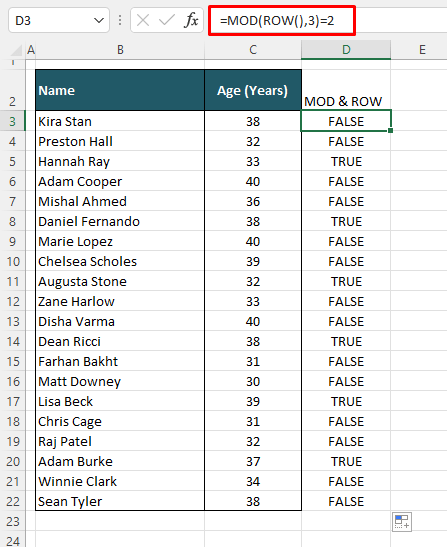
Right now, we have FALSE, FALSE, TRUE, FALSE, FALSE, TRUE onwards. If we edit "2" in the formula to "1", we would have FALSE, TRUE, FALSE, FALSE, TRUE onwards. Since all the TRUE rows will be removed, this chain determines which rows will be deleted.
- With any cell in the dataset selected, go to Home tab > Editing section > Sort & Filter button > Filter. You can also use the keyboard shortcut Ctrl + Shift + L instead.
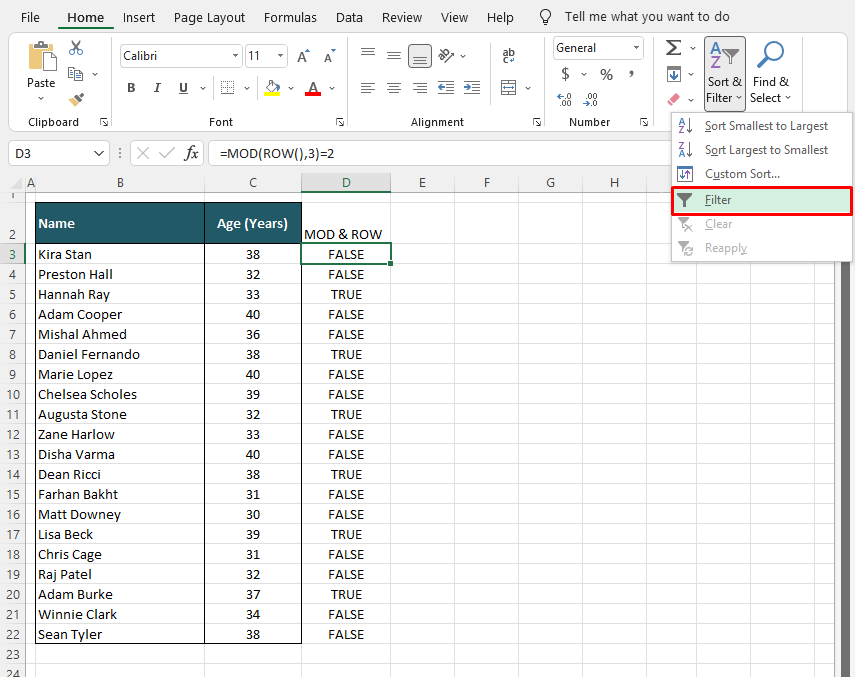
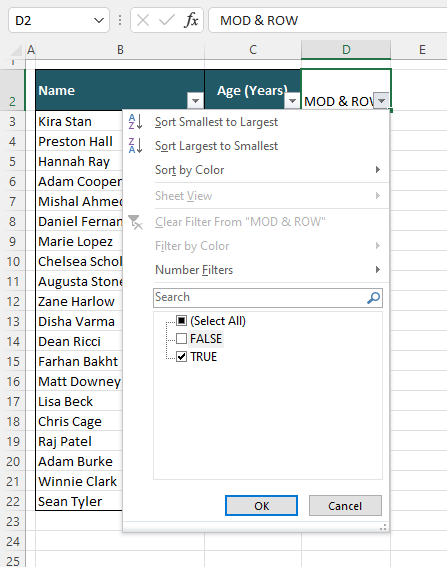
- The filters will be applied to the columns. Click the MOD & ROW column filter. Uncheck FALSE from the drop-down menu.
- Click OK.
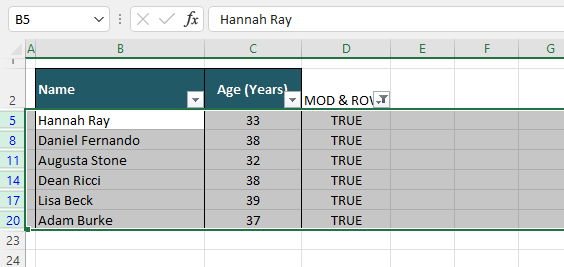
- All the rows with TRUE in the formula results will arrange together.
- Select all the displayed rows (excluding column headers) and delete them.
- Open the MOD & ROW column's filter options again and check the (Select All) checkbox to display the remaining data.
- Click OK.
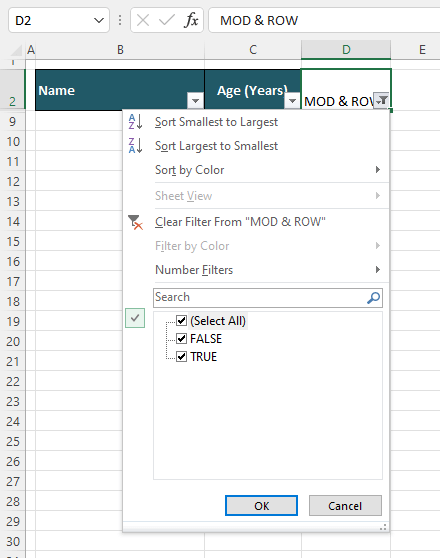
- Delete the MOD & ROW column and remove the filters by pressing Ctrl + Shift + L with any cell selected from the data.
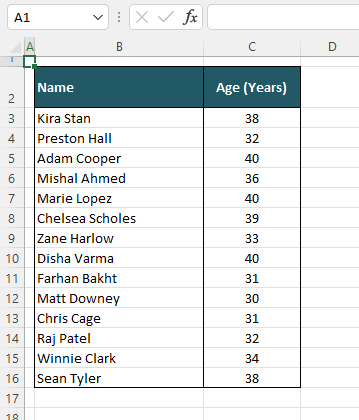
- In this instance, every 3rd row has been deleted.
That was our take on deleting alternate rows or every Nth row. We hope we pitched the easiest methods for you while giving you some scope on tinkering with codes and functions so you can get the results you want. Have a go at one of these techniques when you have to delete every Nth row instead of cracking manual skills. We'll be back with more from Excel city so your manual skills take a rest and Excel skills get in gear!


