All is looking upright in Excel; you've been so organized, have stacked all the worksheets in the most logical order, and have obsessively named over a dozen ranges down to the T. That is what Named Ranges are for, after all, to make the usage of a cell or a range easier in your spreadsheet life.
That is just great going but how far are we falling from greatness when we can't recall range names or their location? Uh oh. Before you write off Named Ranges as a bad idea, Excel has a few very easy-peasy ways to find Named Ranges.
By the end of this tutorial, you will learn how to find Named Ranges using the Name Manager and Paste Name feature and how to find and select a Named Range using the Find & Select feature and the Name Box.
Magnifying glasses at the ready, let's get searching!

Method #1 – Using Find & Select Feature
Purpose: Selecting a Named Range.
Find a Named Range in Excel with the Go To command of the Find & Select feature. Find & Select is used for finding the cells containing certain data e.g., formulas, Conditional Formatting, etc. The Go To option enlists the Named Ranges in the workbook and you can select the cells of a Named Range by selecting it from the list.
The steps below demonstrate the usage of the Find & Select feature to select a Named Range in Excel:
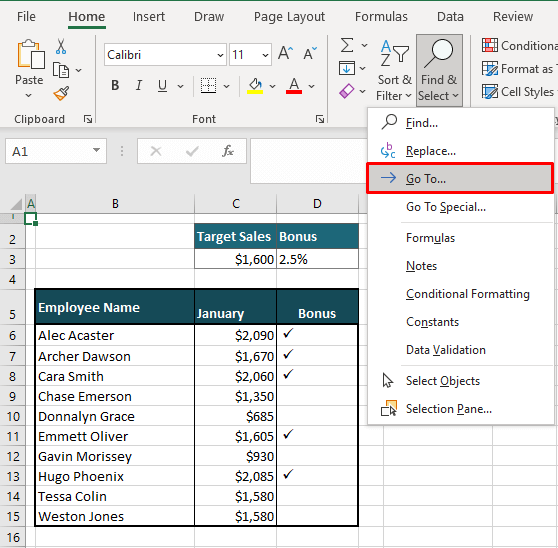
- From the Home tab, click on the Find & Select button in the Editing group and select Go To from the menu. Alternatively, use the F5 key or the keyboard shortcut Ctrl + G.
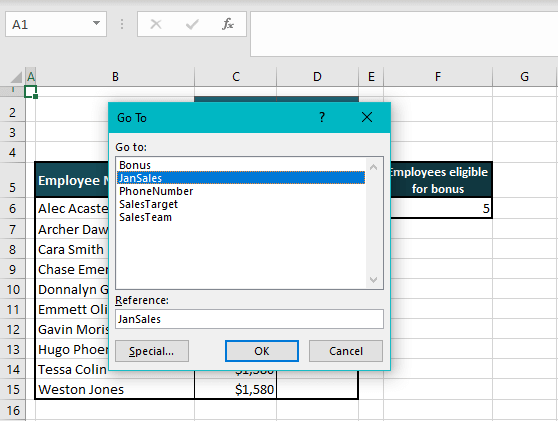
- The Go To dialog box will open, listing the Named Ranges in the workbook.
- Double-click on the name of the range that you want to select.
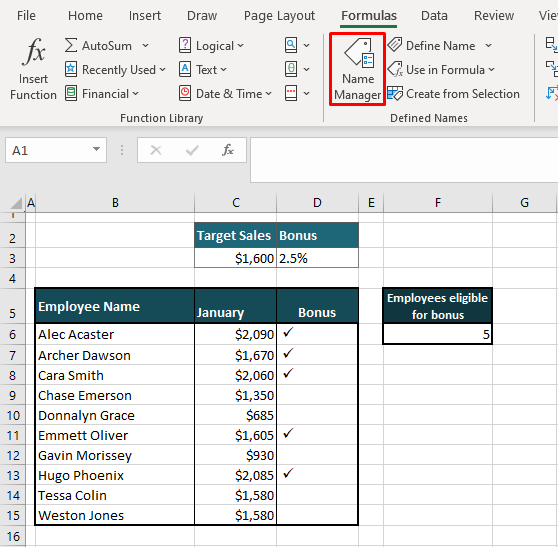
- Let's say we want to select the range named JanSales in our case example. We have named the range of the January sales figures in C6:C15 as JanSales.
- Once you double-click, the Go To dialog box will close, and the Named Range will be selected on the worksheet, jumping to wherever the range is in the workbook even if it is in a different sheet.
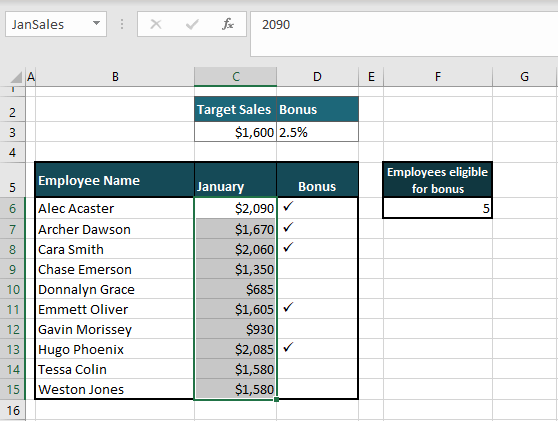
With the help of the Go To command, we have selected the Named Range JanSales i.e. C6:C15. The name of the range is also confirmed through the Name Box.
Note: With this feature, you can only select one Named Range at a time.
Method #2 – Using Name Box
Purpose: Selecting a Named Range.
Using the Name Box you can find and select a Named Range in Excel. The Name Box is another Excel feature that shows all the Named Ranges in the file. You can find the Name Box above the worksheet area, left of the Formula Bar. Other than displaying the address of the selected cell, the Name Box is also used for creating and locating Named Ranges.
To locate a Named Range quickly with the Name Box, use these steps:
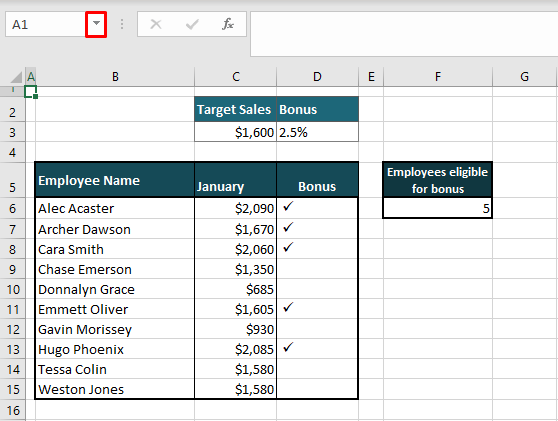
- Click on the downward arrow in the Name Box to display the names in the workbook.
- Select the Named Range from the drop-down menu.
- Using our case example, we are going with JanSales.
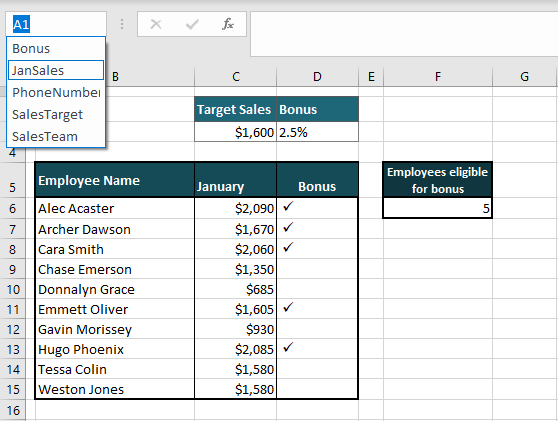
When the name is clicked on, the range it corresponds to will be selected:

Method #3 – Using Name Manager
Purpose: View the location of the Named Ranges.
The Name Manager can be used to find Named Ranges in Excel. The Name Manager is a tool for handling (creating, viewing, editing, deleting, and finding) names in the spreadsheet. As the main log that holds the names in a workbook, the location of the Named Ranges is readily available in Excel's Name Manager.
However, the Name Manager does not select a Named Range, it only displays its location. When you want to view the location of all the Named Ranges (or of any particular one) in the workbook, you can utilize the Name Manager. The steps are as follows:
- Launch the Name Manager from the Formulas tab by selecting the Name Manager icon in the Defined Named Or you can use the keyboard shortcut Ctrl + F3 to do the same.
- The Refers To column in the Name Manager displays the location of every Named Range in the spreadsheet.
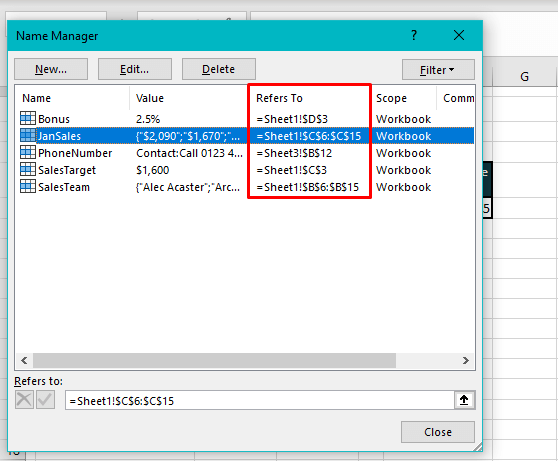
View the location(s) as you like. Close the Name Manager after use.
Method #4 – Using Paste Name Feature
Purpose: Create a list of the location of the Named Ranges or enter values of a Named Range.
The Paste Name feature in Excel assists in finding Named Ranges. If you want the list that you just saw in the previous section extracted to somewhere in the workbook, that is a work cut out for Paste Name.
In the below-mentioned steps, you will see how to create a list of all the workbook's Named Ranges along with their locations. There's a little bonus trick for entering a Named Range's value at the end of this section.
- Select the cell on a worksheet where you want the list to begin.
- The list will consist of 2 columns so make sure that the area you pick has the required free space for the list.
- Press the F3 key to open the Paste Name dialog box.
- Select the Paste List command in the dialog box.
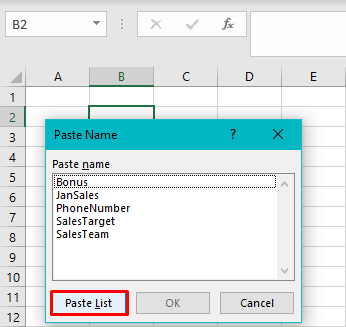
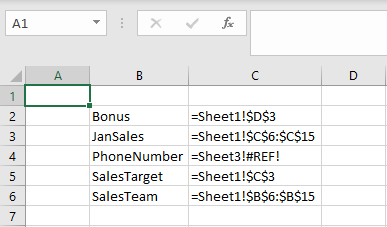
The dialog box will close and a 2-column list of all the workbook's names and their location will be created, starting from the selected cell.
Bonus Trick: Enter Values of Named Range
Here we have a little bonus trick using the Paste Name feature to enter the values of a Named Range. The scenario is that we know we have created a Named Range of the January sales figures but we don't remember where in the workbook we've done that.
There are two less preferable methods. One is checking each tab for copy-pasting the figures. Second is locating the Named Range first before copying it. The preferable trick is to stay on the same sheet and fetch the values with a couple of steps. Those couple of steps for entering values of a Named Range using the Paste Name feature are mentioned below:
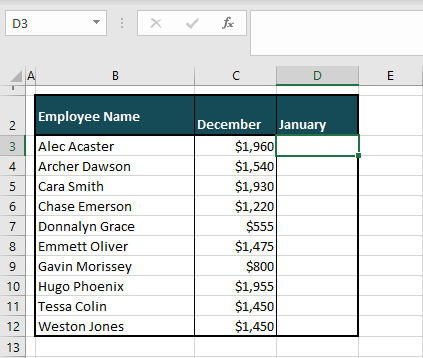
- On the worksheet, select the cell that you would want the Named Range to begin from.
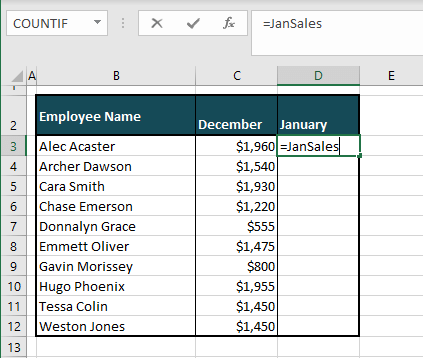
- We're selecting D3 as shown:
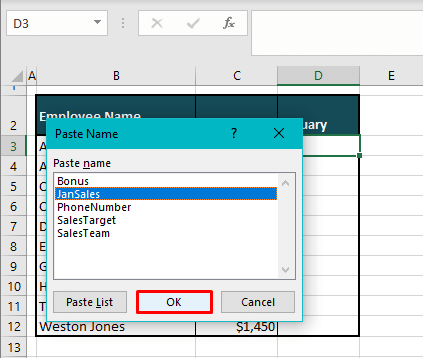
- Open the Paste Name dialog box by pressing the F3
- Select the Named Range that you want to enter on the worksheet.
- Hit the OK
- After the dialog box closes, the selected name will be first entered in D3:
- Press the Enter key to enter the values of the Named Range.
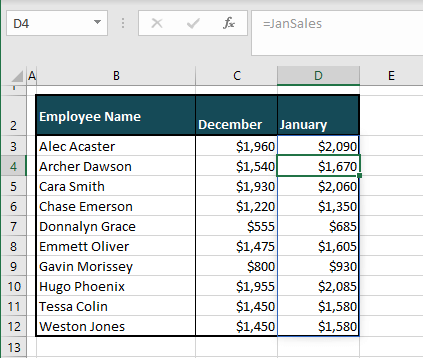
The values of the selected Named Range JanSales will be entered starting from D3:
Notes:
- Only the values of the Named Range will be pasted. The values will carry no format of the original Named Range.
- The Named Range can be pasted from any sheet in the workbook to the active worksheet.
- Only one Named Range can be pasted at a time.
Give the magnifying glass a break, today's search ends here. We've covered plenty of tricks to hunt Named Ranges in Excel down. Let's polish the magnifiers readying them and us for another Excel search. Ready? Tricky? Go!
 The values of the selected Named Range JanSales will be entered starting from D3:
 Notes:

