You won't be late to realize how important orderly things are; your professional and unprofessional life will do a very speedy job of teaching you that. A helping hand in that direction is today's guide on page numbering in Excel.
Page numbers can't be seen on worksheets (which is in Normal view) but they can be seen in Page Layout View, Print Preview, and then of course in print. You can add them at the bottom of the page (as a footer) or the top of the page (as a header). The font of the page numbers can be formatted for color, size, and style. All of that we have in this tutorial along with how to start page numbering from a number other than 1, changing the default order in which pages are numbered, and removing page numbers.
Let's get numbering!

Method #1 – Using Page Layout View
Find out below, how to add consecutive page numbering on a worksheet. This method utilizes the page numbering settings in Page Layout View. Here we have the steps on inserting page numbers from Page Layout View.
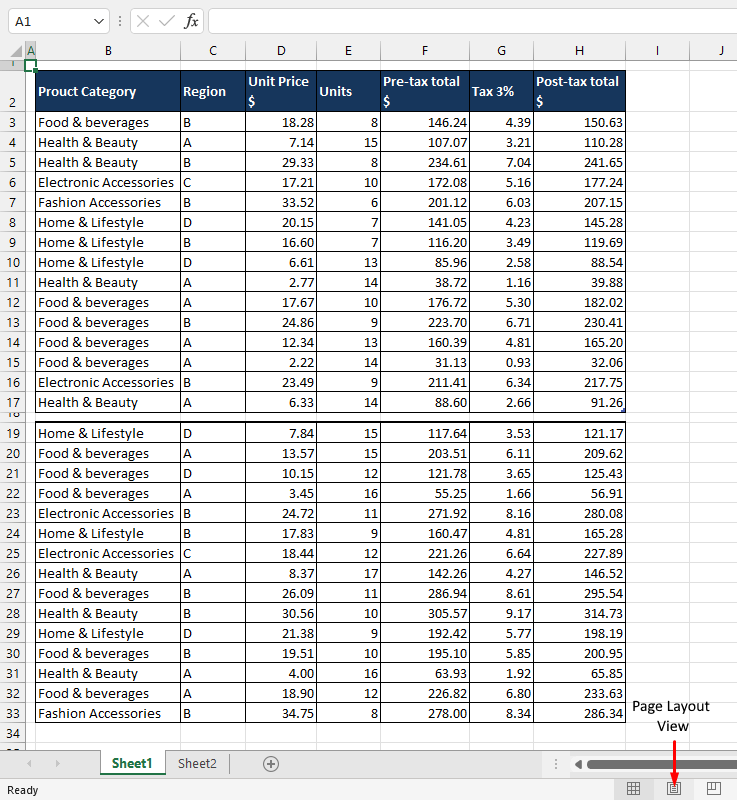
- Click on the Page Layout View icon in the status bar at the foot of the file.
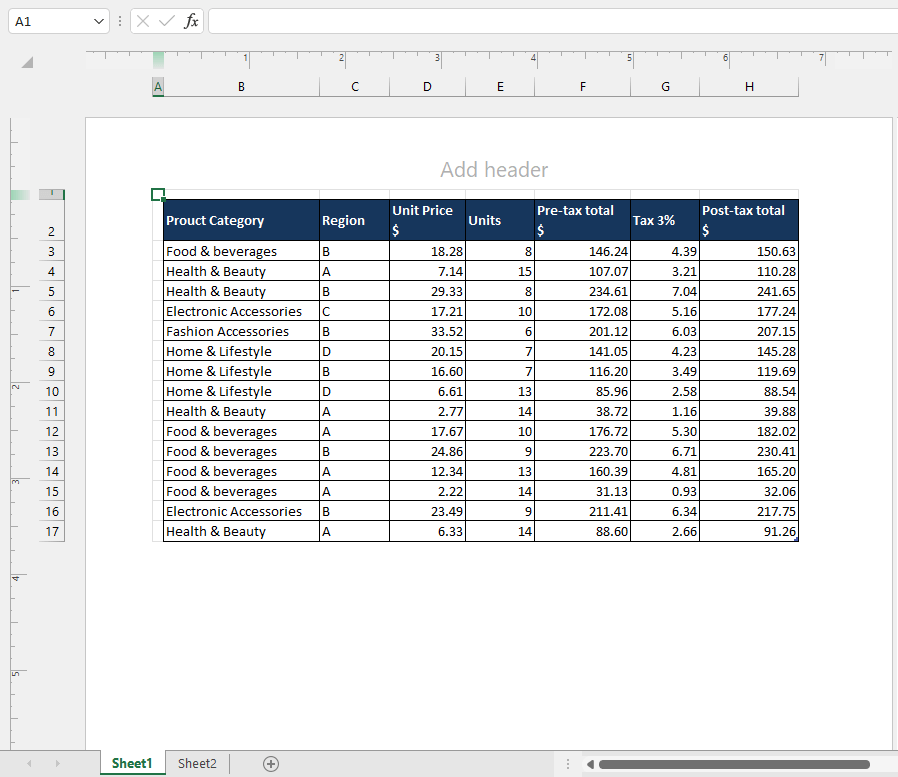
- This is how the Page Layout View looks:
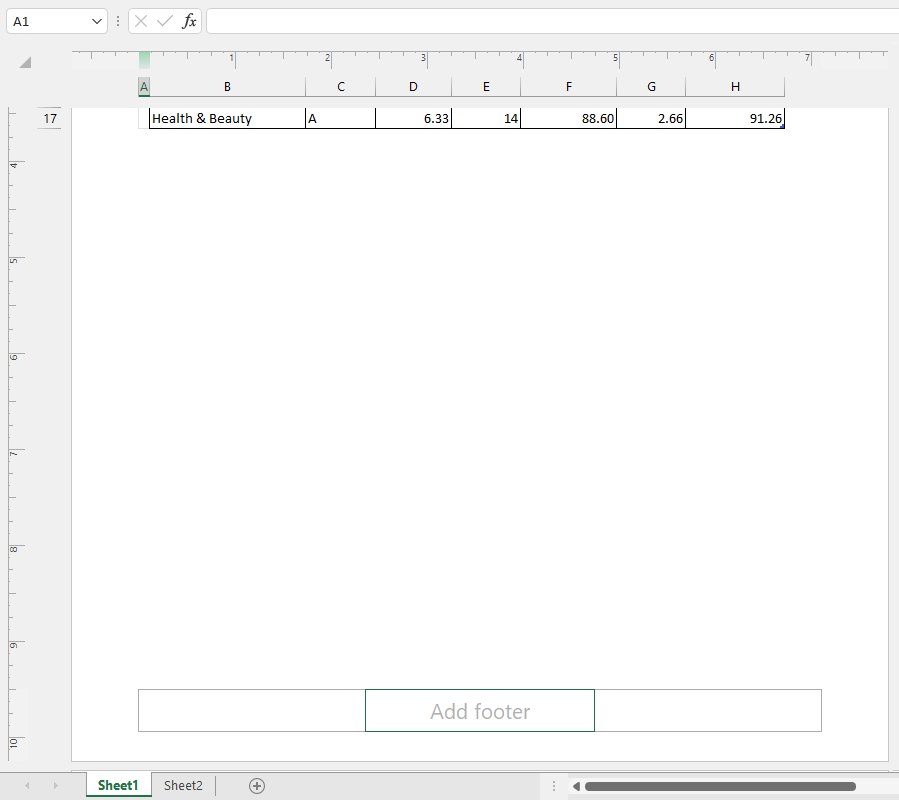
- Scroll to the bottom of the page where it says Add Footer. Hover the cursor on Add Footer to see three blocks appear. Click the block you want to add the page numbers to.
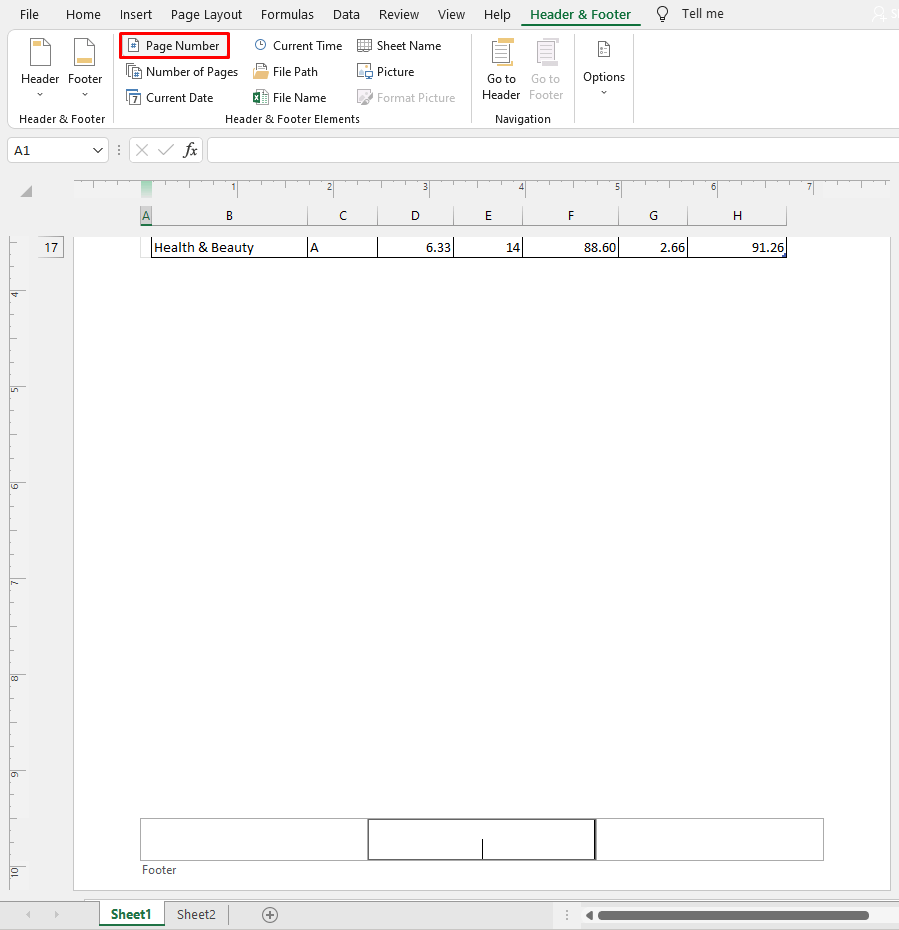
- Go to the Header & Footer tab that has now appeared along with the other tabs and select the Page Number command button.
- This will add a code to the bar that will serially number all the pages.
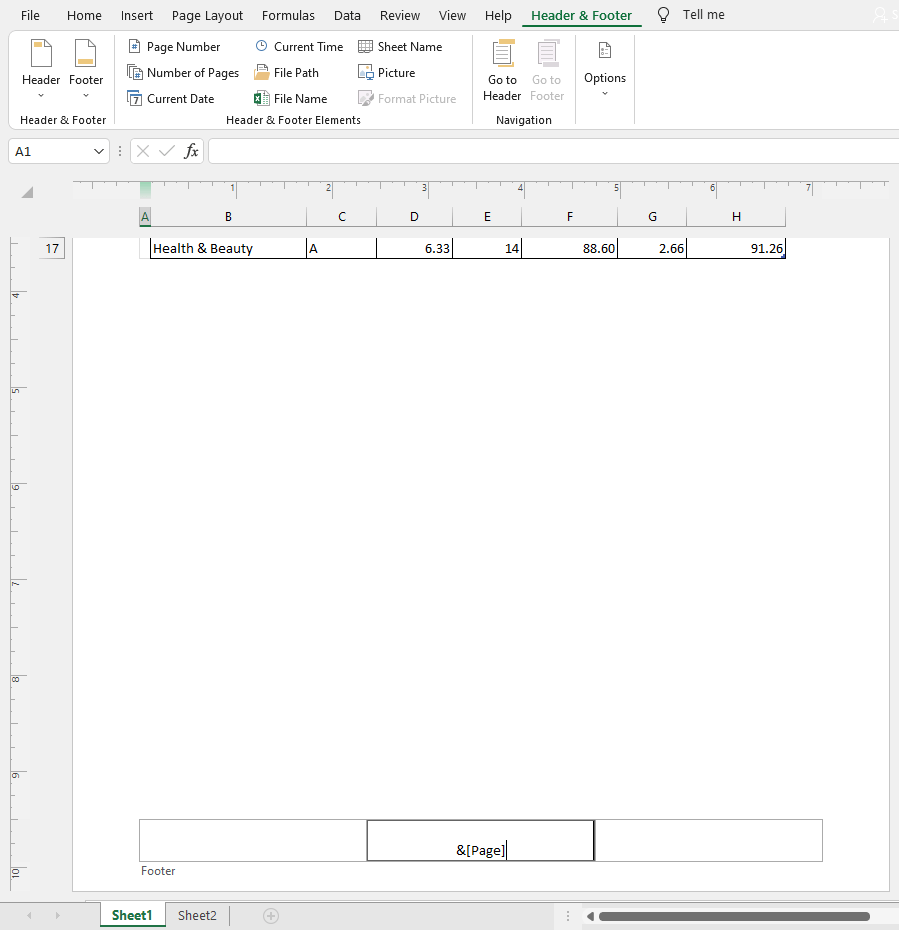
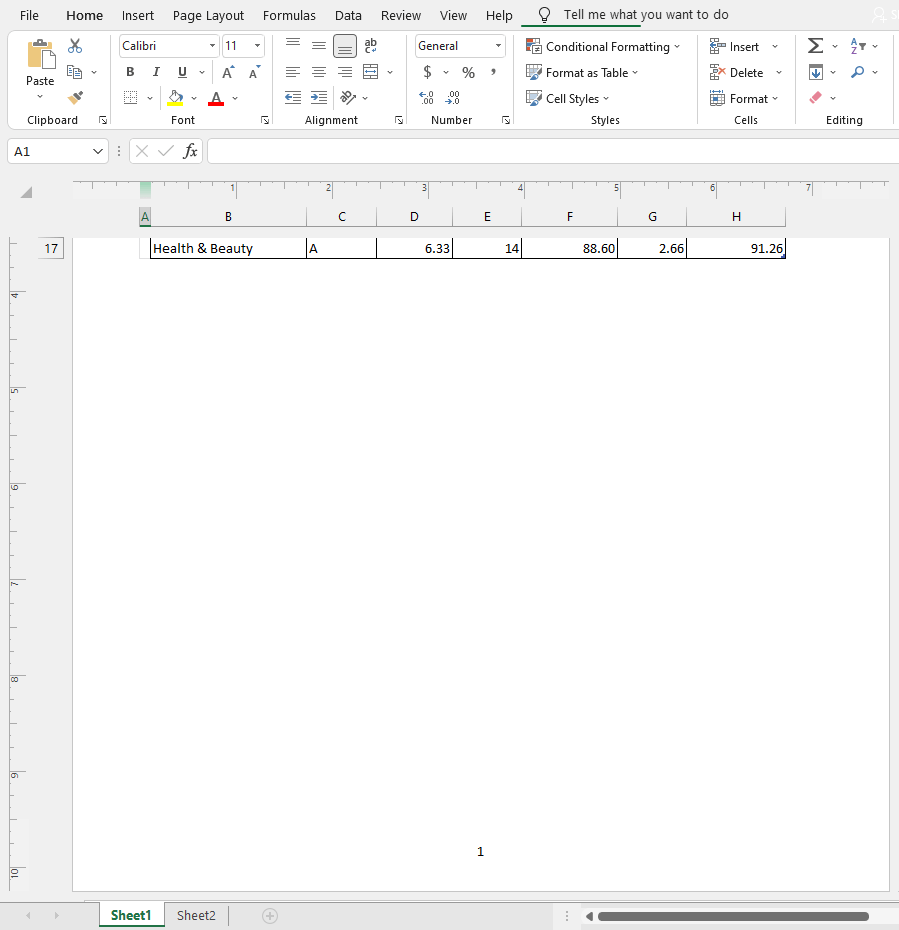
- Click anywhere on the worksheet to exit Footer mode and the page numbers will appear in the footers of the pages.
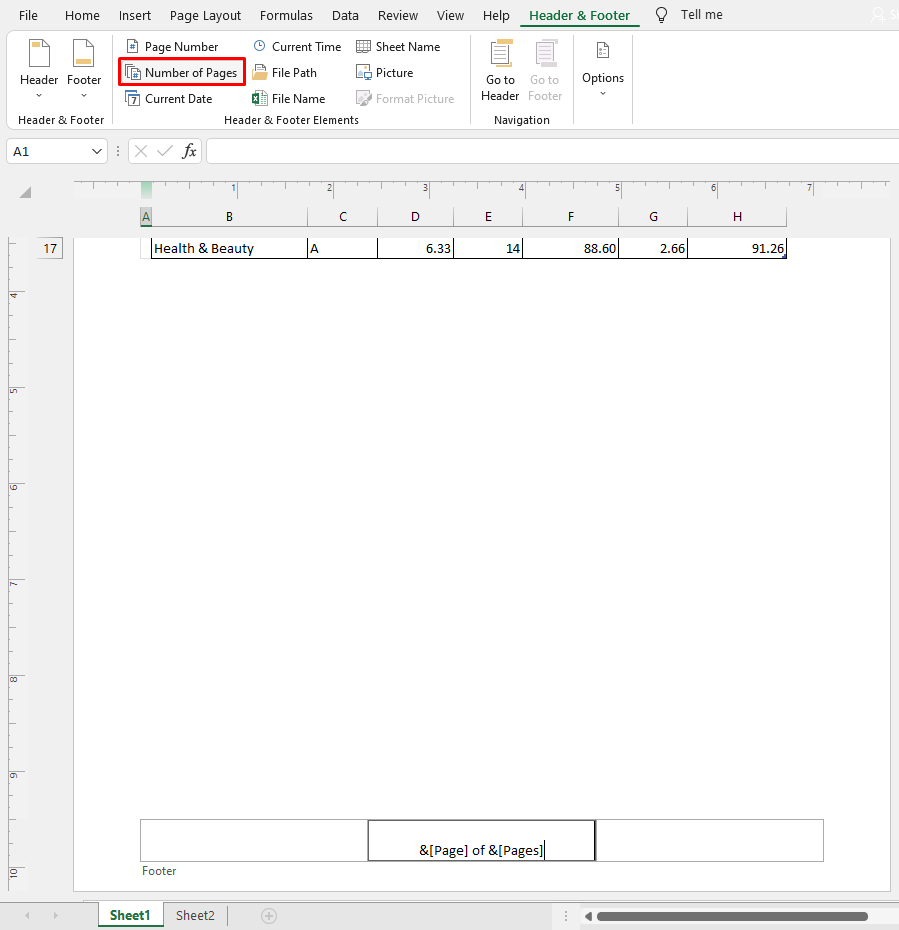
- To add page numbering in the "1 of 2" format, after the &[Page] code in the footer, add " of " (<space character> of <space character>). Then click on the Number of Pages command button. This adds another code to insert the total number of pages. The code becomes Current Page Number of Total Number of Pages (i.e. 1 of 2).
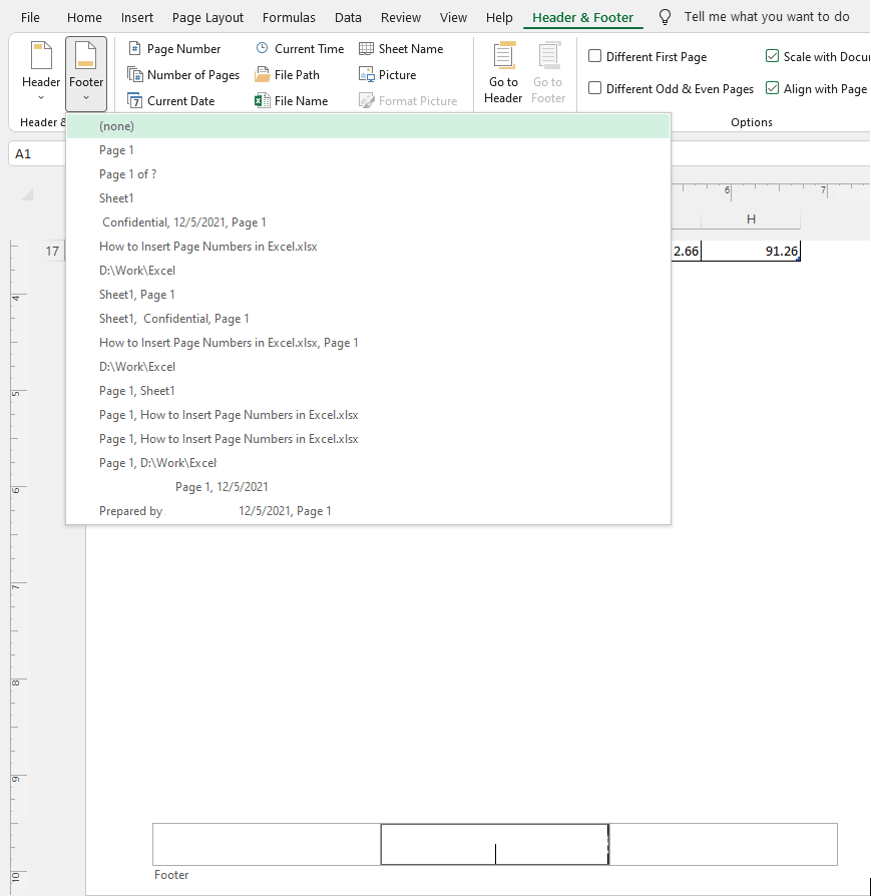
- You can also choose a format from the Footer button and edit the code it provides to your preference.
- Click anywhere on the sheet and there's the page numbering.
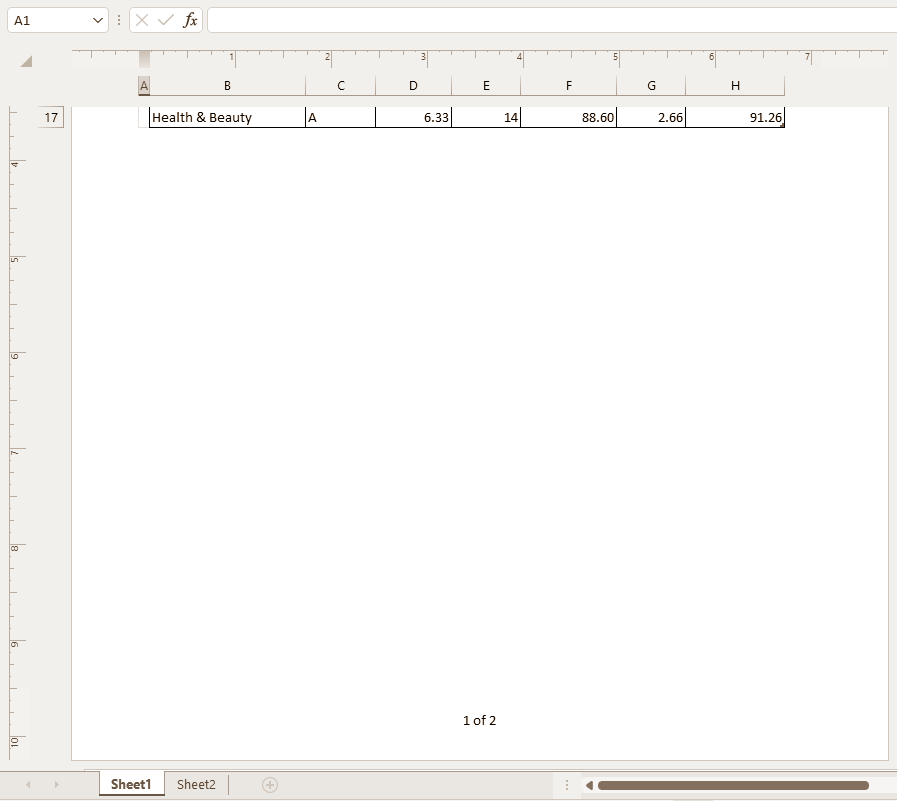
Now you can head back to Normal view by clicking on the Normal icon next to the Page Layout View icon in the status bar.
Notes:
Before going into Page Layout View for adding page numbers, go to Page Break Preview (the icon next to Page Layout View) for adjusting the pages so you can then number them easily.
For adding page numbers in "1/2″ format, instead of " of ", add a forward slash "/" between the two page numbering codes.
You can add page numbers in the headers instead of the footers in the same way.
Method #2 – Using Page Setup Dialog
This method of inserting page numbers also involves using headers and footers however, through the Page Setup dialog box. The Page Setup dialog contains a variety of preset formats for headers and footers (like we saw in the Page Layout View). Now let's see how to insert page numbers from the Page Setup dialog:
- In the Page Layout tab, click on the Page Setup dialog launcher to open the Page Setup dialog box.
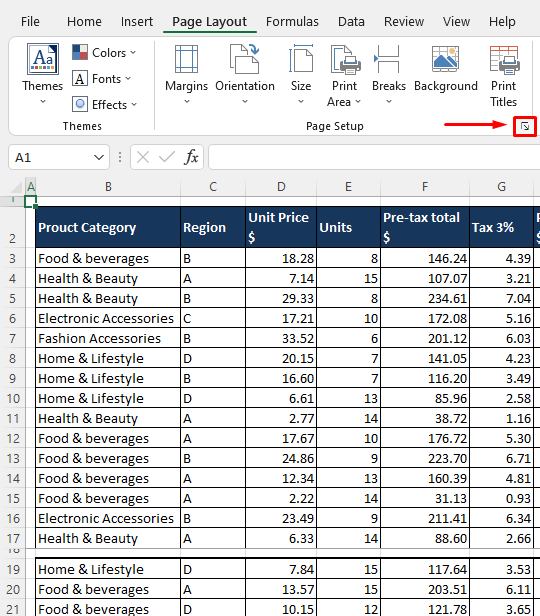
- In the dialog box, go to the Header/Footer. Click on the Footer dropdown to choose a page numbering style from the list.
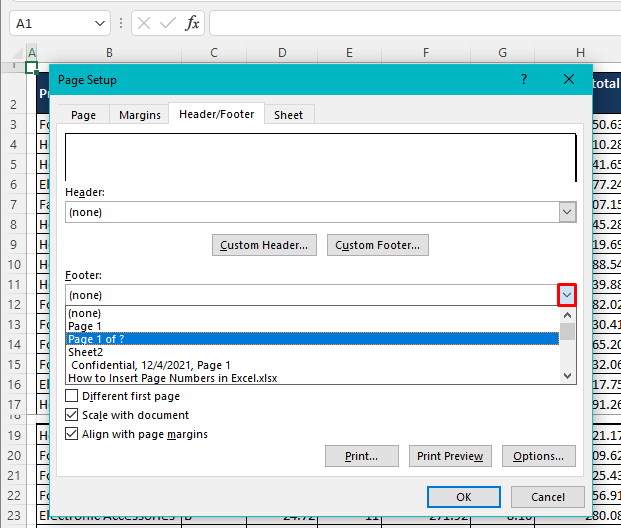
- Click OK and the page numbers will have been inserted. You cannot see these on the worksheet so here's what they look like in Print Preview:
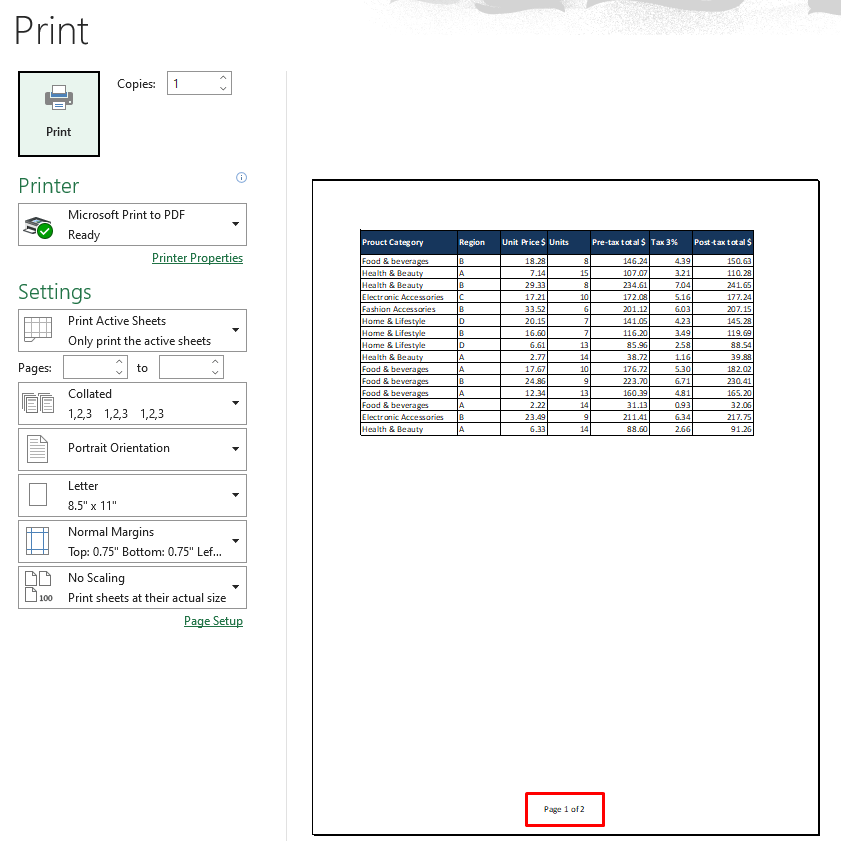
Tip: These are the steps to insert page numbers in the active worksheet. For adding page numbers to multiple worksheets, select the worksheets and follow the steps above.
Different Formats to Insert Page Numbers
Formats of the inserted page numbers can be modified by color, size, position, etc. from the Page Setup dialog. Page numbers can be custom created and those added as headers or footers can later be customized by this method too. For customizing the format of the page numbers as headers/footers, follow the steps below:
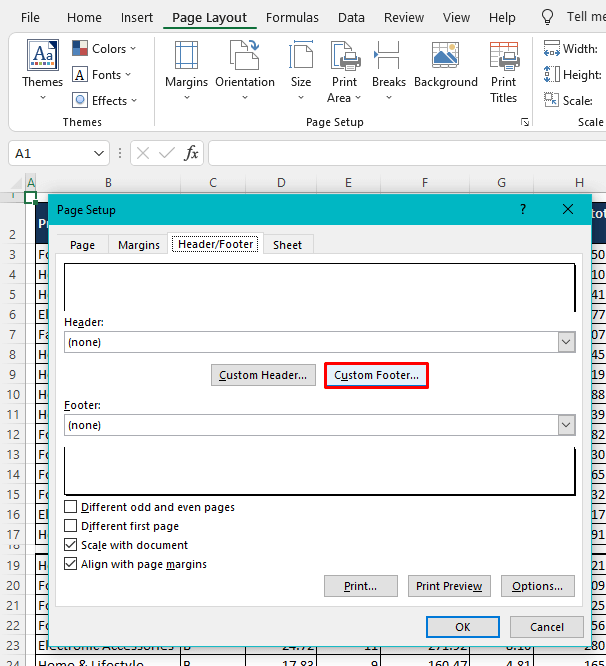
- Go to Page Layout tab > Page Setup dialog launcher to launch the Page Setup dialog box. Click on the Header/Footer tab and then select Custom Footer…
- This will open the Footer window where you have many options for customizing but as a start, you can select a format from the Footer drop list and then head to Custom Footer… to further modify it.
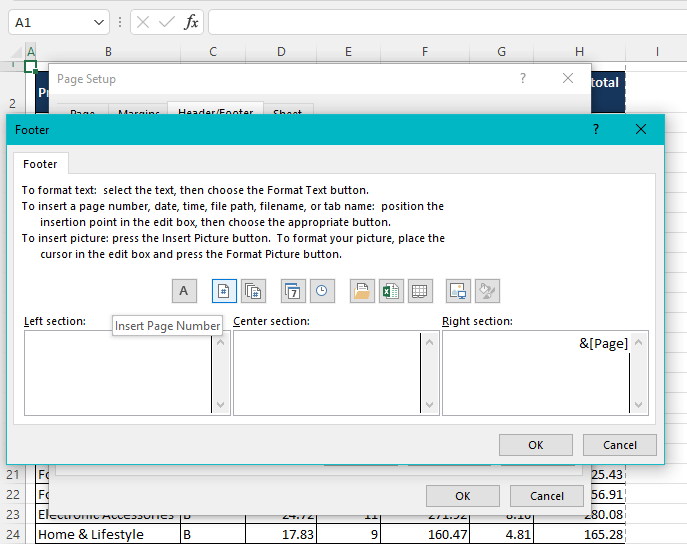
- Use the buttons to custom-create the page numbers.
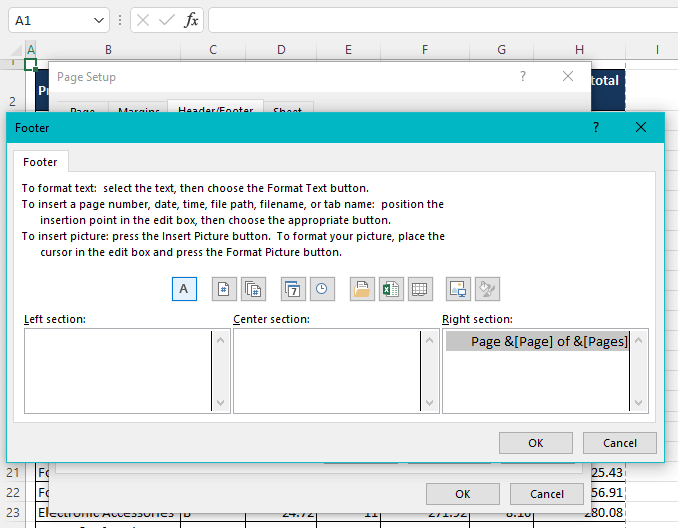
- Select the code and click on the Format Text
- This leads to a small Font window for formatting the text of the page numbers. E.g., we will italicize our page numbers.
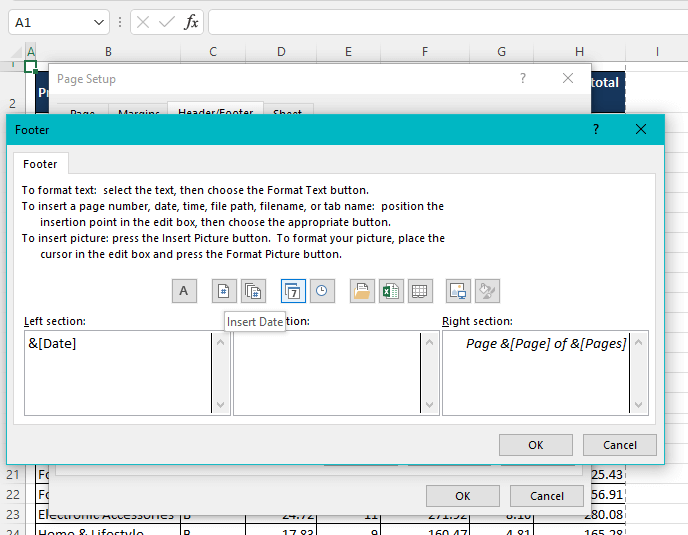
- You can use more than one block for adding other features to the footer.
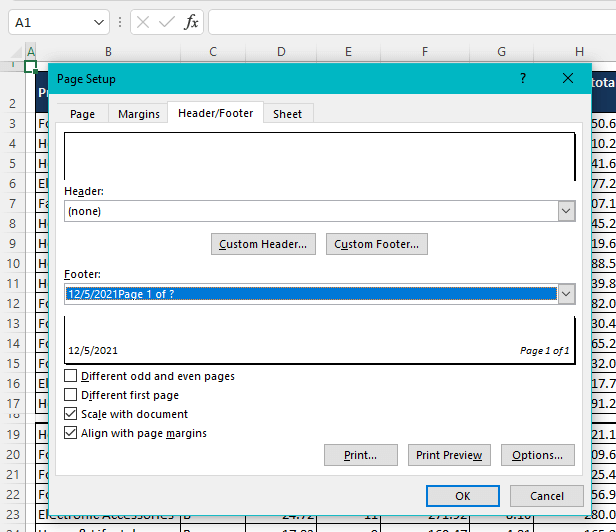
- When done, click OK. You can see a preview of the custom footer in the sample field of the dialog window.
Recommended Reading: How to Add Watermark in Excel
Start Page Numbering with the Desired Number
If your worksheet is a continuation of some previous data, you may need the page numbers to start differently instead of starting from the default "1". To set the page numbers to start with the desired number, we will adjust the first-page numbering from the Page Setup dialog like so:
- Click on the Page Setup dialog launcher in the Page Layout
- In the Page tab, the last option is First page number which is Auto by default.
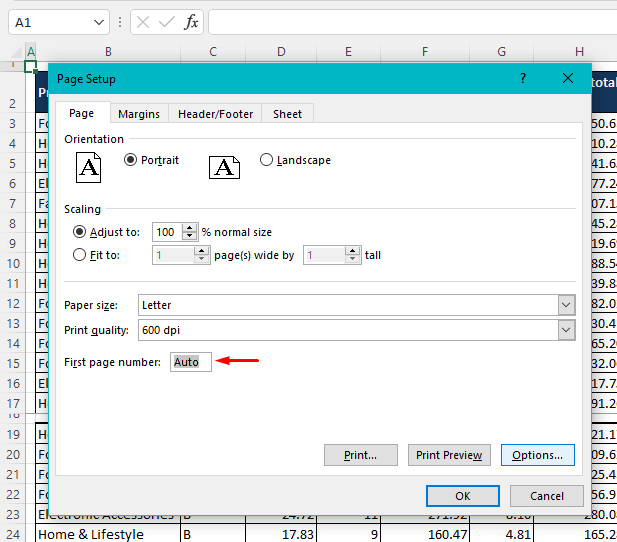
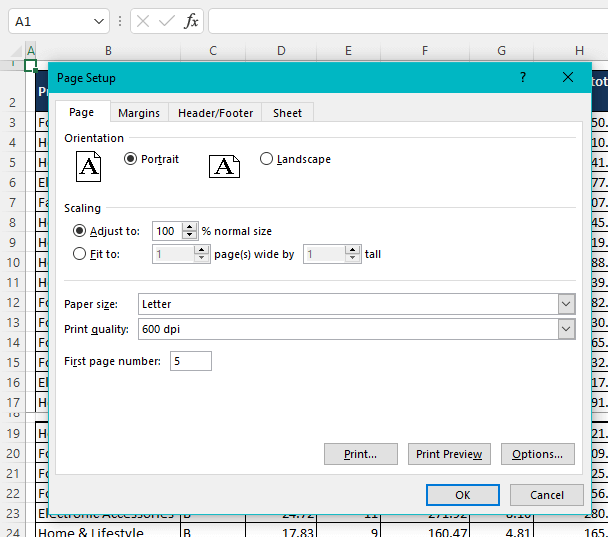
- Change First page number to the number you want the active sheet's pages to begin from.
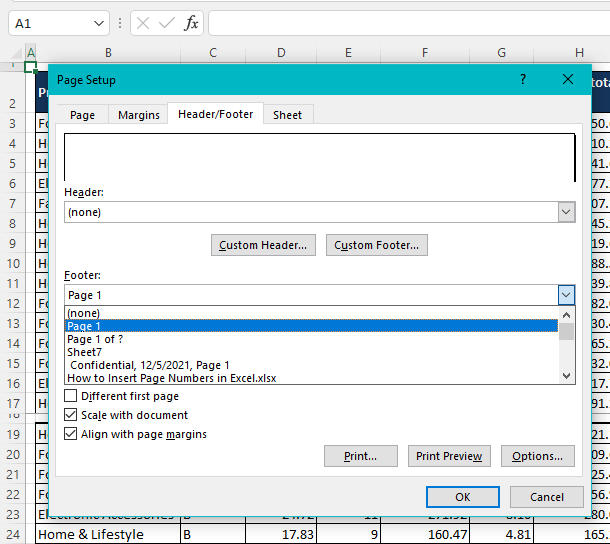
- Now to add the page numbers, go to the Header/Footer tab and select the format for page numbers.
- Click OK.
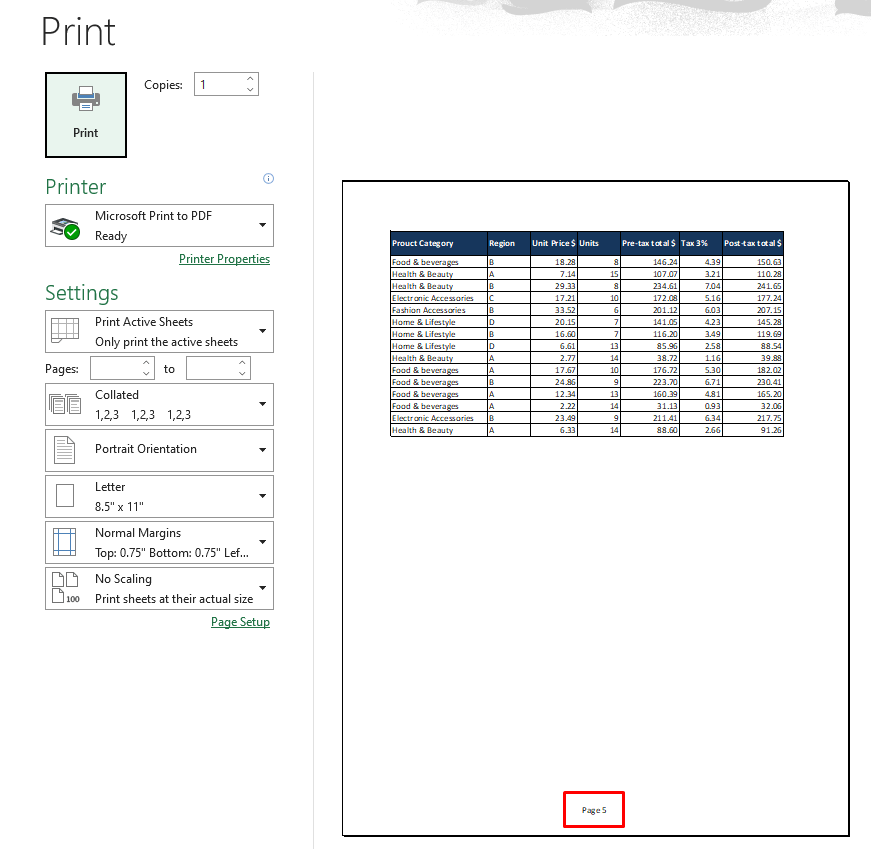
Checking in Print Preview, the numbering for our worksheet starts at the set number "5".
Change the Page Order while Numbering
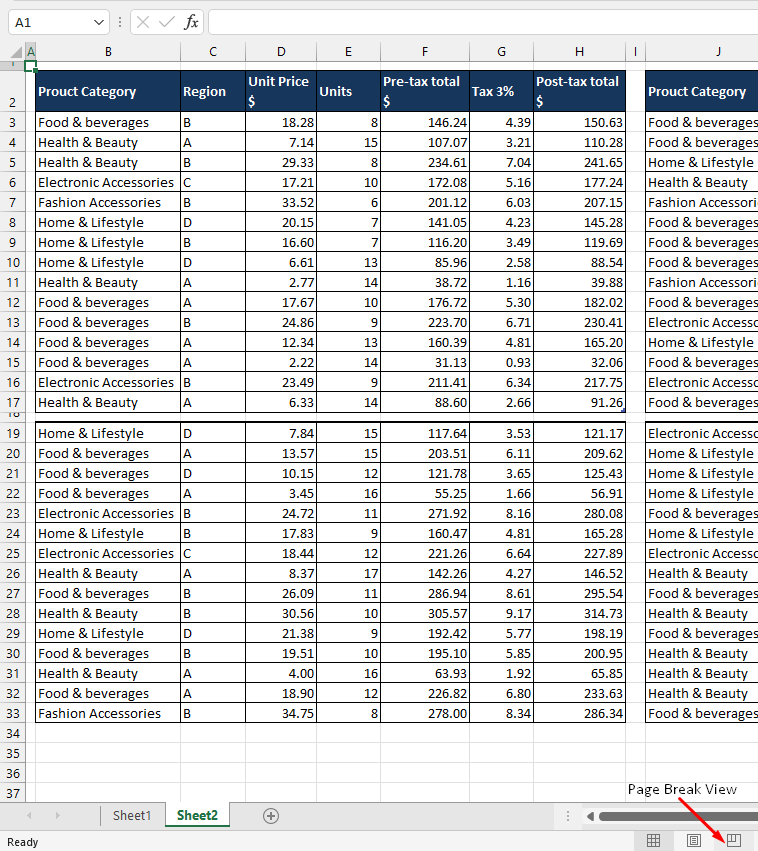
When numbering the pages of a large amount of data, the numbering, by default, goes downwards and then to the right. Let's show you how. Heading to the Page Break Preview for this data (by clicking on the third icon in the status bar):
You can see the order in which the pages are numbered; downward, then right, then repeated.
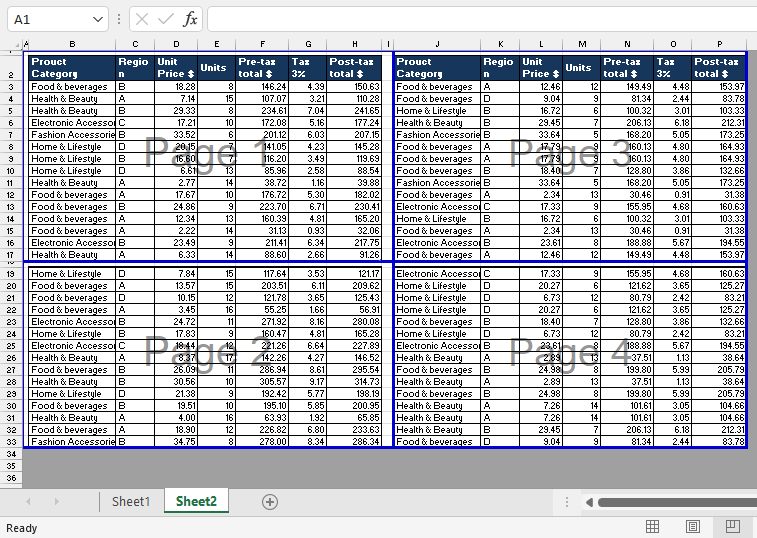
This order can be changed to rightward, then down, then repeated. Calling on today's hero again, the Page Setup dialog box, here are the steps to change the order of page numbering:
- In the Page Layout tab, select the dialog launcher of the Page Setup
- In the opened dialog window, go to the Sheet
- In the Page order section at the end of the Sheet tab, change the order to Over, then down.
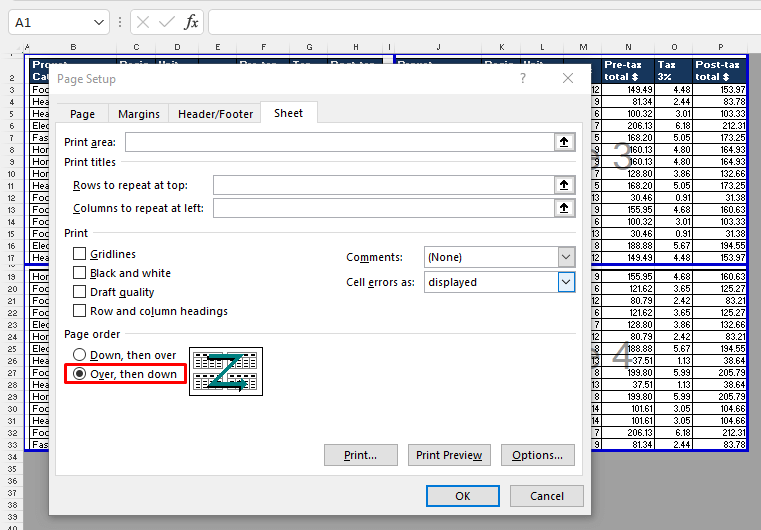
- Click OK.
In the Page Break Preview, you can see that the order has immediately changed to rightward then down.
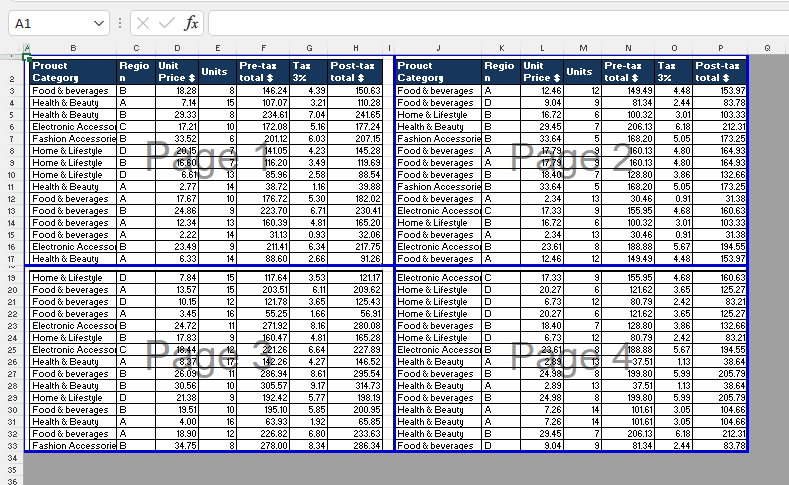
This was just the order for page numbering; you still need to add the page numbers. Use one of the two methods mentioned above for adding page numbers in the set order.
Remove Page Numbers
The page numbers are removed right where they are added from. Since we've shown you two ways of adding page numbers, let's show you how to remove them from both of those methods.
Remove Page Numbers from the Page Layout View
The steps to remove page numbers from the Page Layout View are:
- Go to the Page Layout View by clicking on the second icon at the end of the status bar.
- Scroll to the footer where the page numbers have been added (if the page numbers are in the headers, you will see them immediately at the top.
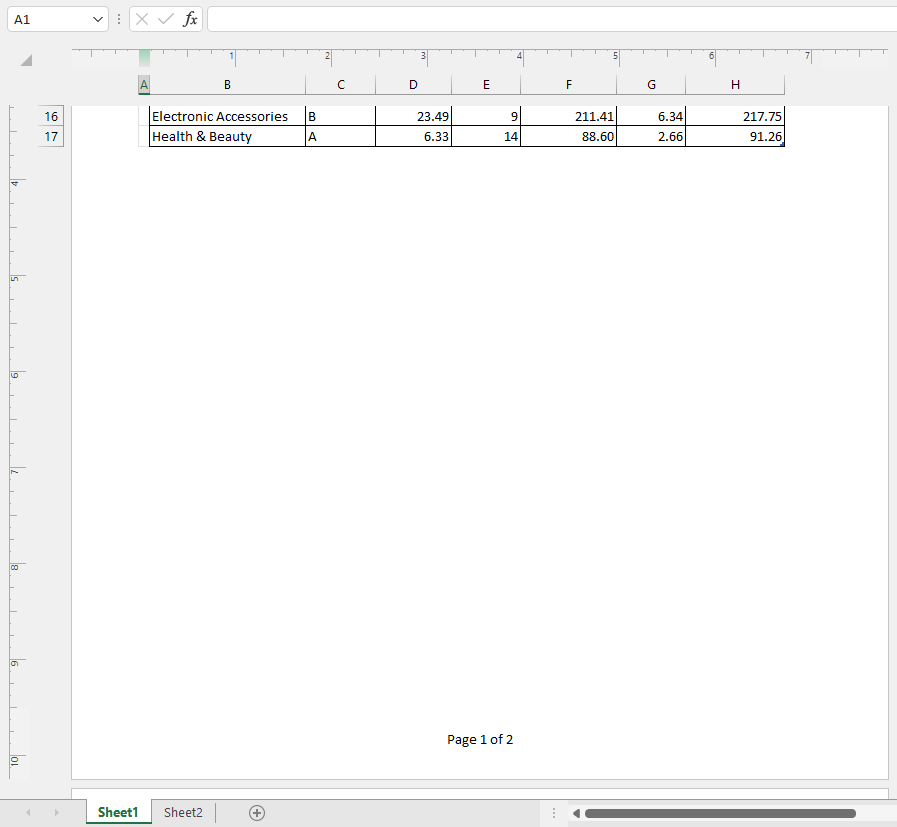
- Click on the page number, it will reveal the entered code.
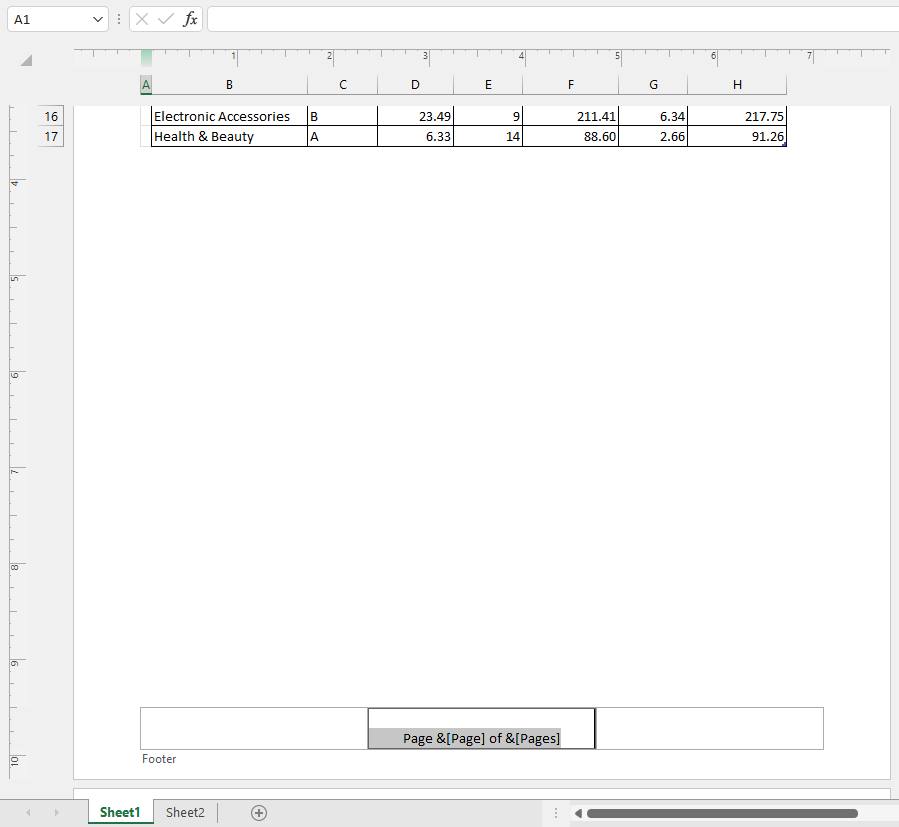
- The code will already be selected so delete the code, click anywhere on the sheet and the page numbering goes:
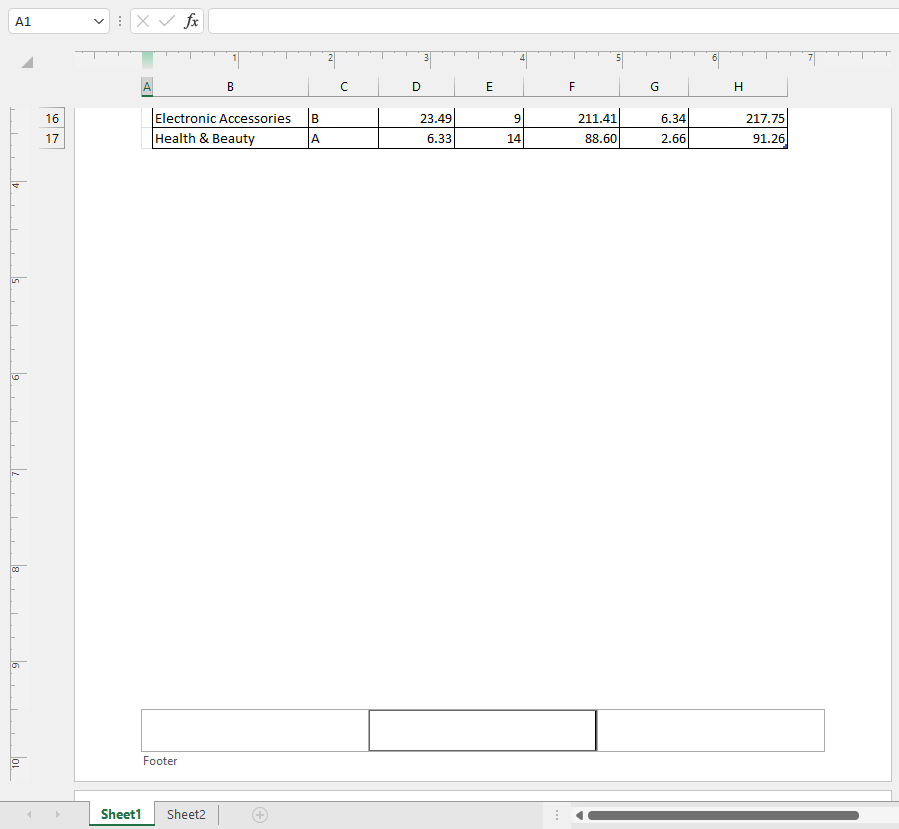
Remove Page Numbers from the Page Setup Dialog
Using the Page Setup dialog, the steps for removing page numbers from a worksheet are:
- From the Page Setup tab, in the Page Setup group, select the dialog launcher.
- In the Page Setup dialog box, select the Header/Footer
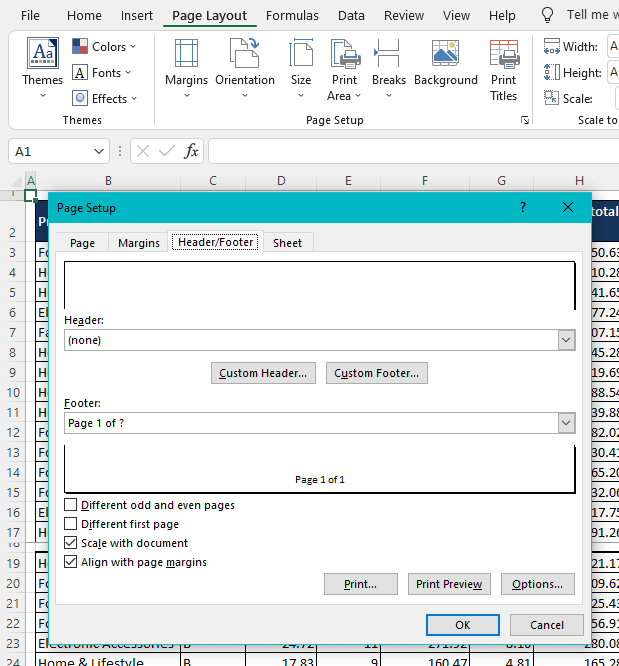
- Open the Footer drop list, and select the (none) option at the top.
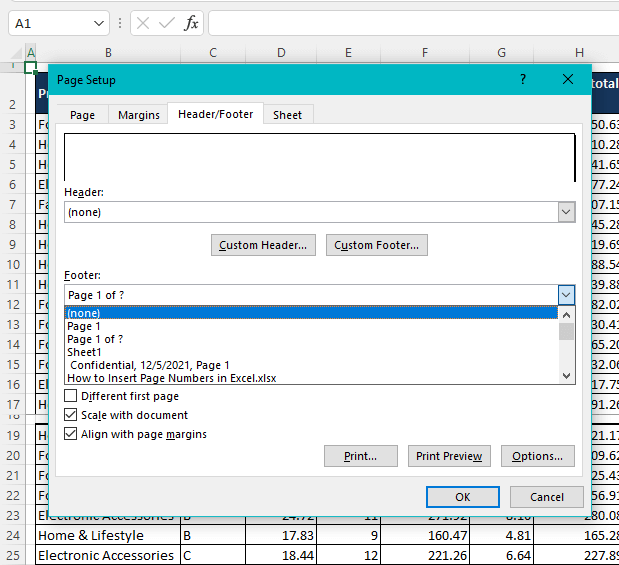
- Click OK. You will see in the Footer sample field that the page numbers have been removed.
You don't have to remove the page numbers exactly from the method you added them; they can be added one way and removed from the other.
And we have powered and numbered our way down to the end. That was a guide for you on page numbering in Excel. While you wrap your head around that and number down your Excel problems with our help, we'll set up another problem shooter – all matters strictly Excel.


