As documents are passed around, upward or downward, perhaps one needs to think about restricting what the other users can do. Maybe it’s okay to make a few changes to see how things add up but imagine the chain effect of accidentally saving an experimental change to a very important document. Or even accidentally hitting a key somewhere. Such changes have reported thousands of losses to companies.
Scary talk aside and solution-storming in, if you’re aiming for a complete restriction where cell values can’t be changed at all, you’re looking for sheet protection. But if it’s okay to make changes to the file as long as they’ll be restricted from being saved, you’re heading right for Read-Only.

We have prepared this tutorial on how to open Excel in Read-Only mode. You will find few easy methods to do that including VBA. We’ve also covered two options for those who need to have the users of the file reminded that they need to access the file as Read-Only.
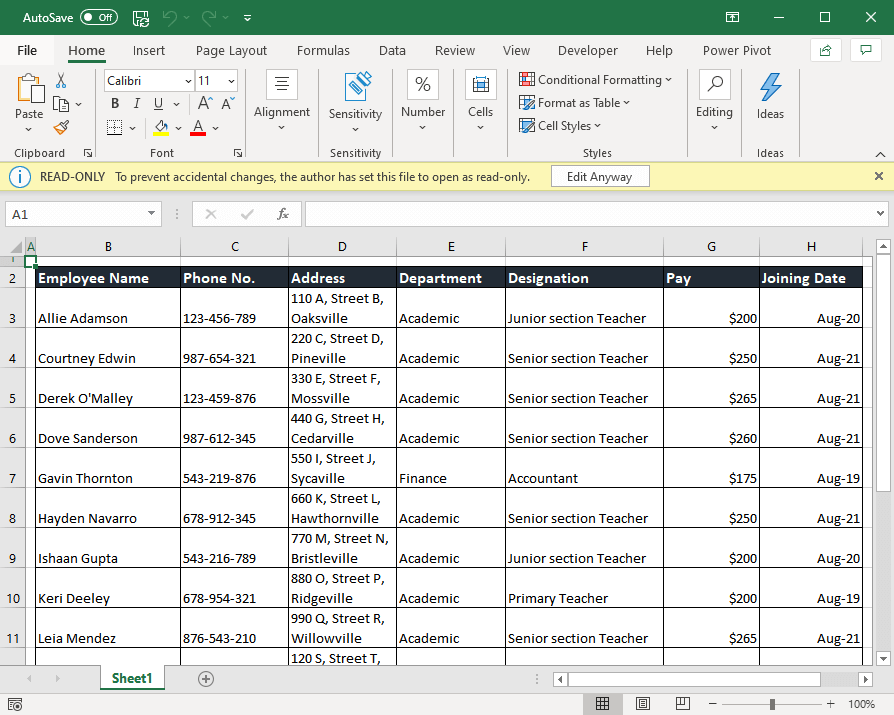
But basically, what happens in Read-Only Mode? Firstly, the file name at the top of the workbook gets a Read-Only tag:
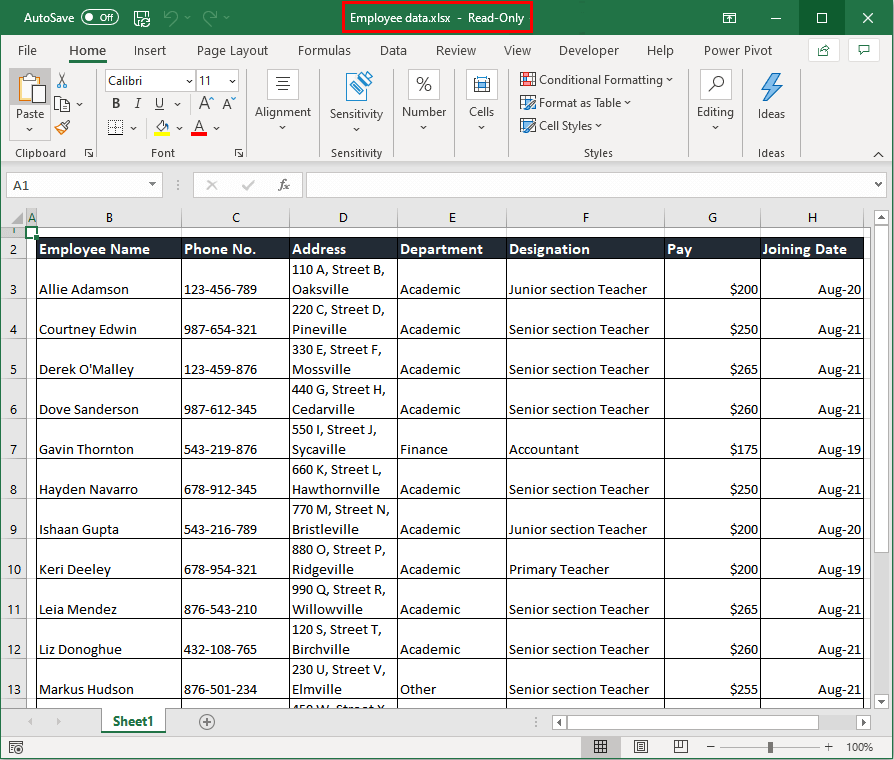
When you make any changes to the file, they will apply but when you try to save the file, you’ll have to save it as a copy because the original file can’t be overwritten in Read-Only mode.
Now we can jump on the “how” part of opening a file as Read-Only. Let’s begin.
Method #1 – Using File Open Dialog
Instead of regularly opening a file, it can be opened as Read-Only, and below are the steps:
- Open Excel and navigate to the File tab, on the ribbon.
- Click on the Open button from the left panel and select Browse from the options to access the Open
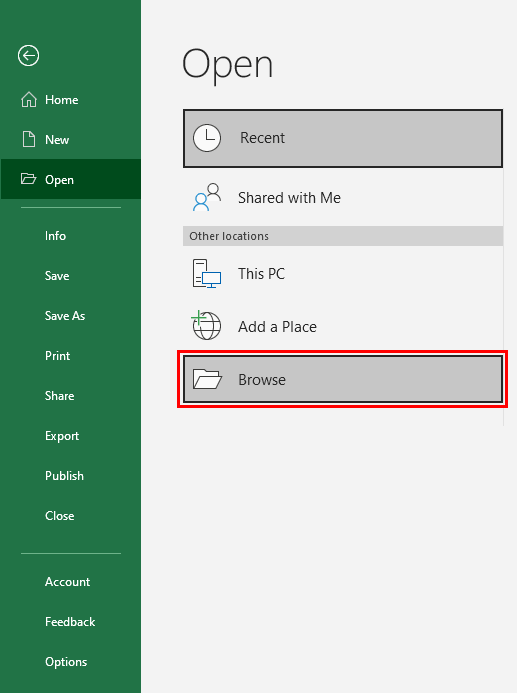
- Browse and select the file you want to open as Read-Only.
- Click on the arrow of the Open command button at the bottom-right of the dialog box and select Open Read-Only from the list.
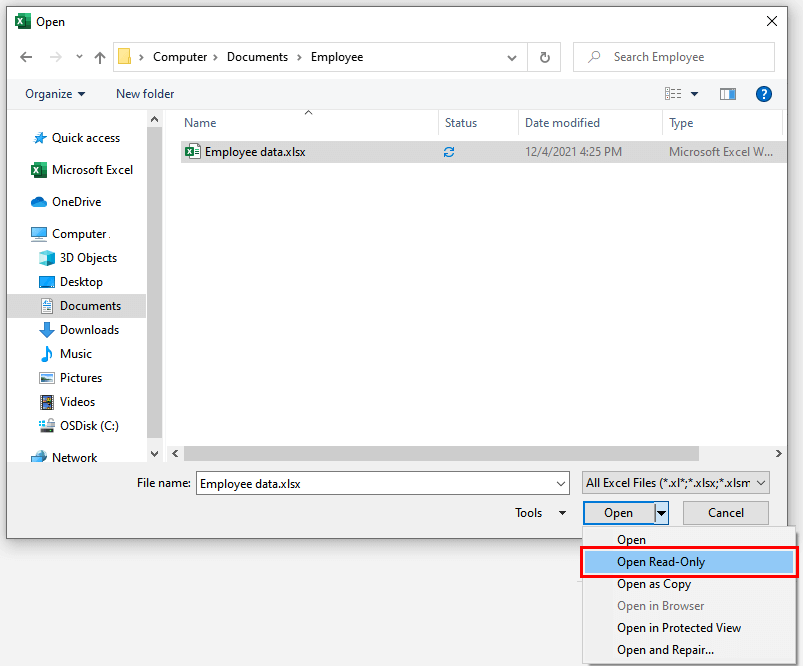
Selecting this option will open the file as Read-Only.

Method #2 – Using VBA
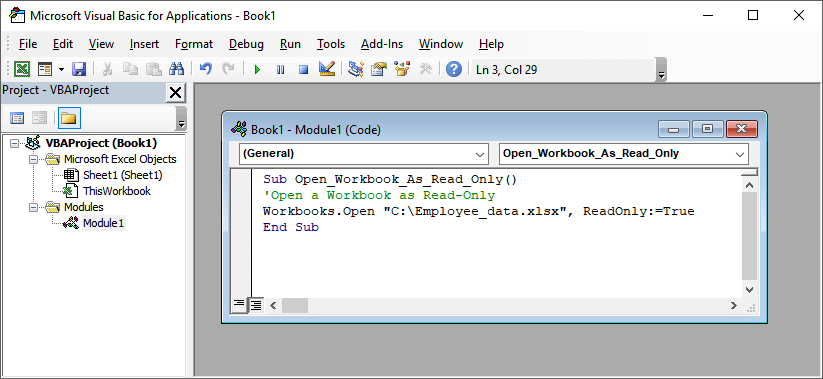
Any workbook can be opened as Read-Only using VBA. You need to run the file path in the provided code and feed it in VBA via a module and the chosen file will open as Read-Only. We have the steps for this below:
- Open a new Excel file.
- Open the VB editor from the Developer tab or press Alt + F11.
- In the editor, click on Insert and select Module to open the Module
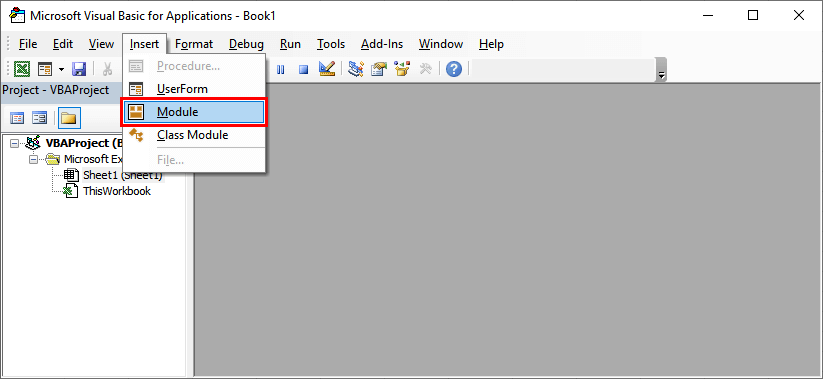
- Copy-paste the following code in the Module window but change the file path to the file path including the filename of the workbook you want to open as Read-Only.
Sub Open_Workbook_As_Read_Only()
'Open a Workbook as Read-Only
Workbooks.Open "C:\Employee data.xlsx", ReadOnly:=True
End Sub
- Press the F5 key to run the command.
The chosen file will open as Read-Only. You can close the previous file.

Method #3 – Forcing the File to Always Open with a Read-Only Prompt
Someone may forget to open a file as Read-Only, oops. Instead of opening the file every time as Read-Only, the file can be made to pop up a prompt, suggesting the user to open the file in Read-Only mode whenever the file is accessed. There are a couple of ways of setting the file with a Read-Only prompt that we have detailed as follows.
Forcing the File to Open with a Read-Only Prompt Using Save As Options
This method utilizes the tools in the Save As dialog, setting it with a Read-Only recommend. These are the steps:
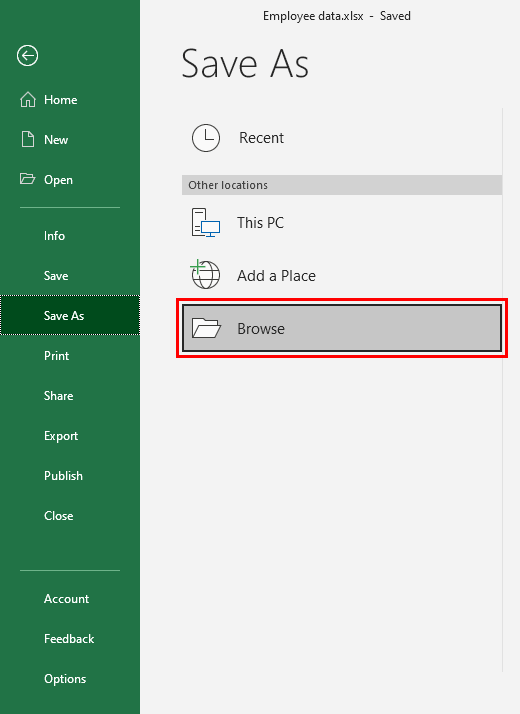
- With the file open, go to the File tab and select Save As from the left pane. Select the location for saving the file. The Save As dialog box will open.
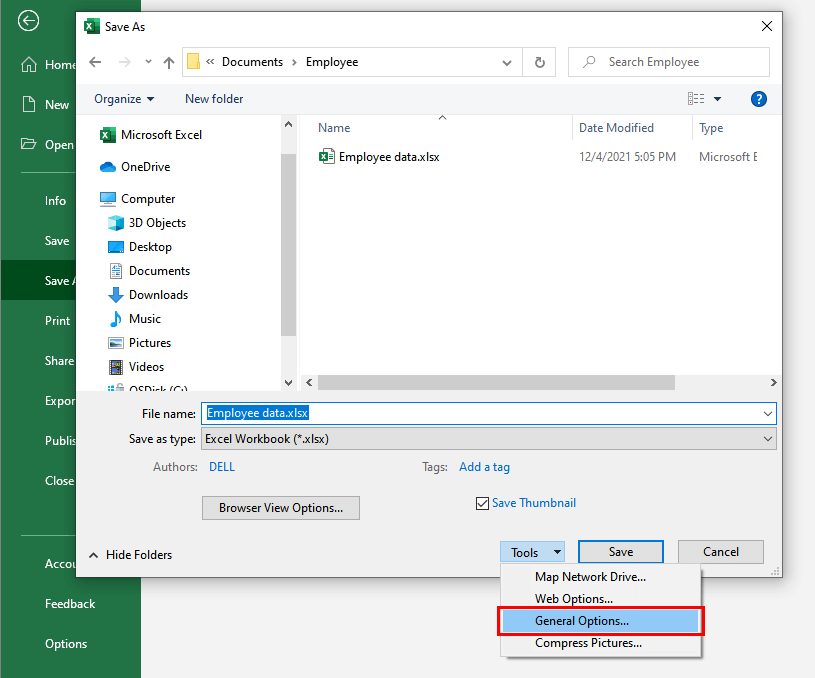
- Click on the Tools button at the bottom of the dialog box and select General Options.
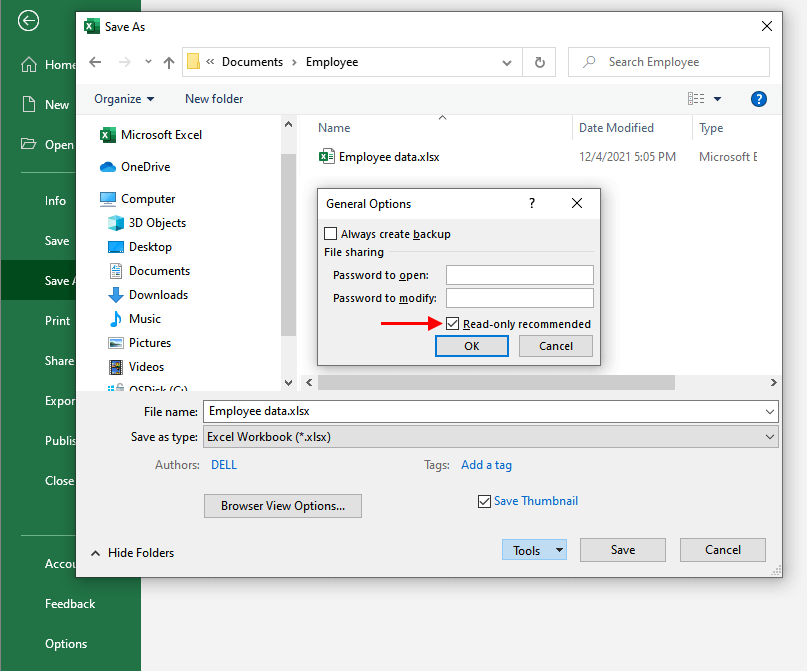
- In the General Options dialog box, check the Read-only recommended checkbox, then click OK.
- Click the Save command button in the Save As dialog box.
- Close the file. When opening the file, the Read-Only recommend will pop up:
The user can still choose to access the editable file by selecting No here but the prompt does its work to serve as a reminder.
Forcing the File to Open with a Read-Only Prompt from Protect Workbook Options
Another way to fit the file with a Read-Only prompt is to use the Protect Workbook options from the Info settings. Here’s how to go about it:
- Click on the File tab of the opened workbook.
- In the File menu, select Info from the left panel and then click on the Protect Workbook button to access the options.
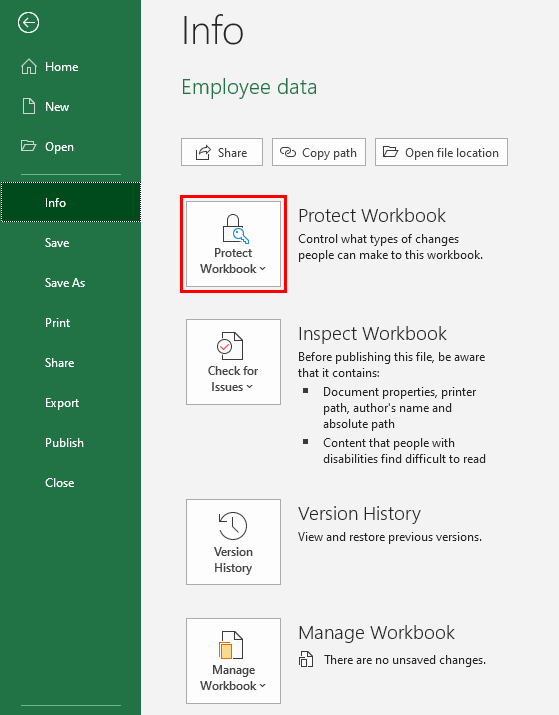
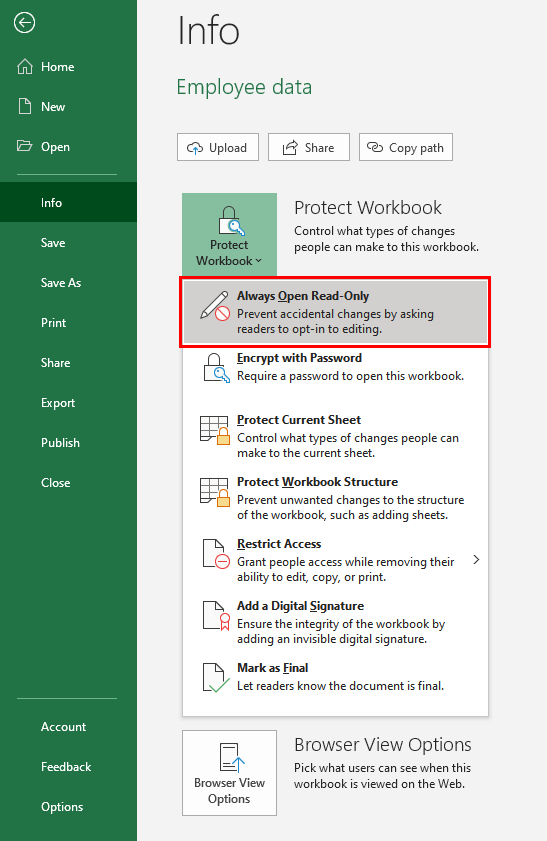
- Select Always Open Read-Only from the options.
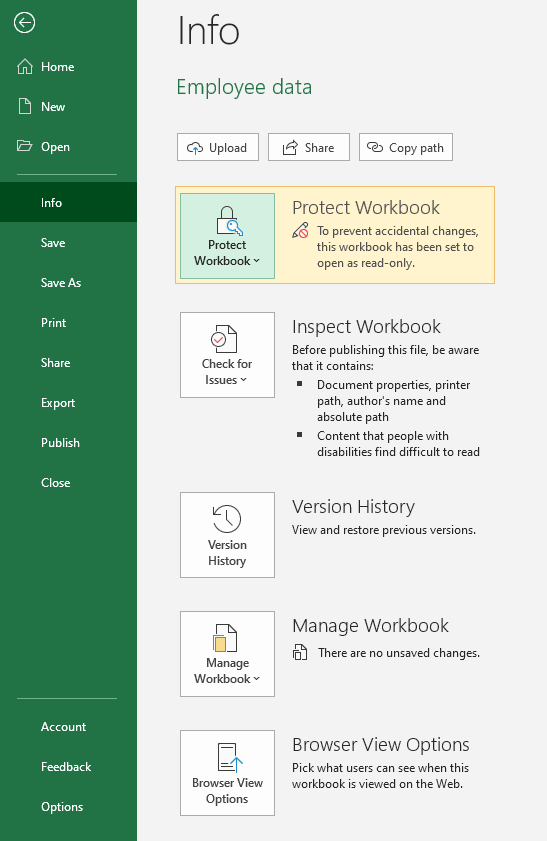
- After selecting the option, the workbook will have been protected with the Read-Only prompt.
- Close the file and save the changes.
And that’s done. Now the file will show the prompt whenever accessed.

Now if you’re done with only reading, have a go at applying one of the methods to open a file as Read-Only. Next time you consider saving your file from meddling, see if you want to have it run as Read-Only or have the workbook protected; Excel hardly comes with a single possibility for things. See you shortly with more possibilities from Ever-Ever-Excel-land!


