Excel is a numerical life savior, a tabular knight, and many things more but it comes with its whims which might suit us like a charm at times or could leave us with a broken computer an unsolved notion later. One such whim is when Excel takes it upon itself to enforce a number into a date. Why it does that, you are soon to find out.
We will begin right from the beginning. What happens when you enter certain numbers in Excel? Let's walk this through with an example. We are creating a baking cheat sheet and we'll chart spoon and cup measurement conversions. Sticking to the common sizes we got the measurement and fraction below and look how that turned out:
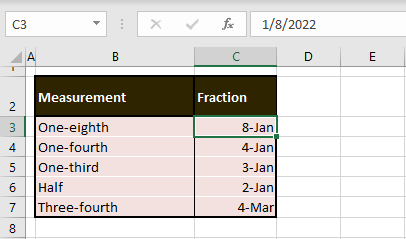
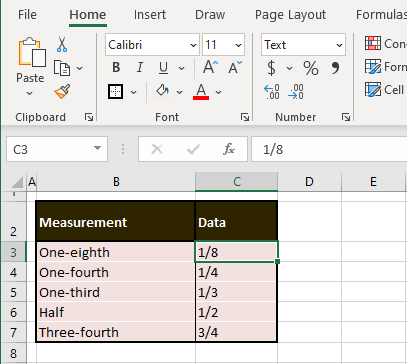
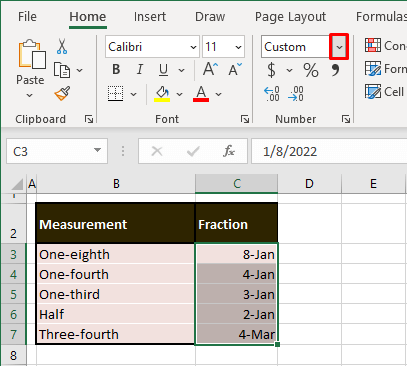
No, we did not get some sporadic days of the year on our measurement chart, this is the result of entering 1/8, 1/4, 1/3, 1/2, and 3/4. Excel has accepted the entries and returned them in date format – the format depends on your computer's local settings.
Note: A hyphen or forward slash as a delimiter in numbers gives Excel the impression that the user is trying to enter a date. This is true for numbers where the supposed month element will be below 13 since there are only 12 months. E.g. 12/4 will become 4-Dec while 13/4 will remain a fraction because there is no 13th month. If you're trying to enter a range of quantities e.g. 5-10, this will also change into 10-May while 13-15 will remain so.
Tip: If it is possible for the data you are aiming to enter, you can try using a delimiter (space, period, comma, etc.) other than the hyphen or forward slash. This will automatically stop Excel from treating the number as a date. If that can't be done, welcome to the rest of this tutorial!
This change of numbers could have been somewhat salvageable but Excel also adds the year to the date value and that just blows everything out of proportion.
Our mission today is to stop this change from numbers to dates. The lineup includes using Number formats, a leading apostrophe, and VBA, each method resulting in a different format so you can pick whatever is your requirement at the moment.
Let's get pulling out the stop signs!
Method #1 – Using Number Formats
The reason Excel automatically changes a number to a date is that the entered number is accepted into another Number format (the Date format in this case). If we fix the type of format in advance, we can avoid the bother of the number changing into a date.
The Date format in Excel depends upon your computer's regional format settings but mostly the triggers for dates in Excel are forward slashes and hyphens. We're guessing that if you're using a forward slash in your number, you may be working with fractions (much like our case example) and so we've dished out a couple of tricks with fractions in focus too.
Using Text/Fraction Format
We'll start with setting the format of the target cell(s) to Text or Fraction. Why are we talking about two formats here when prefixing the Text format should do the trick for all types of numbers? As the name suggests, the Text format will change the number to text, making it unusable in calculations and number formulas. While that may be the only way for some kinds of numbers (e.g., for writing a range like 5-10), if you're dealing with fractions, you can use the Fraction format instead of Text.
Use the following steps to change the format of the cells so that the numbers don't switch into dates. Use the format suitable for the data you're working on.
- Select the cells where you want the numbers to go.
Note: Use this method if you are yet to enter the data otherwise you will have to re-enter the data after changing the format. We have left the numbers that have changed to dates just to show you what would happen if the numbers were left in.
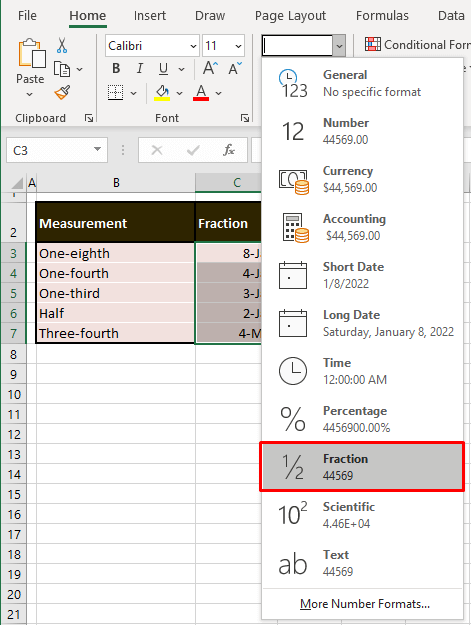
- Click on the arrow (highlighted above) of the Number Format Bar and select Text or Fraction according to your data.
- If the numbers you want to enter are NOT fractions, go for the Text option instead.
- The format of the selected cells will be changed to the selected format.
- Now enter the numbers in the formatted cells.
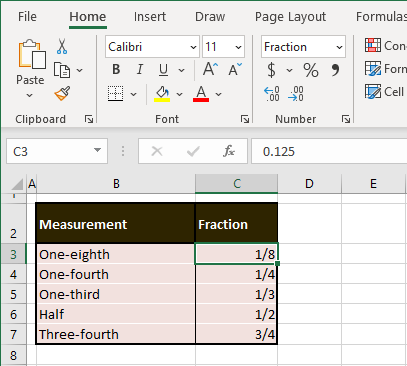
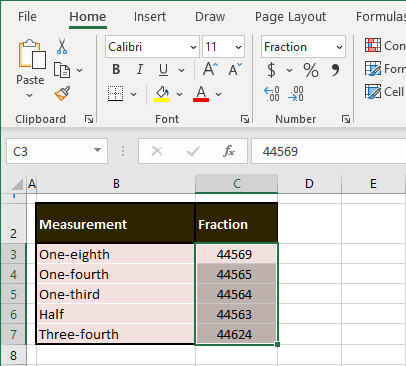
Evidently, the numbers now hold themselves as fractions. They are aligned to the right which means that they are numbers and can be used in calculations.
Note: Use the Format Cells dialog box (by clicking on the dialog launcher arrow of the Number group on the Ribbon) to see all the possible formats that can be applied and also to create a custom format and edit formats.
Method #2 – Using Fraction Format and MONTH & DAY Functions
We have a little bonus section for those temporarily disheartened folks who are working with fractions, have entered the data already, have lots of dates to deal with now, and don't want to go through the ordeal of re-entering the data. We have a little escape for you and it's a numerical one! Use the provided formula, change the format of the cells and you've got your work sorted!
Take this formula and enter it in a new column:
=MONTH(C3)/DAY(C3)We were entering the fraction 1/8 that Excel has changed to 8-Jan, taking the numerator as the month and the denominator as the day, adding the current year into the value. From this full date, we are using the MONTH function to extract the month from the date in C3 and the DAY function to extract the day. We have entered a forward slash between the two since we want a fraction.
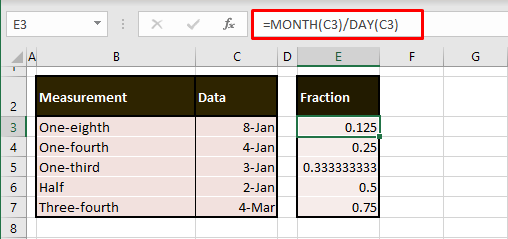
The formula calculates the fraction and delivers the simplified value as the output. Selecting the cells containing the formula, now we'll change the cell format to Fraction.
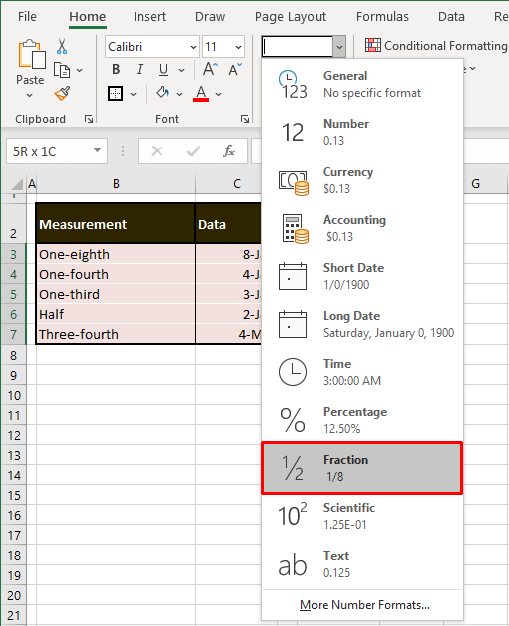
- Use the Number Format Bar to change the format of the cells to Fraction.
- A sample is shown under every format and this one looks promising:
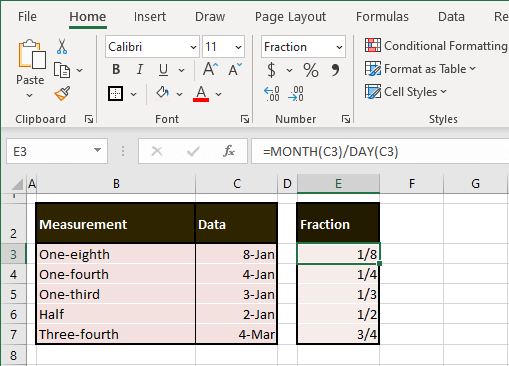
Now we have the output of the formula in fractions:
Tip: If you do not want to keep the formula, you can copy and paste the values back.
Method #3 – Using Apostrophe Before Number
This is an Excel-wide solution to stop the automatic treatment of any type of data – a leading apostrophe. A leading apostrophe doesn't show in the cell itself but makes Excel treat the value after the apostrophe as text.
In our example case, we will be asking Excel to consider the fraction that will come after the apostrophe as text because if it will be considered as a number, it will be snapped into a date.
A leading apostrophe is a method best suited for data entry (as opposed to an already created dataset). Simply enter an apostrophe before entering the number like so:
'1/8The apostrophe will keep the rest of the value in the cell as it is and that will be the value displayed in the cell, without the apostrophe. Although the real value of the cell carries the leading apostrophe and can be seen in the Formula Bar.
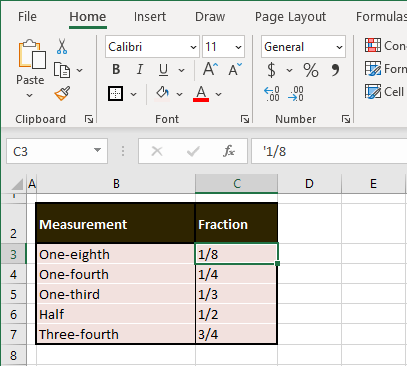
Note that the data is left-aligned, indicating text instead of numbers (which are right-aligned).
Method #4 – Using VBA
Last to the party is the VBA method for stopping Excel from changing numbers to dates. VBA in Excel will work with a code to complete a user-defined task. In the coming steps, you will find the method and the code that will stop numbers from automatically becoming dates by changing the target cells to Text format. Here's what you need to do:
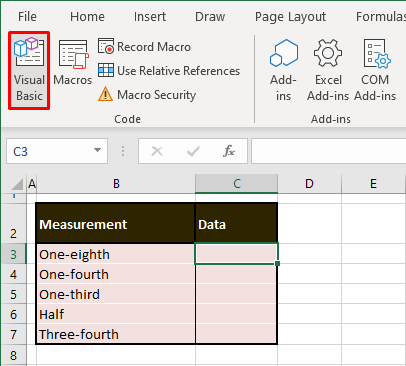
- Use the Developer tab to access the Visual Basic icon to launch the Visual Basic
- Customize the Ribbon to add the Developer tab if you don't already have it. Alternatively use the Alt + F11 keys.
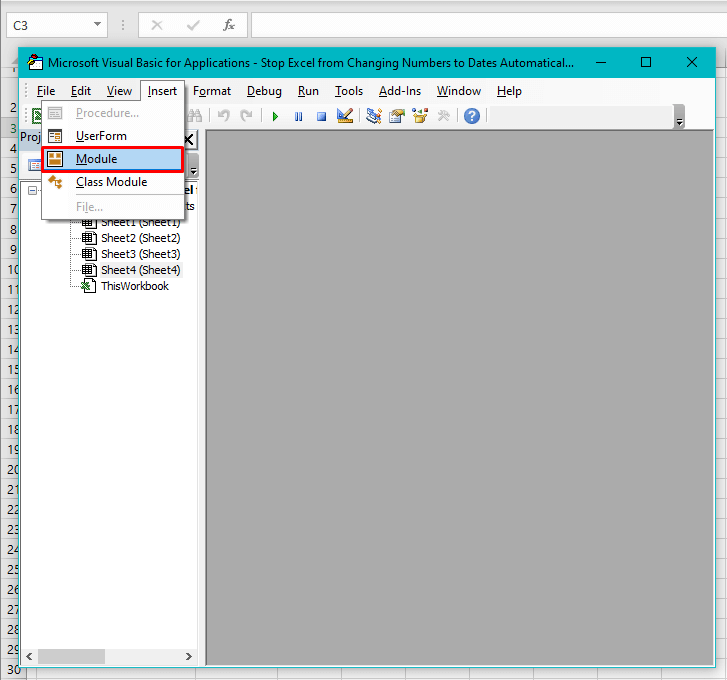
- Click on the Insert tab in the editor and select Module from the drop-down menu.
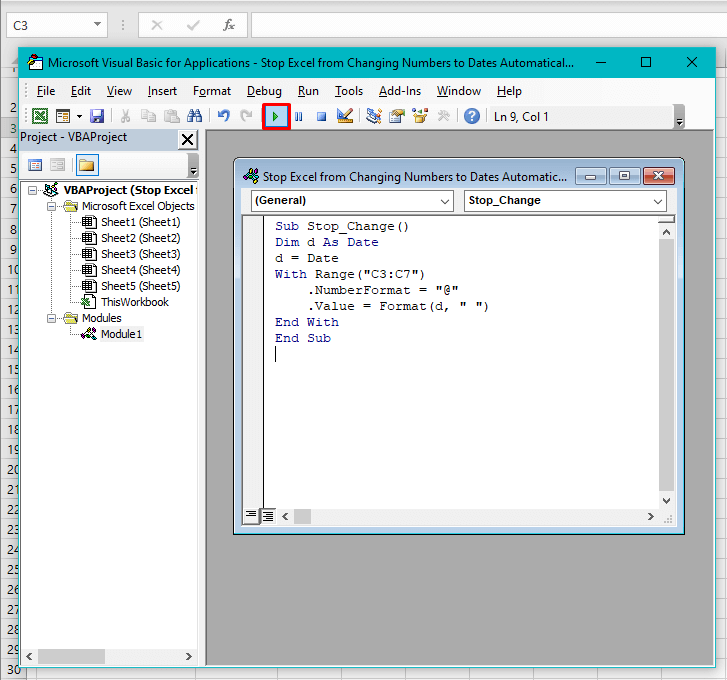
- Copy the code from below and paste it into the Module window that has opened.
Sub Stop_Change()
Dim d As Date
d = Date
With Range("C3:C7")
.NumberFormat = "@"
.Value = Format(d, " ")
End With
End Sub
Alter the range in the code's fourth line to adjust the range as per your dataset. Our target range is C3:C7 as seen in the code.The code name is "Stop_Change" and it will change the format of the target cells to Text. Formatted to text, the numbers entered in this range will not change to dates as Excel will treat them as text.
- Use the Run button as highlighted above or press the F5 key to run the code.
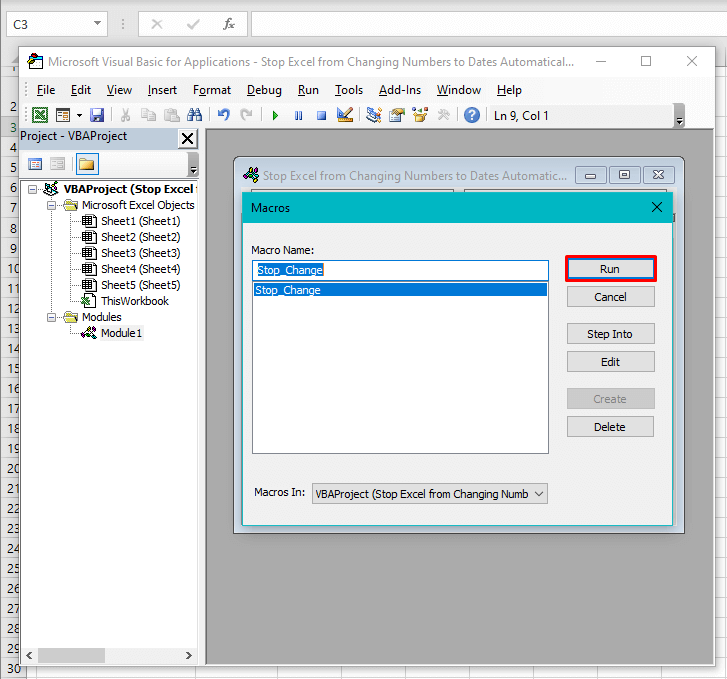
- Select the relevant Macro from the dialog box and hit the Run
- Close the Visual Basic
When you return to the worksheet, the format of the target range will have converted to Text. The Number Format Bar can confirm this when a cell from the range C3:C7 is selected:
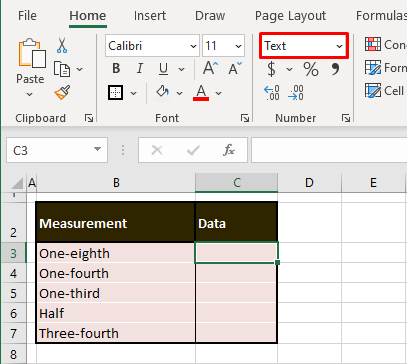
Now enter the numbers; they will not change into dates.
We'll stop here. Now you know how to keep numbers from automatically changing into dates. While you're trying to put a stop to things, we'll crack another case of Excel mystery for you to explore.
 Note: Use this method if you are yet to enter the data otherwise you will have to re-enter the data after changing the format. We have left the numbers that have changed to dates just to show you what would happen if the numbers were left in.