Blank rows or blank cells in data sheets can be very annoying. Although deliberate inserting of empty rows can sometimes make your reports easier to read and understand.
But if you are planning to import your spreadsheet to some other application (such as Microsoft Access) then these pesky blank rows make your life painful.
And in this tutorial, I will guide you on how to delete these blank rows in excel.
So here we go:
Method 1: To Delete Blank Rows in Excel
In this method, we will utilize Excel's ‘GoTo Special’ feature for finding blanks. Below is a step by step procedure for doing this:
- First of all, open the excel sheet where you wish to delete the empty rows.
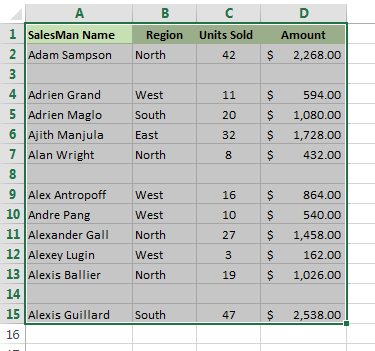
- Then select your data range.
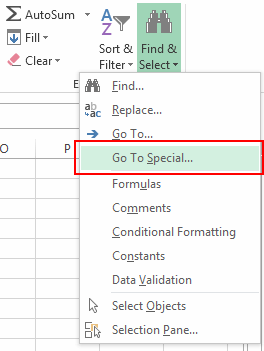
- Next, navigate to ‘Home’ > ‘Find & Select’ > ‘Go To Special’

- Now, you will see the ‘Go To Special’ dialog box. Here click the ‘Blanks’ radio button and click ‘Ok’.
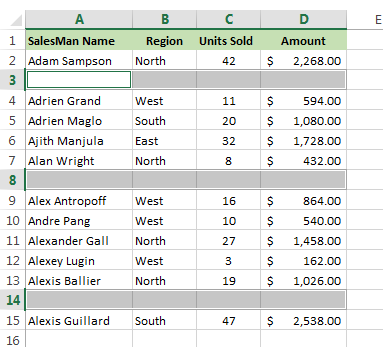
- This will select all the blank cells at once. Now you just have to delete them.
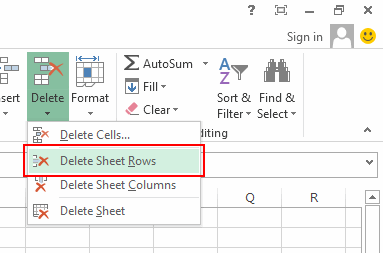
- And to do this without clicking anywhere else on the sheet (otherwise, your selection will vanish into thin air) just navigate to ‘Home’ > ‘Delete’ > ‘Delete Sheet Rows’.
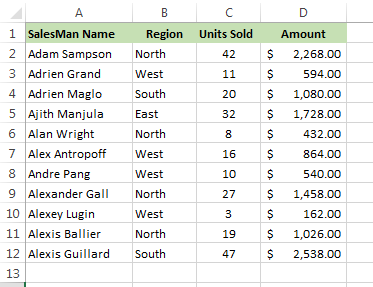
- Now all the unfilled rows will be deleted.
Note: There is one thing you should be careful about. If there are some missing values in any column they will be deleted as well so the data will displace and can cause inconsistency.
Bonus Tip:
To do the above steps using a keyboard simply press the following keys after selecting your data:
F5 Alt+S K {Enter} Ctrl – {Enter}
Recommended Reading: How to Find and Delete Duplicate Records in Excel
Method 2: Remove Blank Rows by Using Excel Find Functionality
In this method, we will take the advantage of the Excel Find feature. Below is a step by step tutorial for doing this:

- First, select your data set and hit Ctrl + F keys to open the “Find and Replace” dialog.
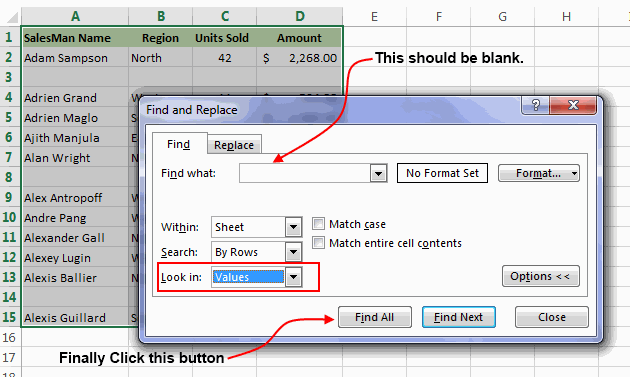
- Next, click the “Options” button, and select “Values” from the “Look in” dropdown. Let the “Find What” textbox remain blank and click “Find All”.

- After this, the “Find and Replace” dialog will display all the blank cells. Click any one record and press Ctrl + A to select all the blank cells.

- Now, Close the “Find and Replace” dialog and without clicking anywhere else navigate to ‘Home’ > ‘Delete’ > ‘Delete Rows’.

- This will delete all the selected rows.
Method 3: Eliminate Blanks by Using Excel Filter Functionality
In this method, we are going to use Excel’s Auto filter functionality to delete the blank rows. Follow the below steps to use this method:

- First of all, select the range from which you need to remove the unfilled rows.
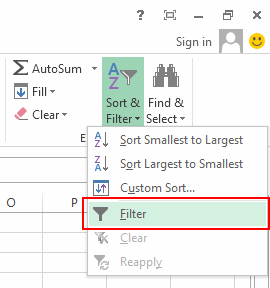
- Navigate to “Home” > “Sort and Filter” > “Filter” or alternatively you can also press the Shift + Ctrl + L keys to apply a filter.
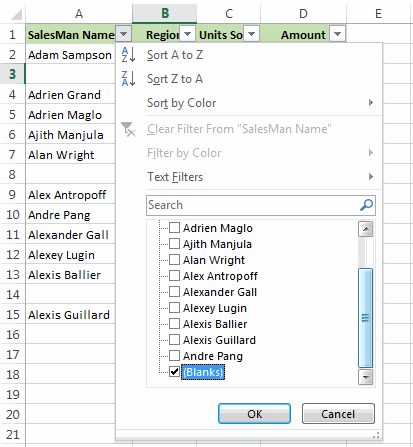
- After this select, a column, click the filter dropdown, uncheck all the values excepting “Blanks” and click “Ok”.

- Now, with all the unfilled rows selected, navigate to ‘Home’ > ‘Delete’ > ‘Delete Rows’. Finally remove the filter and you will see unfilled rows eliminated.
Method 4: Remove Blank Rows by using a Macro
If you want to eradicate empty rows using a macro then you can use the following code. This code internally uses the same mechanism that we did in Method 1.
So, below is the code:
Sub DeleteBlankRows()
Dim Rw As Range
If WorksheetFunction.CountA(Selection) = 0 Then
MsgBox "No blank rows found", vbOKOnly
Exit Sub
End If
With Application
.Calculation = xlCalculationManual
.ScreenUpdating = False
Selection.SpecialCells(xlCellTypeBlanks).Select
For Each Rw In Selection.Rows
If WorksheetFunction.CountA(Selection.EntireRow) = 0 Then
Selection.EntireRow.Delete
End If
Next Rw
.Calculation = xlCalculationAutomatic
.ScreenUpdating = True
End With
MsgBox "Blank Rows Removed"
End Sub
Please note that before running this macro you need to select the range where you are trying to delete blanks.
Note: For running this code you may need to enable excel macros, this article explains how to do it.
So, these were some easy ways to delete blank rows in Excel. Do share any other techniques for doing the same.


