As a time-saver, it's completely permissible to copy data as all information cannot be completely organic. And for those who wished they could copy item 1, item 2, and item 3 together so they could paste it where needed, your wish came true long ago with the digital Clipboard.
But too much information is a thing and it’s also totally a thing in Excel. Keep your Clipboard free for the next round of copying and find out how to do it in Excel here today with this tutorial.

What is Clipboard
The Clipboard in Excel refers to the Office Clipboard and is like a temporary store for the items you are copying e.g. by using Ctrl + C, Ctrl + X, or right click and copy on text, an image, or other objects from webpages, Office documents or other programs. You can copy up to 24 items that will be shown in the Clipboard after which the earliest item will be deleted from the Clipboard when the 25th item is copied.
Clipboard is especially useful if you have to paste the same few items in rotation or some common items to different locations in Excel. The Clipboard can also be cleared item by item or whole; quite why we’re here today.
Let’s get clearing!
How to Clear Clipboard in Excel
Clipboard clearing is managed in the Clipboard task pane and there are two ways to delete it; the first option deletes all the items and the second deletes single items. Do note that multiple Clipboard items cannot be deleted by selecting; it’s either one or all. Let’s start with clearing the Clipboard completely of its entries.
Method #1 – Clearing All Items at Once
Clearing all the Clipboard items is a one-click game if the Clipboard task pane is open. This also means that if the click is accidental, it’s still going to happen and you will lose all the copied items. Let’s recap accessing the Clipboard before clearing all items on it with these steps:
- Open the Clipboard by clicking on the dialog box launcher in the Clipboard group of the Home
- The Clipboard task pane will be shown on the left of the worksheet.
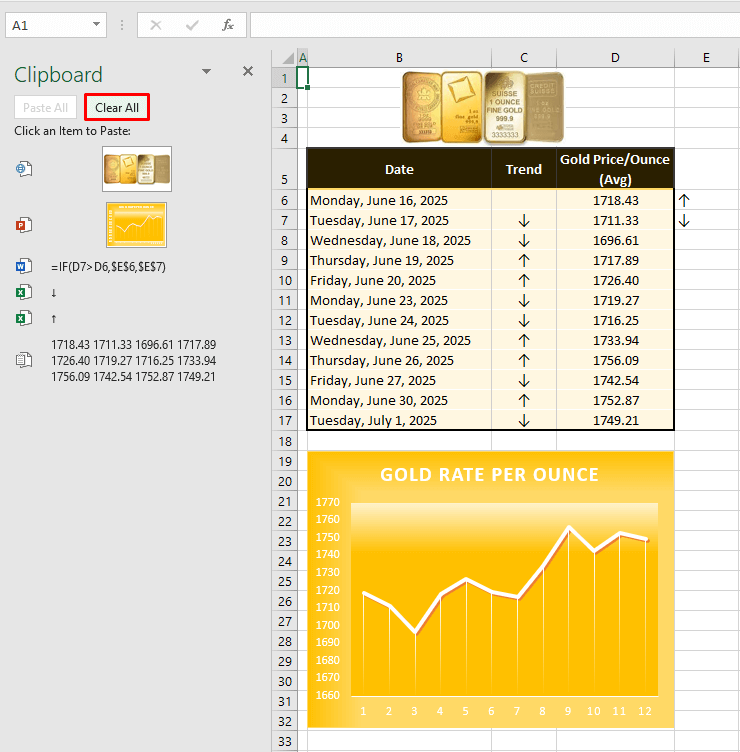
- From the top of the Clipboard task pane, select the Clear All
- The items from the Clipboard will instantly clear. You will have nothing ready to paste.
Method #2 – Clearing Items Individually
Clearing items from the Clipboard requires individual attention to the items. Each unwanted item has to be deleted one by one as there is no option to select multiple items. Single items are also cleared from the Clipboard task pane so open that first and proceed with these steps:
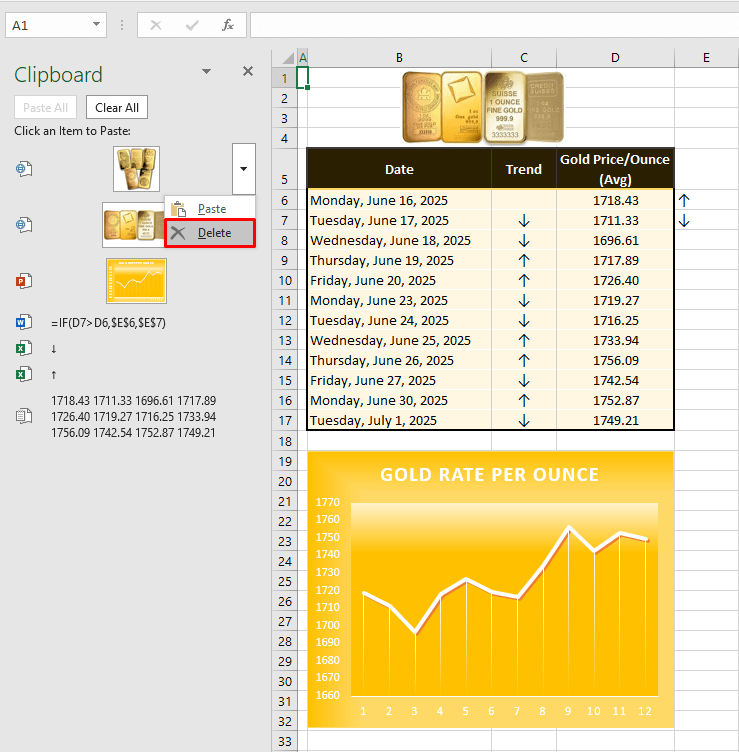
- Hover the mouse pointer on the unwanted item in the Clipboard.
- A small arrow will appear on the right of the selected item.
- Click on the arrow and select the Delete
In our example case, we’re trying to remove the second image from the copied items as we’ve decided to keep the first one.
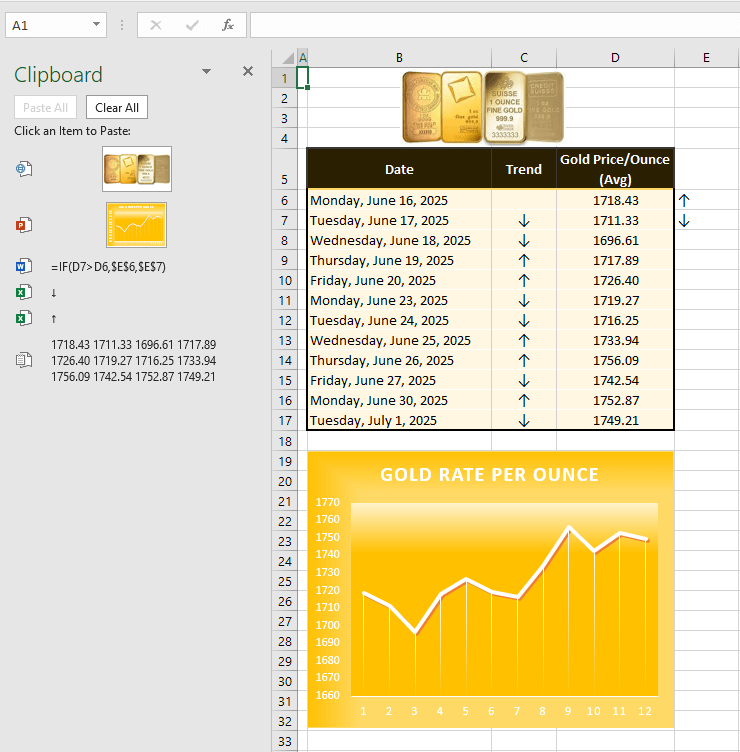
The deleted item will instantly be cleared.
Method #3 – Using VBA
There is also a code option to clear the full Clipboard through VBA. VBA automates Excel tasks via codes and here, we will use a code to clear our Clipboard. The code will deal with the visible or hidden Clipboard nonetheless; if you haven’t opened the Clipboard task pane, it will still be completely cleared. The steps given below will demonstrate how to use VBA to clear the Clipboard in Excel:
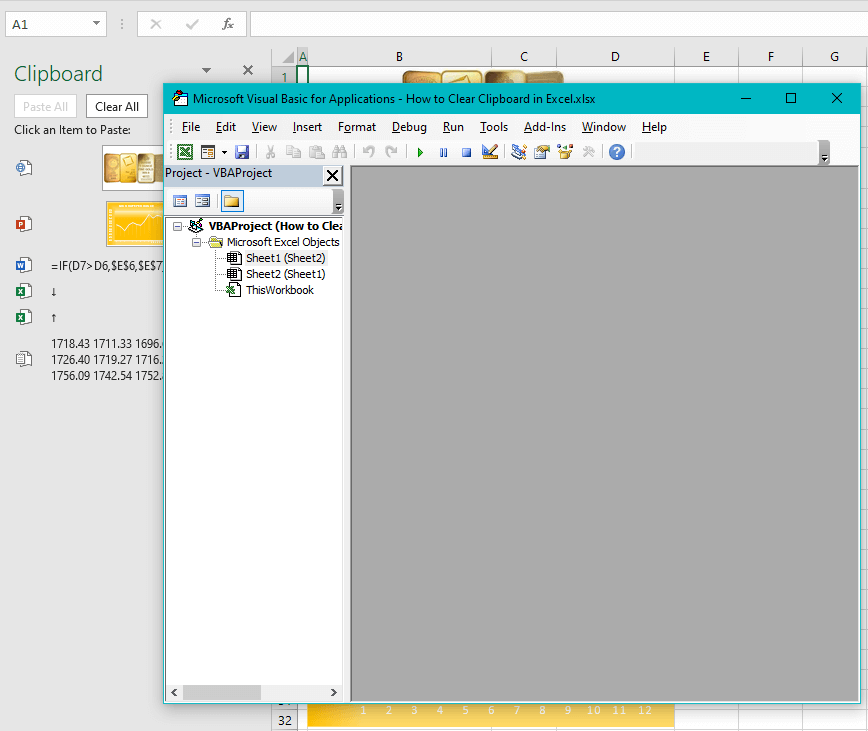
- Launch the Visual Basic editor from the Developer tab’s Visual Basic
- In the absence of the Developer tab, use the Alt + F11 keys.
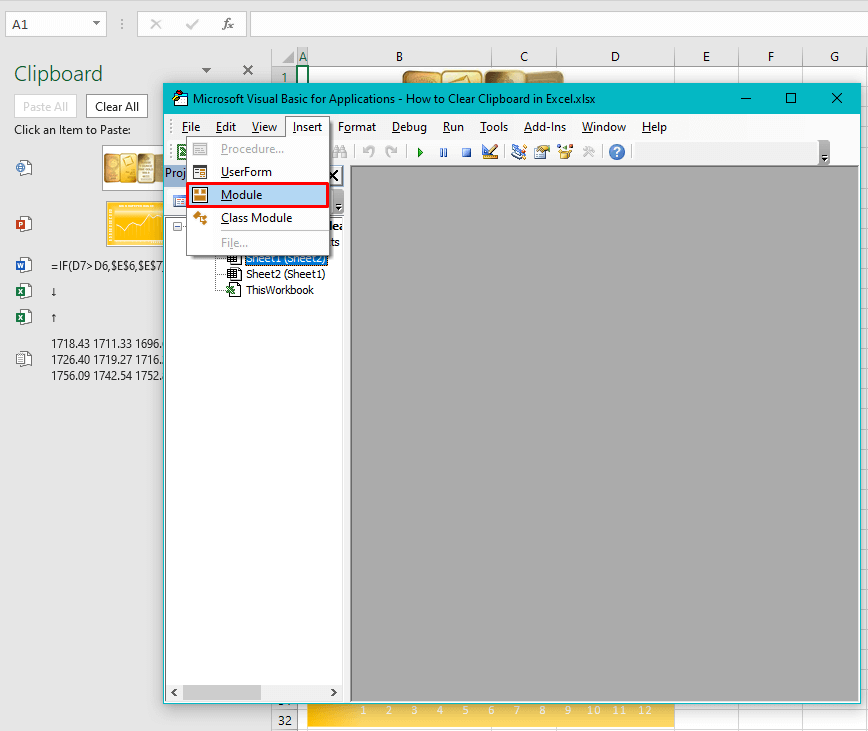
- Add a module using the Insert tab > Module
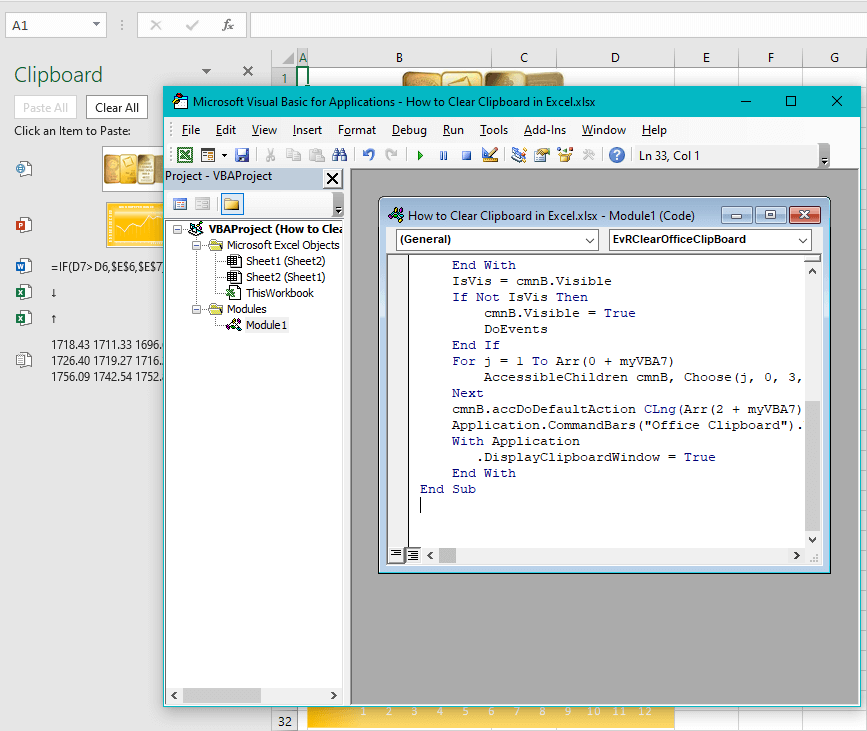
- In the Module window, copy and paste (that makes another item for your Clipboard) the code mentioned below:
#If VBA7 Then
Private Declare PtrSafe Function AccessibleChildren Lib "oleacc" (ByVal paccContainer As Office.IAccessible, _
ByVal iChildStart As Long, ByVal cChildren As Long, _
ByRef rgvarChildren As Any, ByRef pcObtained As Long) As Long
Public Const myVBA7 As Long = 1
#Else
Private Declare Function AccessibleChildren Lib "oleacc" (ByVal paccContainer As Office.IAccessible, _
ByVal iChildStart As Long, ByVal cChildren As Long, _
ByRef rgvarChildren As Any, ByRef pcObtained As Long) As Long
Public Const myVBA7 As Long = 0
#End If

Public Sub EvRClearOfficeClipBoard()
Dim cmnB, IsVis As Boolean, j As Long, Arr As Variant
Arr = Array(4, 7, 2, 0) '4 and 2 for 32 bit, 7 and 0 for 64 bit
Set cmnB = Application.CommandBars("Office Clipboard")
With Application
.DisplayClipboardWindow = True
End With
IsVis = cmnB.Visible
If Not IsVis Then
cmnB.Visible = True
DoEvents
End If
For j = 1 To Arr(0 + myVBA7)
AccessibleChildren cmnB, Choose(j, 0, 3, 0, 3, 0, 3, 1), 1, cmnB, 1
Next
cmnB.accDoDefaultAction CLng(Arr(2 + myVBA7))
Application.CommandBars("Office Clipboard").Visible = IsVis
With Application
.DisplayClipboardWindow = True
End With
End Sub
This code will clear the Clipboard of all its contents. If the Clipboard is hidden, after using this code, the Clipboard will be cleared and displayed.
If you prefer that the Clipboard should be closed or should remain hidden after running the code, alter the third last line of the code from:
.DisplayClipboardWindow = Trueto:
.DisplayClipboardWindow = False- We have done nothing other than changing the "True" to "False".
- To run the code, press the F5
The code will run to clear the Clipboard and keep the Clipboard open. If the Clipboard was hidden before running the code, the True statement in the third last line of the code will open the Clipboard after clearing it. Hidden or not, this is what the Clipboard will look like once this code is used:

Accessing Clipboard
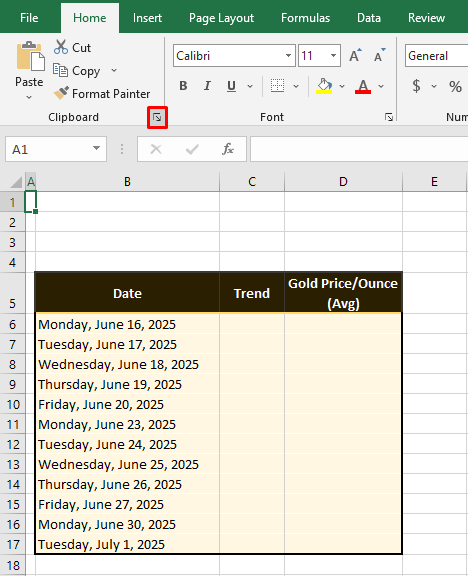
If you look in the Home tab on the Ribbon, there’s a little neglected group on the left that is probably bereft of your attention because it contains copying, pasting, and cutting and you know how to do all that with Ctrl + C, Ctrl + V and Ctrl + X but that’s right where the Clipboard is. The group’s even named Clipboard.
Click on the dialog box launcher of the Clipboard group to open the Clipboard task pane in Excel:
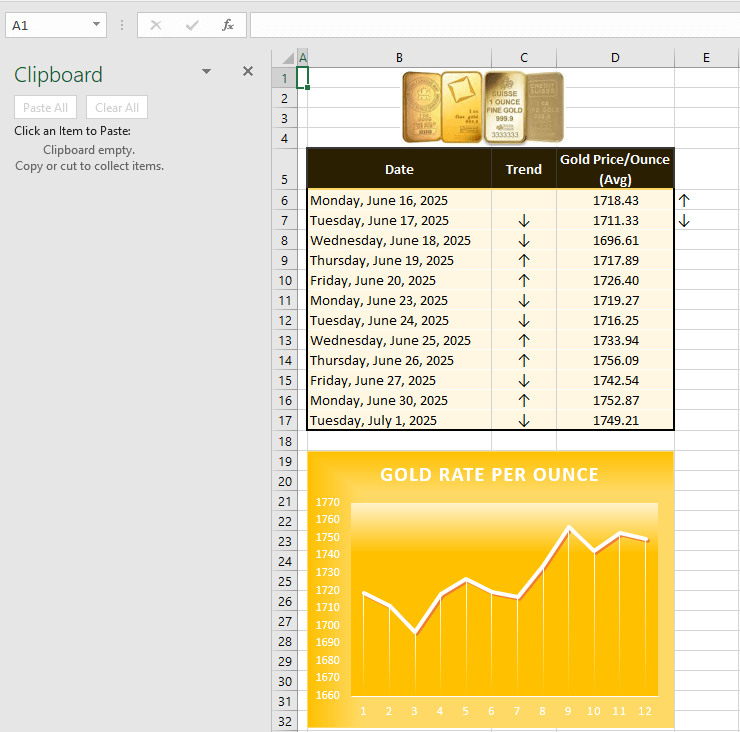
As an example to demonstrate the usage of the Clipboard, we are readying a dataset to enlist the movement in gold prices per ounce. With the Clipboard open, we can view (and eventually paste) all the copied items we have collated to put together on our worksheet:
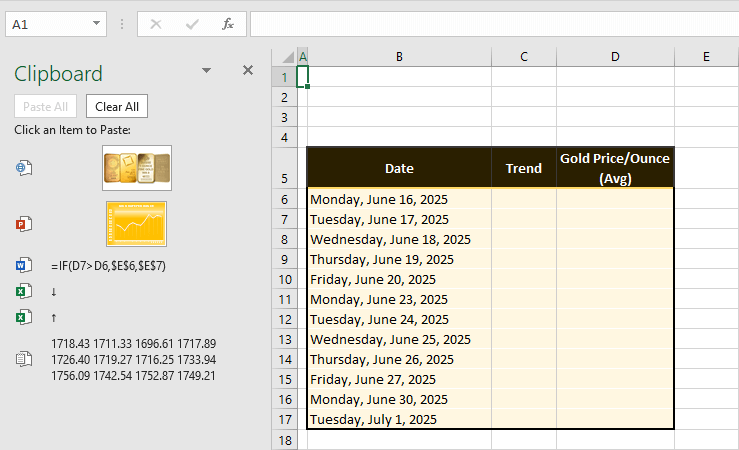
Arranged from the latest at the top, we have some figures and an image from webpages, arrow symbols from Excel, a formula from a Word document, and a graph from PowerPoint. On the left of every entry, the icon displays the source of the item.
Using Clipboard
Using the Clipboard entails pasting an item from the Clipboard to the worksheet. To use an item from the Clipboard, select the cell where you want to place the item and click on the item from the Clipboard. A single click on the item works as copy-pasting that item to the selected cell.
An item will only be pasted once even if multiple cells are selected. To paste all the items from the Clipboard, select the Paste All button at the top of the task pane.
Need of Clearing Clipboard
Clearing the Clipboard may help with one or more of the following:
Clearing large items: If the Clipboard is holding large copied items, your computer will be rendered slow and it would help clean such items away.
Keeping required data: With a full Clipboard, you can get confused with the items and if using the Clipboard is a method you rely on to conveniently paste your data, you may get carried away if you’re not keeping an eye on the collation. Copy the wrong type of data and you will spend more time sorting it out than the convenience Clipboard offers.
If you’re working in sets of data, suppose you gather the copied items first for product A, then for product B, etc., you’ll find it easy to clean the Clipboard in between the sets.
Also, since you’ll be keeping the required data, you’ll work more efficiently.
24 items: The Clipboard is limited to holding 24 items and with more copying, the first item gets deleted itself. Therefore, keep the Clipboard clear to contain the essential data.
Deleting confidential information: Clearing the Clipboard may become necessary to avoid inadvertently sharing classified data contained in the copied items.
Clearing log: Confidential or not, working on someone else’s computer can leave traces anywhere and it’s favorable to clear as much of them as can be done.
Are we clear on that? We certainly hope so because we’re clearly at the end of this tutorial. From us to you, that was all on clearing the Office Clipboard in Excel and a run-through on what the Clipboard is and how it works. Be sure to keep your clipboard clear for the next lesson because it’s coming right at ya!
 If you prefer that the Clipboard should be closed or should remain hidden after running the code, alter the third last line of the code from:
