The standard height of a row that you see in an Excel spreadsheet is dependent upon the font size you are using. The row height by default is enough to display one line of data. While additional data can be added in another cell, many times that would not be favorable and the data will have to be added to the same cell. Such as the example of a header of a table; you cannot have a table header in two different rows, the row will have to be shared.
In some situations, you may find that resizing the column width or breaking the data down into subcategories so that the row can be separated, helps. When these fixes aren't possible or your first way of choice, by all means, it is all good to set the row height in Excel.
This tutorial details setting the row height using the mouse (click & drag and double click), the keyboard, and a couple of options in the Format section of the Ribbon. Find out how to set all selected rows to the same height, or row-specific heights.

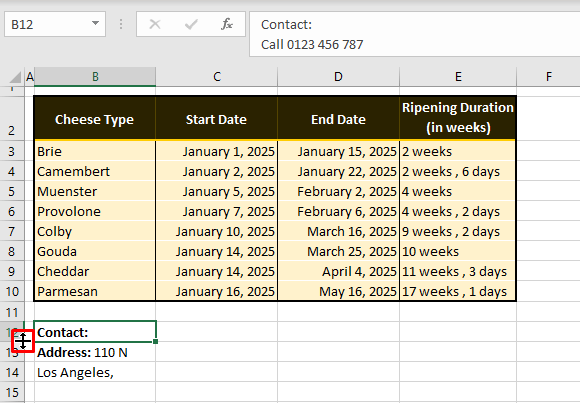
For an example to work on, have a look at the scenario below. In cell B12, we can see just the text "Contact:". In accordance with the font size, the standard row height set for our worksheets is 15.00 (20 pixels). Upon selecting the cell and extending the Formula Bar, it becomes clear that the cell bears more content including a phone number.
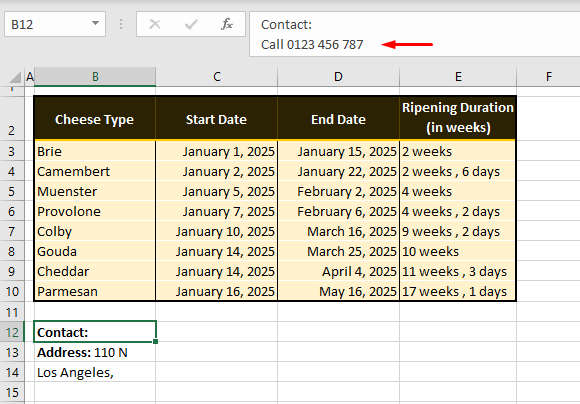
This detail is obviously crucial information that needs to be displayed and for that, we will opt to resize the row by changing the row height. Read our 5 easy methods for setting row height in Excel.
Get set row!
Method #1 – Using Mouse Click & Drag
To change the row height in Excel, use the click-and-drag technique with the mouse. This method lets you manually stretch the row to the required height. The greatest advantage of click and drag is that you can freely set the row height of your preference by eye. The steps below demonstrate how to adjust the row height with the mouse using click and drag:
- Point the cursor to the bottom line of the header of the row that you want to adjust.
- As per our case example, we are adjusting row 12 so we'll point the cursor below row 12.
- When pointed along a row header's line, the cursor will change to a double-headed resize arrow.
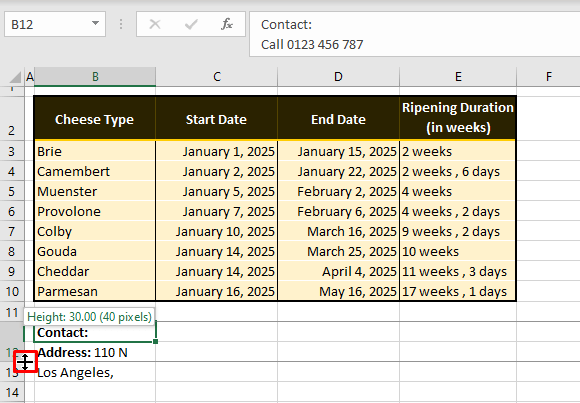
- Once the double-headed arrow appears, click and drag to set the row height.
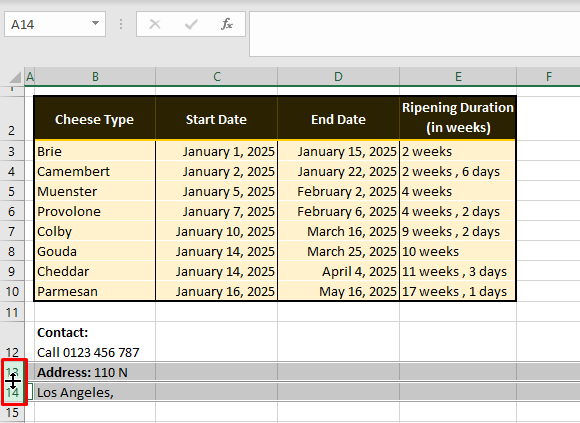
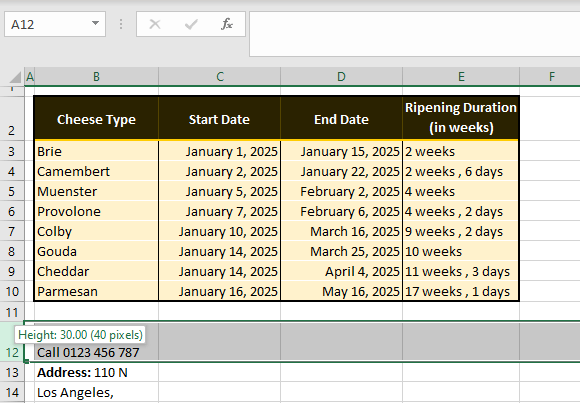
- While holding down the left mouse button, you will see the clicked row banded by darker gray lines. You can shorten or lengthen the row height. We are increasing the row height to 40 pixels (as will be displayed in a bubble) as we want to resize the row to include the text of two rows.
- Release the mouse button when you have adjusted the row to the preferred size.
- The row height has been adjusted from 20 pixels to 40 pixels by clicking and dragging the mouse button:
- The same adjustment can be applied to multiple rows by selection. If you select all the rows that need adjusting, their heights can be set together. See how below.
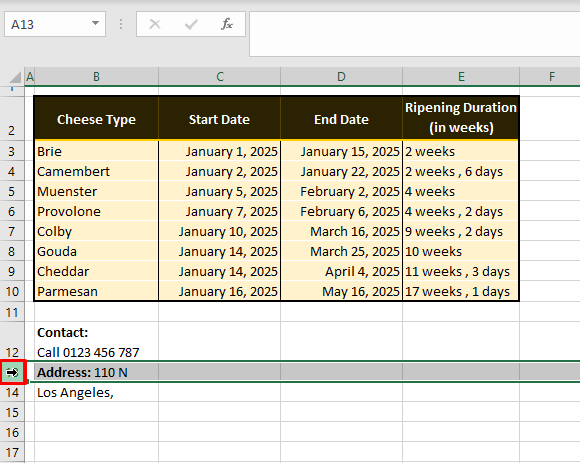
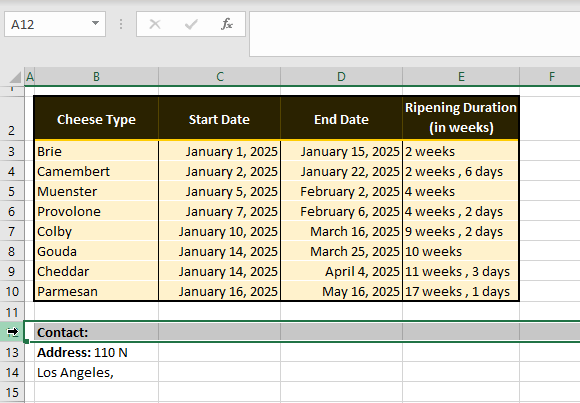
- Point the cursor to the mid of the row header you want to resize until a black rightward arrow appears.
- Click to select the row.
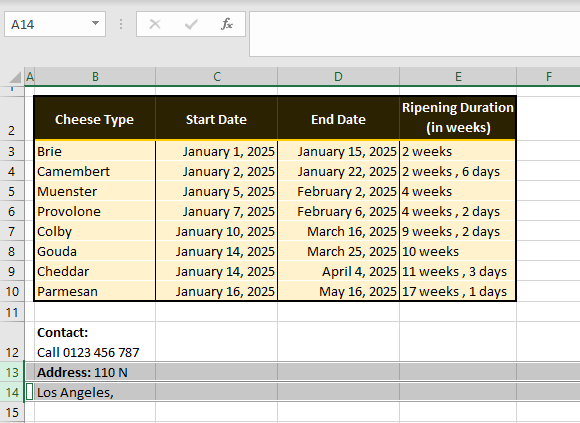
- For selecting continuous rows, you can click and drag the left mouse button. For discontinuous rows hold down the Ctrl key and select the rows by clicking on the row headers.
- Once all the rows are selected, position the cursor on the lower line of any of the selected rows to display the resize arrow.
- Click and drag to set the row height.
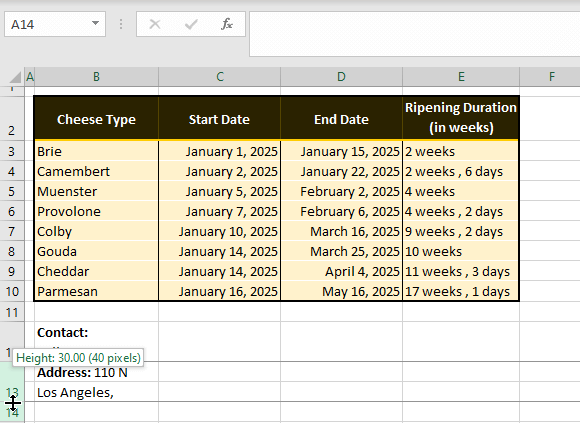
All the selected rows will be resized together:
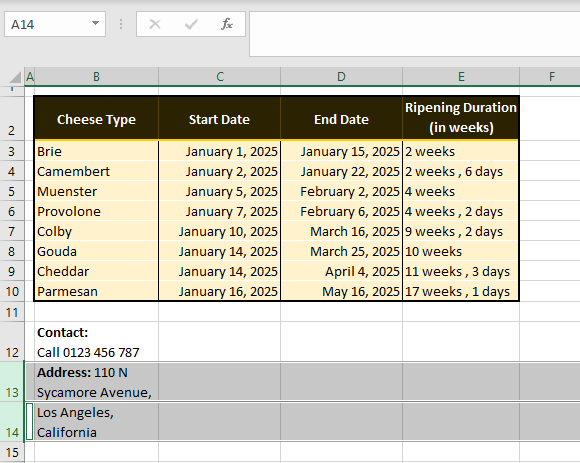
While this method lets you decide how much of a row you want increased/decreased, if there are other non-blank cells in the row, you cannot be sure if your resizing is displaying the contents of all the cells in the row completely. What if there's a cell with three rows of data instead of 2 rows as in our example case? The solver of that problem is the next method.
Method #2 – Using Double Click on Mouse
Set row heights in Excel by double-clicking the left mouse button on the row header line. The double-click method is a more automatic method than click and drag as it gauges the row for the largest data cell that requires the greatest display and sets the row height as per that cell when double-clicked.
To understand that better, consider an example where cell A1 contains data with 2 line breaks and cell B1 with 3 line breaks. When we'll attempt to resize row 1 by using double-click, the entire row will be expanded according to B1 as it contains the lengthiest content height-wise.
Therefore, this method is a surefire way of knowing that all cells in the row will have their data displayed. A small practical demonstration should clear any doubts:
- Hover the cursor over the row header's bottom edge. A row resizing arrow will appear.
- Double-click when the resizing arrow appears.
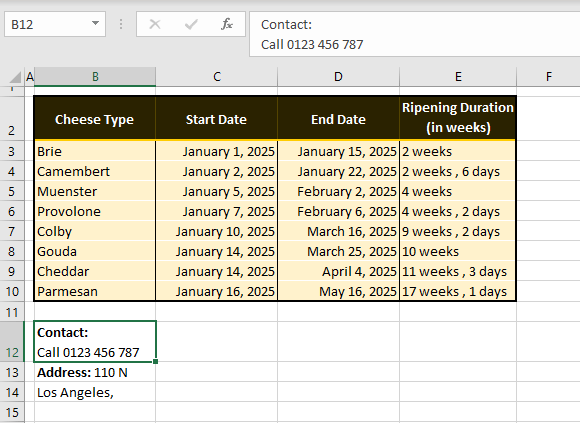
- Instantly, the row will be resized to fit the contents of the largest data cell:
Notes:
Just as the row height will be increased for taller data, if the row height exceeds the height required for the cell with the tallest data, the row height will decrease to fit that cell upon double-clicking.
The height of multiple rows (as shown in the previous section) can be set by double-clicking. Do note that with this method, all the rows will be resized according to the tallest data cell in each of them.
E.g., if one row's tallest data cell is of 40 pixels and another row's is of 60 pixels, the double-click will resize them to 40 and 60 pixels respectively. To get all the selected rows to the same height, use method 1 or 3 given in this guide.
Method #3 – Using Row Height Option
Use the Row Height option from the Ribbon to set the row height in Excel. Manually adjust the row height by typing in a value. When you hold down the mouse button on the row header's edge, the row height is displayed in pixels in parentheses.
There is another value in decimals before that (in points, let's say) and this is the value that needs to be entered in the Row Height option. These steps will help you set the row height of the selected rows with the Row Height option:
- Select the rows that you want to resize. For this example, we are selecting row 12.
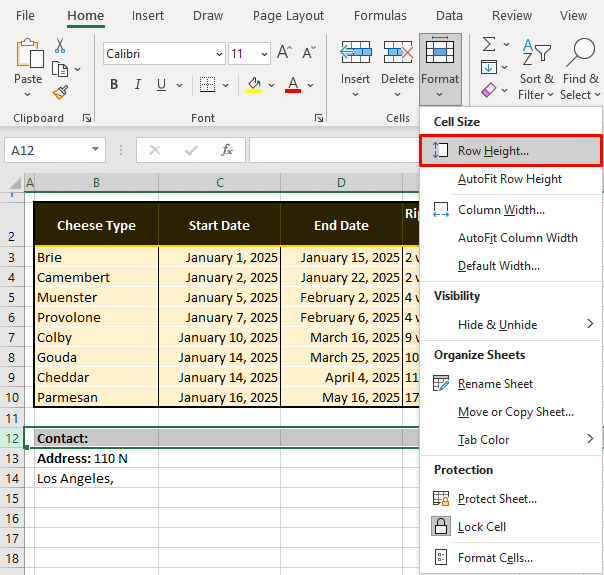
- Select the Format button from the Ribbon in the Cells group and select Row Height from the menu.
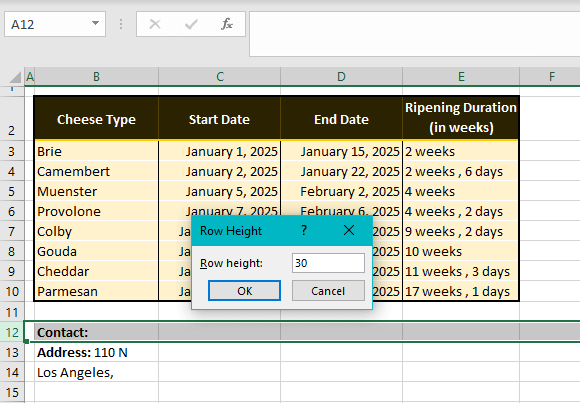
- A small dialog box will open titled Row Height.
- Enter the value for the row height in the given text box.
- Since by default of our chosen font, the rows are of 15.00 points, to set the row to double the current height, we will enter 30 here.
- Click on the OK button when done.
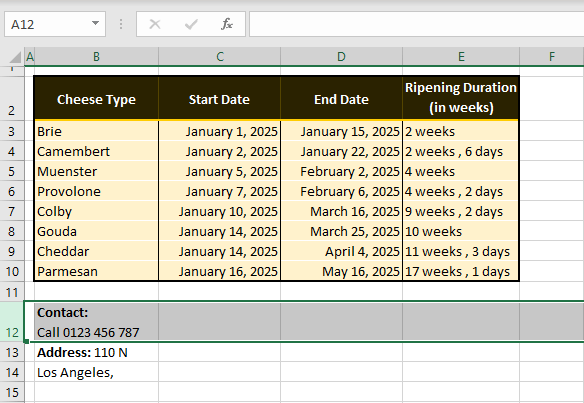
The selected rows will be resized to the set height. If you check by holding the mouse button down on the row's bottom edge, you can see that it has been adjusted as per the value entered in the Row Height dialog box:
Method #4 – Using Keyboard Shortcut
We can give you a keyboard shortcut that will set the row height of the selected rows in Excel. This method is the keyboard version of applying the Row Height option (elaborated in the above section). The keyboard shortcut is as follows:
Alt, H, O, H
The keys are to be typed in succession, one after the other instead of together.
The Alt key displays the shortcut keys for all the elements above the Ribbon.
The H key selects the Home tab.
The O key opens the Format menu in the Cells group.
The H key selects the Row Height option that opens the Row Height dialog box. If you want to use the Autofit Row Height option instead of setting the row height, press the A key at this point instead of H . What does Autofit Row Height do? Find out in the next section.
For the keyboard shortcut to apply, you are to select the relevant rows first. You can see the complete steps for using the shortcut to set the row height below:
- Select all the rows for setting their heights as one.
- Hit the Alt, H, O, H keys in succession to access the Row Height dialog box.
- Enter the value that you want to set the selected rows to.
- We have set 30 here.
- Select the OK button to close the dialog box and apply the row height.
- The row height will be resized to 30.
The full keyboard shortcut after selecting the row(s) therefore is:
Alt, H, O, H, (type row height), Enter
Method #5 – Using AutoFit Row Height Feature
And the last method of changing the row height in Excel is by using the Autofit Row Height option. This is another way of applying the mouse double-click technique. Autofit Row Height automatically resizes the row to fit the largest data cell.
In the following steps, you will learn how to use the Autofit Row Height feature to adjust row height in Excel:
- Select all the rows that you want to automatically set the heights of.
- Go to the Home tab > Cells group > Format button > Autofit Row Height
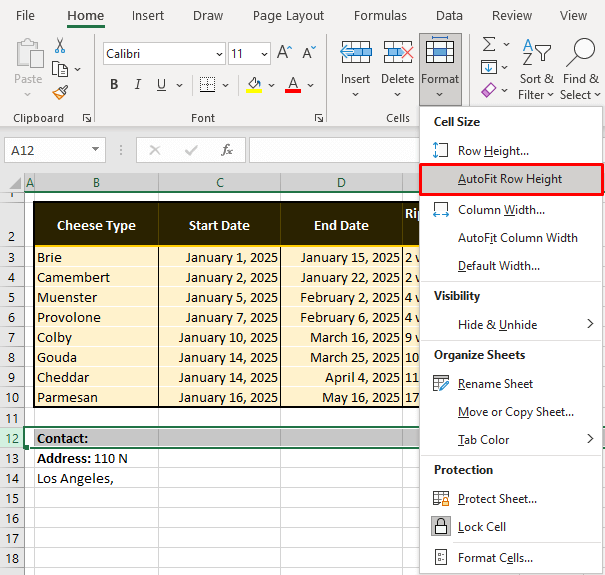
Instantly, the heights of all selected rows will be AutoFitted according to their data cells:

No problem with row sizes anymore? Great. We hope this tutorial helped with any row height issues your worksheets were having. If said worksheets are giving you any other problems, feel free to bring them up here, we have a world of tricks stacked up, ready to perform. Ready? Tricky? Go!
